You are using an out of date browser. It may not display this or other websites correctly.
You should upgrade or use an alternative browser.
You should upgrade or use an alternative browser.
Community Event / Creation The C-Pod: A DIY Command seat (build log)
- Thread starter ThereIs0nly0ne
- Start date
Thanks for the offer Shrukan! Once I've completed the project, I'll give you a shout if that's ok?
Absolutely! Can't wait to see the finished product!
A great thread, that I enjoy reading and seeing the progress of the build.
Very much looking forward to the completed article, + Rep for the time, effort and dedication you've put into this!
Hey, thanks for that Engadine. I'm glad you're finding this enjoyable
Absolutely! Can't wait to see the finished product!
Great stuff! Thanks Shrukan.
Pesky space zombies. I don't know how many times I've told them NOT TO SIT IN THE COMMAND SEAT.
Don't know what to do with them, cant shoot them, they're already dead.

Last edited:
Glad to see you're back on the build. Superb work as always.
Just recently spent a couple of hundred quid on 18mm mdf to start on a simpit myself now and have been using your pics for ideas.
I'm no where near as skilled and it's super hard to not just rush the job to sit in it and play, but looking at your results helps.
Onto the chair and side pods next ��
Just recently spent a couple of hundred quid on 18mm mdf to start on a simpit myself now and have been using your pics for ideas.
I'm no where near as skilled and it's super hard to not just rush the job to sit in it and play, but looking at your results helps.
Onto the chair and side pods next ��
Oh wow, I've only just discovered your build but some incredibly impressive stuff here! Well done on both your enthusiasm and the incredible quality of your build - you're setting an amazing example for the rest of us to get motivated by (much to my mrs disappointment!). Been looking at building a flight sim cockpit for years, but have always been stymied by the fact that most of what's been done has been modelled on actual planes, instead of the sci-fi look that I've had in mind. Going to steal a fair few ideas from here, if you don't mind Also, I know it's been said many times before - but I'd be more than happy to purchase a copy of your plans if you do go down that path (though I'd have to get in line by the looks of it). Keep up the amazing work
Glad to see you're back on the build. Superb work as always.
Just recently spent a couple of hundred quid on 18mm mdf to start on a simpit myself now and have been using your pics for ideas.
I'm no where near as skilled and it's super hard to not just rush the job to sit in it and play, but looking at your results helps.
Onto the chair and side pods next ��
Thanks Demonmaker, I'm glad I took a break from the build and now feel re-invigorated again. A case of doing too much project work with this, the R-Pod and the Arcade cabinet I think.
Glad to hear you've got started. I know that there's a desire to get the job done as quickly as possible but the only recommendation (other than making a build log
Oh wow, I've only just discovered your build but some incredibly impressive stuff here! Well done on both your enthusiasm and the incredible quality of your build - you're setting an amazing example for the rest of us to get motivated by (much to my mrs disappointment!). Been looking at building a flight sim cockpit for years, but have always been stymied by the fact that most of what's been done has been modelled on actual planes, instead of the sci-fi look that I've had in mind. Going to steal a fair few ideas from here, if you don't mindAlso, I know it's been said many times before - but I'd be more than happy to purchase a copy of your plans if you do go down that path (though I'd have to get in line by the looks of it). Keep up the amazing work

Thanks very much for the kind feedback herda831. I was in a similar predicament with this. I enjoy flight sims but this type of experience is where it's at for me, hence taking the plunge with this build. Feel free to use what you like from this project, the idea of this log is to share ideas after all
I need to seriously consider doing something about those plans once I've completed this ...
Wow major props for this. A pretty amazing project. Wish I had the time/skills/tools here in china.
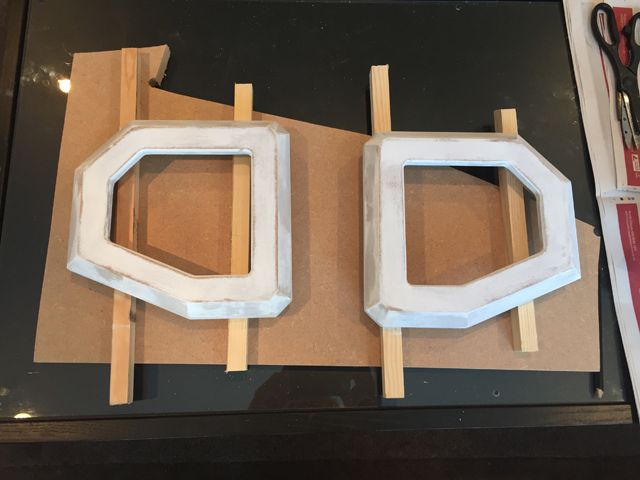
The outside and inside edges of the cutouts have been beveled:
http://i218.photobucket.com/albums/cc26/SpaceHedgehog/ShapedPiecePod2_zps848cc6a8.jpg
http://i218.photobucket.com/albums/cc26/SpaceHedgehog/ShapedPiecePod1_zpse80ddcbb.jpg
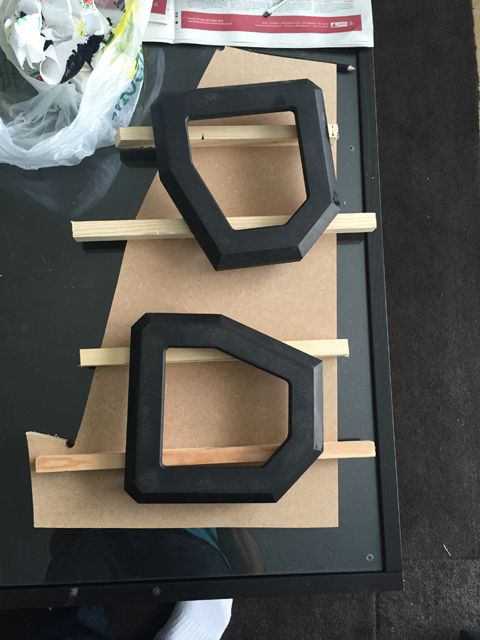
Both sides have been completed:
http://i218.photobucket.com/albums/cc26/SpaceHedgehog/ShapedPiecePod3_zps1f2a50a5.jpg
In-place:
http://i218.photobucket.com/albums/cc26/SpaceHedgehog/ShapedPiecePod4_zpsfad990fb.jpg
Edit: That's it for today.
I've got to ask - how do you get such clean bezels on the inside edges of the cutout? Still using a guide or is it a freehand technique. Apologies if I'm just expressing my ignorance on how to use a router, never had a chance to play with one
Wow major props for this. A pretty amazing project. Wish I had the time/skills/tools here in china.
Thank you for that
I've got to ask - how do you get such clean bezels on the inside edges of the cutout? Still using a guide or is it a freehand technique. Apologies if I'm just expressing my ignorance on how to use a router, never had a chance to play with one
I used a chamfer bit for this with a router guided. I will post more info later.
Unfortunately it looks like I will lose my mother within the next 24 hours. This project will be dedicated to her and will have a name plaque with her name - Wendie. She always loved to hear about the projects I was working on as she knew it gives me great pleasure.
Take care everyone.
Take care everyone.
You too Commander. Best wishes to you, and to all your family at a very difficult time.
edit:
I've got to ask - how do you get such clean bezels on the inside edges of the cutout? Still using a guide or is it a freehand technique. Apologies if I'm just expressing my ignorance on how to use a router, never had a chance to play with one
If you take a look this thread through from the beginning, you'll find a lot of info on techniques and materials being used. The base techniques with the woodworking and inlays seem quite similar between armrests, headrest and seats, and I think you'll find what you're looking for is already described earlier.
As for plans .. don't forget, you can always design your own and make it just as unique as this one. Your/our challenge, is to try to achieve results that even begin to approach! The thread includes pics of the OP's previous projects, and I'm sure making mistakes have been part of the whole learning curve .. but I reckon the OP will be well pleased if this build inspires others to 'give it a go'.
Just don't forget the simpit builder / woodworker's mantra ... measure twice, cut once!
Take care everyone.
Last edited:
Thank you for that
Unfortunately it looks like I will lose my mother within the next 24 hours. This project will be dedicated to her and will have a name plaque with her name - Wendie. She always loved to hear about the projects I was working on as she knew it gives me great pleasure.
Take care everyone.
Very sorry to hear that TIOO. All the best for you and your family.
Sorry to hear that TIOO. Best wishes to you and your family at this difficult time
Thanks you very much Winterwalker, herda831, DrSpin and pigfumbler. I'll be having a little time out but hope to get back on this project again fairly soon so expect some updates.
Thank you for that
I used a chamfer bit for this with a router guided. I will post more info later.
Unfortunately it looks like I will lose my mother within the next 24 hours. This project will be dedicated to her and will have a name plaque with her name - Wendie. She always loved to hear about the projects I was working on as she knew it gives me great pleasure.
Take care everyone.
My condolences, my friend, really sorry to hear about this.
I hope you manage through this with as much ease as is possible in such circumstances.
Take care.
Thank you very much Enride and oz42, it's appreciated.
I've just returned from the funeral today having spent the weekend with my brother and sister at my mums house where she'd been living on her own (my father passed away 10 years ago). We were sorting through some things and my sister called me to say that she'd found a suitcase full of my old computer cassettes, joysticks and other bits and pieces (my mother had a habit of keeping things she knew we might want and appreciate later in life). Inside the suitcase I found my original BBC Model B boxed copies of Elite (both the disk and cassette versions) in the excellent condition that I'd left them in. Thanks mum.
I've just returned from the funeral today having spent the weekend with my brother and sister at my mums house where she'd been living on her own (my father passed away 10 years ago). We were sorting through some things and my sister called me to say that she'd found a suitcase full of my old computer cassettes, joysticks and other bits and pieces (my mother had a habit of keeping things she knew we might want and appreciate later in life). Inside the suitcase I found my original BBC Model B boxed copies of Elite (both the disk and cassette versions) in the excellent condition that I'd left them in. Thanks mum.
Last edited:
Cp-1 is perfect for my full motion sim
I love the CP-1 seat you have created. It would solve one of my problems as I create a full motion simulator modelled after Saker-one. Iam hoping youre willing to sell copies of it.
I am planning a single seat simulator and a dual seat. So theres a potential of my buying several seats if youre willing and the price is right. I am located on the west side of Houston, Texas, USA.


