Community Event / Creation The C-Pod: A DIY Command seat (build log)

Sorry to hear about your loss. The name plate idea is really beautiful, I'm sure she would be proud to be a part of your creative projects :)
Take care, pal. I wish you the best.
 
Thanks very much CMDR Pantsu. We've just come back from a great weekend celebrating my mum's life at her house. She had a wonderful garden and we enjoyed some fantastic weather.

Thanks Toadslinger. I'm not planning on building any more of these myself (at least by my own hands) but will be looking at putting some plans together once I've completed it.

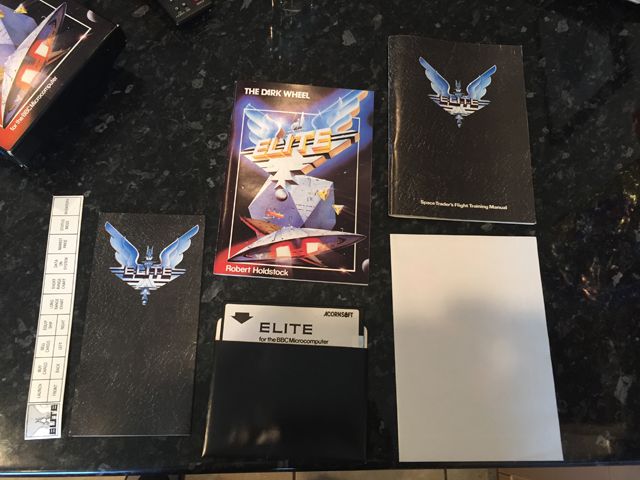
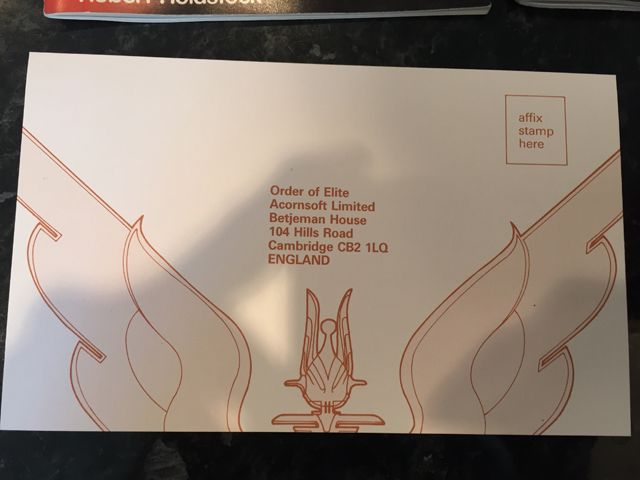
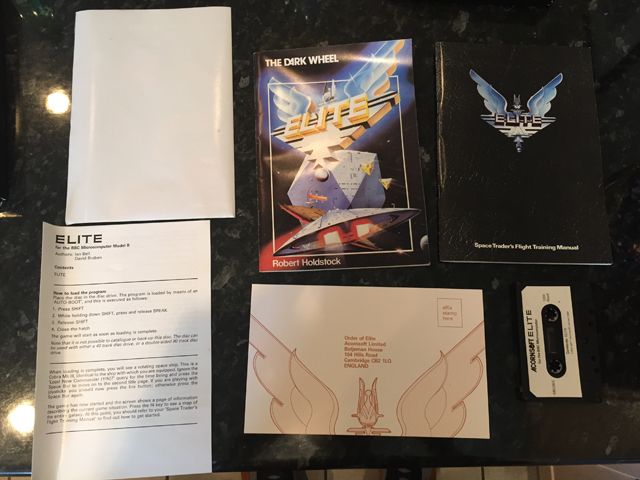
I bought the Elite boxes back home and took some pictures:


Crikey, they look mint.

My condolences, my friend, really sorry to hear about your mom.

Crikey, they look almost mint. :eek: :D what a lovely thing to find as a reminder of your time at home with her.
Stay well mate.
 
With much enjoyment i saw this build log. I am very much impressed by the work you are doing. But first let me send you my condoleances. I fast-forwarded from the first few pages to the last few only to read about your loss.

Perhaps you have stumbled across my work on a custom HOTAS for Elite I've been blogging about for the past few weeks on this forum (link). It's all electronics, laser cut acrylic panels and 3D-printed parts but eventually I want to enclose them in a custom playseat not very different from what you did there. Perhaps we could share some ideas, or perhaps you could tell me little about your woodworking skills if you have the time to do so.

Thank you very much for inspiring me and I wish you health and strength in these sad times.
 
Thanks very much for that. I've been pretty busy with sorting things out lately as you can imagine so I've not been checking the forums out too much until now - had I seen your thread about 6 weeks ago, I'd have been all over it. Your project looks amazing!

Regarding the woodworking skills I have, I'd be happy to share anything specific you may have a question about. I've pretty much taught myself through trial and error / practice. I don't have a large set of tools - just a router (the most important tool imho), jigsaw, regular drill, power drill/driver, a couple of clamps and a workbench.
 
I've pretty much taught myself through trial and error / practice. I don't have a large set of tools - just a router (the most important tool imho), jigsaw, regular drill, power drill/driver, a couple of clamps and a workbench.
Same here, i'm also self-taught. On the topic of the router, just this week I bought a 350W table drill to get perfectly aligned countersunk screws, which will no doubt outperform the feeble Dremel i have. Perhaps with a few adjustments I can turn that into a router maybe?
 
Last edited:
Unfortunately I don't think the drill would have the rotation speeds necessary to turn it into a router - router bits spin at an incredible rate. If I were to recommend one tool to invest in, it would be a router. A magical tool!
 
I have this one Einhell BT-BD 501 it has a configurable drill speed between 280 and 2350 min-1, which is rpm. And you are right, that is nowhere near the advised 18000-25000 for basic router. I wouldn't see myself pushing in a square meter of woon under the drill though. Best work on a bench. Perhaps they have a router a the hackerspace, i'd have to check.
 
Same here, i'm also self-taught. On the topic of the router, just this week I bought a 350W table drill to get perfectly aligned countersunk screws, which will no doubt outperform the feeble Dremel i have. Perhaps with a few adjustments I can turn that into a router maybe?

It's a nice idea, but unfortunately, it won't work.

As others have said, the speeds are too low, but that's not all. A drill has two serious points that make it unsuitable for router duty beyond speed: the commonly used Jacobs chucks are not meant to hold side loaded tooling (such as router bits, end mills), and the bearings in most drills are not meant for radial loads (again, such as the aforementioned tooling bits).

Using a drill (unless it is a mill/drill combination machine) for side loaded operations is a certain method to "force" a drill upgrade, hopefully just when it decides to drill ovals, and burn out rather than throwing spinning bits around :)

P.S. Fantastic work on the HOTAS. Very clean and well thought out!
 
Last edited:
Any router people got any thoughts on whether this kind of project is doable with 1/4" | 8mm bits? I need to buy a router before the end of the year for some DIY projects and am looking at one that has an 8mm and a 1/4" collet because it has some great laminate trimming attachments. The larger model also has a 1/2" collet but is a little bit unwieldy for the other work I'm doing.


Am a total router noob!

Yes, absolutely, it's definitely do-able. You may not be able to get such a deep bevel due to restrictions on the chamfer bit size (I may be mistaken there), but you should have no other challenges tbh.
 
Buy a tool not a toy. Budget brand routers may be ok for light hobbyist work, but anything meaty you might suffer.
I blew up a power craft one, before getting a good Dewalt one, totally different kettle of fish.

Ps I used to build custom car audio installs so reliability in my tools was paramount.
 
Last edited:
Buy a tool not a toy.

Oh - it's a Festool router I'm after so am sure it'll hold up :) I just like the weight of the 8mm collet model though. I'll have a look what the biggest chamfer bit and biggest rabbet bit can put in it is. Only just really working out this stuff - might just ask a dealer!
 
Last edited:
What are the dimension of the main frame of the seat?
I plan on making one of these for myself in the coming months, so I may be asking many a question, if that's okay ;)
 
No problem. The height is 38" (minus headrest), the width (including pods) is 30" and the length is around 35" at the longest points. Hope that helps!

Sadly, my daughter has been having some serious health issues which has been taking up most of my time recently. Hopefully she'll be on the mend soon.

Devestating to hear that mate, hope everything ends well :(
Family first, always! Take care friend.
 
Such an amazing thread, I am in awe of your work so far. Proof that you don't need a workshop brimming with expensive tools and bottomless pockets to do this kind of thing.

Just read through all 60 odd pages of this in one go.
I'm looking to do something on a much smaller scale, I've been looking at Roccat and a custom made pannel powered by a teensy as in this post https://www.reddit.com/r/EliteDange...m_control_panel_step_by_step_now_you_can_too/ similar to an ardrino but cheaper as its only for keyboard emulation. Woks with ardrino sketches too. I've seen a build where a guy used several of them in his flight sim obber build.

Great/amazing work so far, I hope your RL problems get better soon.
 
Back
Top Bottom