Here is a quick How-To on constructing the Cobra papercraft. I'm sure that there are other ways to assemble it but this has worked pretty well for me. Let me know if you have any additional questions. This is still pretty high level but hopefully it will give you a place to start if you haven't had much experience with papercraft.
Disclaimer: I'm a novice myself so this may or may not be the best method.
Here is a link to the Cobra Mk. III papercraft pattern: http://imgur.com/gallery/o3Z9k/new
Link to the Hi-Res images used in this post: http://imgur.com/gallery/sKyek/new
Materials
-Print the pattern with no scaling on thick paper or card stock. I've found that stores tend to have better, more durable, ink than my home or work printer.
-X-acto blade or comparable knife. Scissors may be possible but not as accurate for the small cuts.
-Steel ruler. The knife will easily cut into plastic rulers so I'd recommend a metal one.
-Super/Crazy glue. I use the one that comes with an applicator brush. It's very runny and dries really quickly with a strong bond.
-Ballpoint pen or similar tool with a very small rounded end. This is for making indentations in the paper for valley folds (ones that fold up). I'm using a tool that is made for getting at crab/lobster meat in the shell.
-Cutting mat. This is the green pad with a grid pattern. It lets you make cuts more easily and without worrying about messing up your table. You could also use cardboard.
-Chopstick or a slim dowel. This if for applying the glue in hard to reach places and also for pressing down inaccessible tabs.
-Painter's tape. Low tack tape is good for temporarily holding parts together so that you can glue with accuracy.
Step 1. Cut Out All of the Pieces and Cut Slits for the Thruster Fins
Not much to this part... just make sure not to cut off any of the white tabs. You may also wish to go ahead and score any of the lines that will be folded down (mountain folds) with the blade or indent the lines that will be folded up (valley fold) with your pointy-yet-rounded tool or ballpoint pen. Go ahead and cut slits where the white lines are on the thruster section. This is where the thruster fins will insert later on. With thick paper you will have to cut a very-very-slim rectangle here so that the fins can actually be inserted properly.
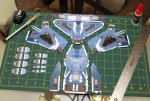
Step 2. Assemble the Cockpit and Glue the Thruster Fins Together
Just make sure to score your fold lines before starting any assembly of a given part... this goes for the tabs on the thrusters as well. It can be much more difficult to get good fold lines after you're started assembling. You can see the tool that I used for the valley folds around the cockpit in this image.
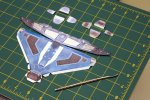
Step 3. Assemble the Side Wings and Attach them to the Upper Hull
You can see where I'm using the blue painter's tape to temporarily hold the parts in place for gluing.
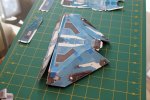
Step 4. Attach the Front Hood
Fold the tabs on the hood 90 degrees down and lower it on top of the cockpit. Then fold up the hood tabs and glue them in place before gluing the cockpit tabs to the underside of the hood.
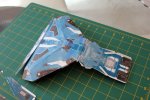
Step 5. Attach the Two Underside Ridges to the Central Underside Section
This image shows how everything so far has been glued in place including the two underside ridged sections
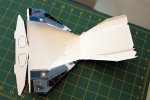
Step 6. Attach the Entire Underside Section Along with the Ridges to the Lower Wing Area
Start gluing in this step with the very back of the underside ridges, where they meet the rear thruster section. This will ensure that everything else lines up. The tricky part will be getting at the tabs at the front bumper area once this is done. This is where I used a chopstick to apply glue and then push down on the front bumper tabs after the underside ridges were glued in place. Make sure to use strips of painters tape to hold tough sections together while gluing.
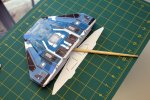
Step 7. Attach the Thruster Fins to the Rear Thruster Section
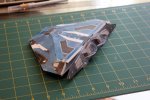
Step 8. Glue the Thruster Section to All of the Rear Tabs
This is what brings it all together. The sequence that worked for me was to first glue the two long top tabs to the top of the thruster section. Then glue the underside ridge sections... make sure to bend everything properly to make it fit the rear thruster section before you start gluing so that you aren't fighting the paper to get things glued in to the right place. Next glue the central lower section that is between the ridges. Then finally glue the rear tabs that are on the outsides of the wings.
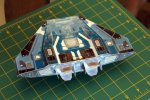
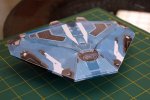
Finished!!!
Disclaimer: I'm a novice myself so this may or may not be the best method.
Here is a link to the Cobra Mk. III papercraft pattern: http://imgur.com/gallery/o3Z9k/new
Link to the Hi-Res images used in this post: http://imgur.com/gallery/sKyek/new
Materials
-Print the pattern with no scaling on thick paper or card stock. I've found that stores tend to have better, more durable, ink than my home or work printer.
-X-acto blade or comparable knife. Scissors may be possible but not as accurate for the small cuts.
-Steel ruler. The knife will easily cut into plastic rulers so I'd recommend a metal one.
-Super/Crazy glue. I use the one that comes with an applicator brush. It's very runny and dries really quickly with a strong bond.
-Ballpoint pen or similar tool with a very small rounded end. This is for making indentations in the paper for valley folds (ones that fold up). I'm using a tool that is made for getting at crab/lobster meat in the shell.
-Cutting mat. This is the green pad with a grid pattern. It lets you make cuts more easily and without worrying about messing up your table. You could also use cardboard.
-Chopstick or a slim dowel. This if for applying the glue in hard to reach places and also for pressing down inaccessible tabs.
-Painter's tape. Low tack tape is good for temporarily holding parts together so that you can glue with accuracy.
Step 1. Cut Out All of the Pieces and Cut Slits for the Thruster Fins
Not much to this part... just make sure not to cut off any of the white tabs. You may also wish to go ahead and score any of the lines that will be folded down (mountain folds) with the blade or indent the lines that will be folded up (valley fold) with your pointy-yet-rounded tool or ballpoint pen. Go ahead and cut slits where the white lines are on the thruster section. This is where the thruster fins will insert later on. With thick paper you will have to cut a very-very-slim rectangle here so that the fins can actually be inserted properly.

Step 2. Assemble the Cockpit and Glue the Thruster Fins Together
Just make sure to score your fold lines before starting any assembly of a given part... this goes for the tabs on the thrusters as well. It can be much more difficult to get good fold lines after you're started assembling. You can see the tool that I used for the valley folds around the cockpit in this image.

Step 3. Assemble the Side Wings and Attach them to the Upper Hull
You can see where I'm using the blue painter's tape to temporarily hold the parts in place for gluing.

Step 4. Attach the Front Hood
Fold the tabs on the hood 90 degrees down and lower it on top of the cockpit. Then fold up the hood tabs and glue them in place before gluing the cockpit tabs to the underside of the hood.

Step 5. Attach the Two Underside Ridges to the Central Underside Section
This image shows how everything so far has been glued in place including the two underside ridged sections

Step 6. Attach the Entire Underside Section Along with the Ridges to the Lower Wing Area
Start gluing in this step with the very back of the underside ridges, where they meet the rear thruster section. This will ensure that everything else lines up. The tricky part will be getting at the tabs at the front bumper area once this is done. This is where I used a chopstick to apply glue and then push down on the front bumper tabs after the underside ridges were glued in place. Make sure to use strips of painters tape to hold tough sections together while gluing.

Step 7. Attach the Thruster Fins to the Rear Thruster Section

Step 8. Glue the Thruster Section to All of the Rear Tabs
This is what brings it all together. The sequence that worked for me was to first glue the two long top tabs to the top of the thruster section. Then glue the underside ridge sections... make sure to bend everything properly to make it fit the rear thruster section before you start gluing so that you aren't fighting the paper to get things glued in to the right place. Next glue the central lower section that is between the ridges. Then finally glue the rear tabs that are on the outsides of the wings.

Finished!!!

Last edited:
