Newcomer / Intro How I got hooked on exploration - my first expeditions

For all the Newcomers who might overlook the role of explorer and discard it as "uninteresting" at first, I want to give you an account of my first experiences with deep space exploration.

Back when I started in my free Sidewinder, exploration credits were still a fraction of what you can earn now by simply scanning star systems. After the 1.2 patch I decided to give the Vulture a try in combat, and I was amazed at how safe I felt in that space ship for the first time in that game, ever... I had flown a pretty tanky Asp before, a slightly combat capable Clipper, too... and, of course, the Viper and Cobra back when I was still learning the game.

I had been bounty hunting in the revamped RES zones for a couple of days and amassed a dozen millions or so, when I read in a patch note that they had added a far out starport named after my favourite author Terry Pratchett. So I added a fuel scoop to my 16 ly ranged Vulture and thought that I would make a pilgrimage to "Pratchett's Disc" to pay my respects and maybe use it as a base for exploration. I noticed it was only a couple hundred lightyears away from the Coalsack Nebula, and that seemed like a reasonably interesting destination for a first trip out.

Exchanging my cargo space for an A4 Fuel Scoop, a Detailed Surface Scanner and an Advanced Discovery Scanner, I journeyed to the system HIP 74290:

View attachment 28003

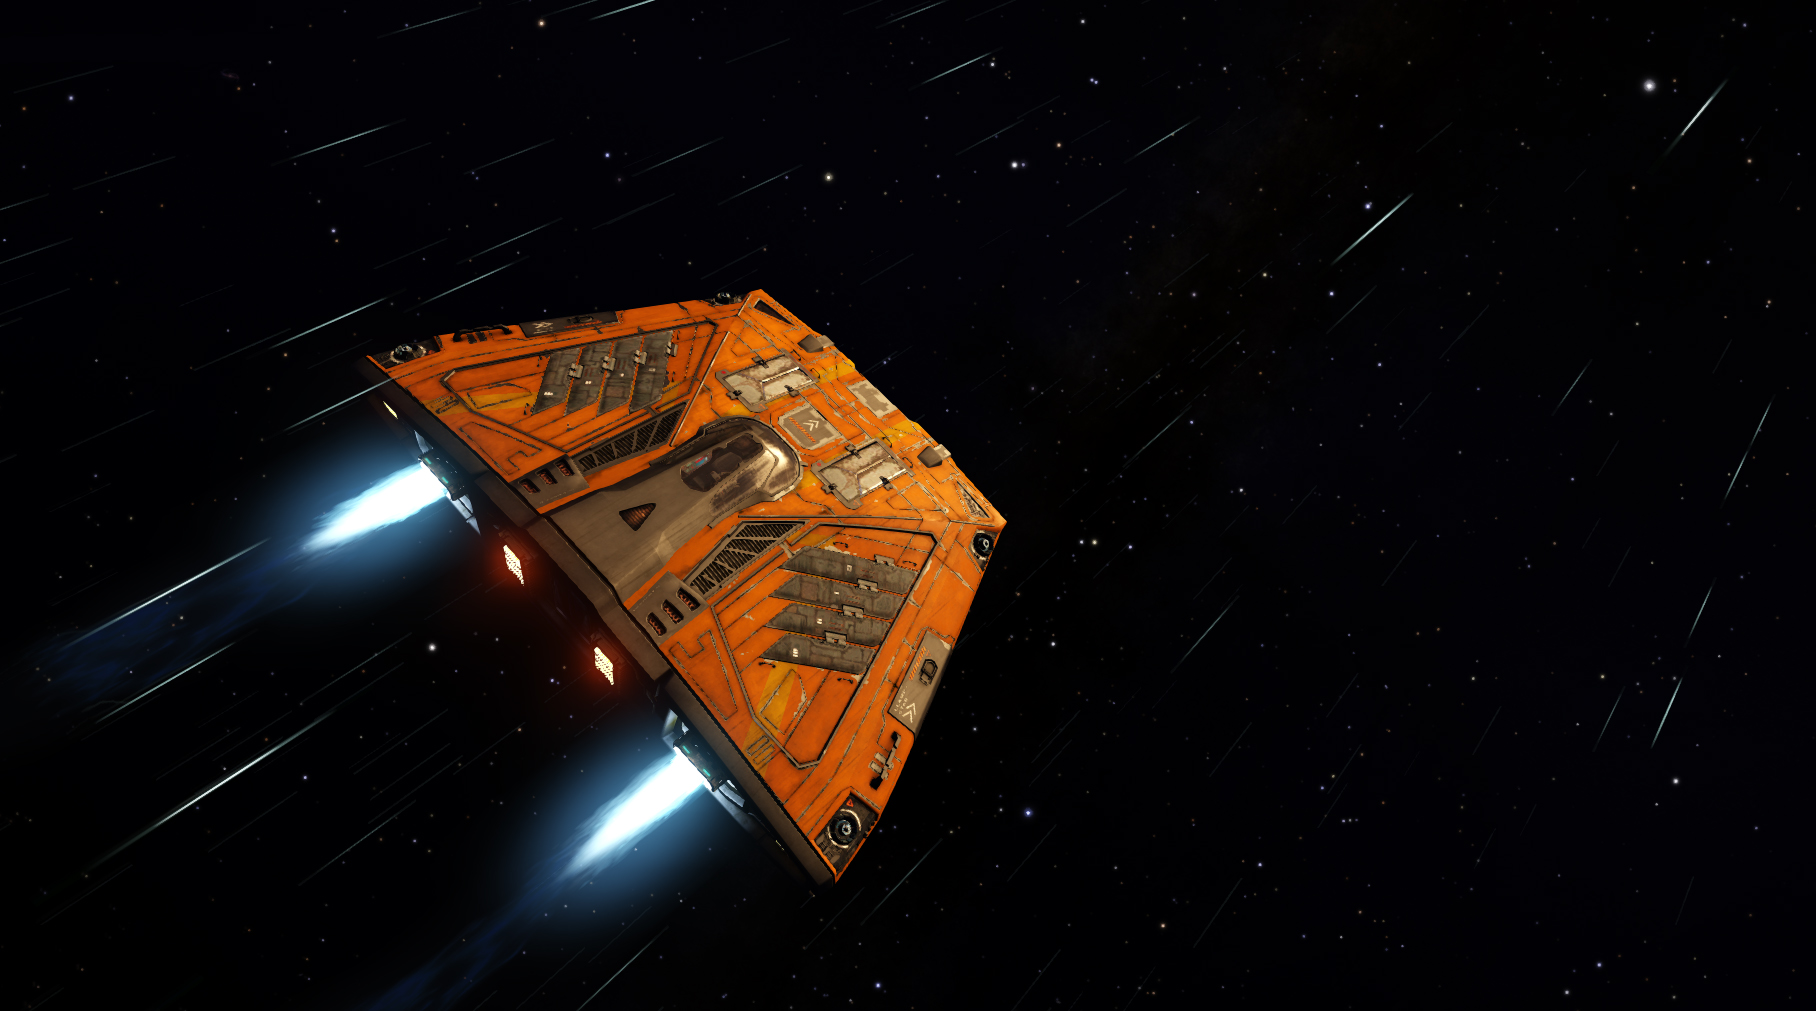
Upon arrival, I checked out the local shipyard and outfitters, only to reveal that there were no Asp Explorers on sale, only Haulers, Adders and Cobras, but not even the best frame shift drives for those ships, let alone fuel scoops or D-grade lightweight modules... so I had the choice: Do I travel 300 ly back to civilized space and try to build a decent exploration ship, or do I head out now in my trusty A-kitted Vulture, the "Reckless"? I had the scanners and a fuel scoop... I exchanged my point defence turrets with heat sink launchers and got on my way:

More or less heading straight towards the Coalsack Nebula, I knew I had to be careful where to jump, since my vessel only had an 8 ton fuel tank. I filtered the Galaxy map to only show scoopable stars, and carefully planned my route from tank stop to tank stop, until I finally arrived in the Musca Dark Region:

Coalsack Nebula.pngCoalsack.jpgCoalsack.pngView attachment 28008View attachment 28009View attachment 28010

And this is exactly what I came for: Screenshots. I wanted to see things I had not yet seen inside the inhabited zone. Granted, the Coalsack is not the most spectacular nebula, and boy, the dark region really IS DARK! :D

But seeing those purple clouds of gas in the sky engulfing a darker patch of night visible against the backdrop of the Milky Way... totally worth it! I switched my galaxy map mode from "visible scoopable stars" to "realistic mode" and picked the dots that appeared most shiny and interesting to me...

In the following posts I will show you some of the systems I cartographed. But first, have some impressions of my discoveries inside and around the Coalsack Nebula:

Gas Giants and Brown Dwarfs:

Stars:


Ammonia Worlds:

High Metal Content and Metal Rich Planets:

Terraformable Waterworlds:

 
Last edited:
Yep I would say you're hooked :)

A nice spell away from all the pirates and trolls, what could be better.
 
The first remarkably unusual system I came across: HIP 62154

As soon as my discovery scan finished and I opened the system map, I knew this would be a valuable find:

View attachment 28057View attachment 28058

The parent star:

The planets are all relatively far out from their star... and the first five planetary bodies, as well as the seventh one, are various types of high metal content planets, most of which have different kinds of atmospheres...


High metal content planets are pretty valuable to scan... especially when they have an atmosphere, as it could be that they are terraformable.


On the system map, they appear in any colors that are not grey (rocky planets) or white (ice planets). They can be brown, red, orange, yellow, even purple... Sometimes, a high metal content planet that has a thick atmosphere will appear grey-ish, though... but you can still distinguish them from ice worlds by looking at the dashboard hologram when you have them targeted:

Typical ice planet hologram:

High Metal Content Planet Holos:


Any terraformable planets will grant you a big payout bonus, so always scan every terrestrial planet! You might get lucky!

The real jackpots in this system, however, were the three waterworlds with indigenous life. Planets six, eight and nine:

A good rule of thumb is: If your system map shows blue terrestrial planets, you are in for a treat :)


The outer planet was, indeed, one of the largely worthless ice planets, but I payed it a visit anyway as it had rings and I love to go ring surfing :D


I always find it exciting to find systems such as this... it has all necessary attractions and resources to be colonized. Two planets in the habitable zone are terraformable, most of the planets are well stocked with metals, and three of them carry ocean born life that could potentially sustain a human population without being dependent on supply routes. Scientists, planetary mining corporations and industrial companies alike would have a place here, along with a booming fishing industry.
 
Last edited:
Those are some really great shots! I love my Vulture, though I wasn't brave enough to set off into the black with it. That is very cool, commander.

I look forward to seeing more of your adventures.
 
My first Earthlike! - Musca Dark Region BG-Y D91

After having roamed the Musca Dark Region for a bit, an explorer's dream came true for me:

View attachment 28095View attachment 28096

Granted, I wasn't the first here, but it was the first time I found an earthlike planet in an uninhabited system... oceans, clouds and continents alike. When a blue marble on your system map shows a blue and white ball with green patches, there is a high chance it isn't a waterworld, but an alien earth indeed:


Ain't she a beauty?

But she was really just the icing on the cake here... this binary system had its fair share of cheap ice planets, yes, but a couple of not too shabby gas giants and high metal content planets orbited the primary parent star as well:


A Class III Gas Giant with a complex ring system in close orbit around the primary star.

High Metal Content planets:


The second one has a thick atmosphere and could easily be mistaken for a waterworld or an ice world, since its surface is not visible through the cloud layers...

And look at that: The alien earth is not the only planet with life in this system!


Brown gas giants such as this are often inhabited by atmospheric life forms based on ammonia or water vapour. Which makes them scientifically valuable. As in: muchas monetas! :D

In my experience, gas giants are always worth a detailed surface scan. The only things I'd skip in the current iteration of the game are rocky planets and ice planets (the small, often grey, sometimes yellow and mostly white dots that are the moons of other, larger planets such as gas giants) and asteroid belts (which at the moment in 1.2 are worthless even if scanned in detail - which might get fixed in the future, though).
 
Last edited:
Great screenshots! That's why i love this game. I'm a fan of exploring too, but still didn't earn enough credits to buy a decent explore ship :(
 
Great screenshots! That's why i love this game. I'm a fan of exploring too, but still didn't earn enough credits to buy a decent explore ship :(

You can explore with anything. I started in an Adder. CMDR Sirocco's Vulture is a non-standard, and very cool choice, as well.
 
A few tips for aspiring explorers - "To scan or not to scan? - An illustrated guide"

So... before I show you the rest of my pictures from my first journey out into the black, I have decided to provide those who want to try exploration for themselves with some useful information - which is the second intended purpose of this thread besides showing off my collection of screenies :D

The most comprehensive guide on anything related to exploration is "Nutter's Explorer's Guide".

Seriously, a must-read. Don't pass it up.

If you want to have a rough idea of what payouts to expect from which type of star or planet, you can always take a quick look at this infographic.

And last but not least: If you just want to make good credits without worrying too much about being the first to discover anything, you can check out the List of Earthlikes and go scan them for money.

Now to the good part: To scan or not to scan? How can you see in-game which planetary bodies are worth scanning and which are not?

Well, it goes roughly like this:


Enter a system, honk the horn (fire your discovery scanner) and while scanning the surface of the star in front of you, take a look at the system map. Asteroid belts, at least currently in version 1.2 of the game, mean nothing more than a group of worthless navigation contacts. This is getting looked into by the developers, however, so we might see a change in 1.3 if we are lucky.

The brown planets beyond the system's asteroid belt are most likely high metal content planets, maybe even metal rich. Definitely scan them. Same goes for the gas giants. Especially the brown ones, as they could hold atmospheric life, which increases their value. I personally wouldn't bother with the white and bright grey planets, though, as they are most likely rocky or icey planets, which are worth very little.

Now, if you are just starting out in your Sidewinder, you might want to collect the scan data even for ice planets, as the pay looks good to a low income beginner. Once you get past a certain threshold, though, you scan a red dwarf star system and see the system map and go:


Which is perfectly legitimate.

So how do you identify ice planets and asteroid belt clusters in your navigation panel contact list?

You will just have to click through the list and watch the dashboard hologram for each contact.

Asteroid Clusters:

And, as mentioned already in a post above, ice planet holos:


Fair warning: The holos for rocky planets look exactly like those for high metal content planets at the moment. Check back on the system map to see whether it is worth a closer look.

So... what IS worth a closer look? Rule of thumb: Any terrestrial planet that is not white or bright grey, also every star and all gas giants. Moons are often rocky, even if they appear yellow in the system map.

Examples for worthwhile systems:


Now I said moons can often be passed up because they are not worth much. However, moons are not always just barren rocky planetoids or ice planets. Sometimes, high metal content planets or even metal rich planets will orbit another planetary body.

----------------------------------------------------------------------------------------------------------

To further illustrate this guide, let me show you an example of a fairly generic star system from my journey through the dark Coalsack regions:

Musca Dark Region HM-V C2-45

View attachment 28133

Nothing fancy... a couple of planets with high metal content and a few gas giants... many rocky moons and ice planets. Still, worth a quick survey sweep:

Asteroid belt.png

The yellow main sequence star as seen from the asteroid belt.


The first planet proves to be "metal rich" - 100 % metals! Doesn't look like much on the outside, but is worth quite a bit of money.


Planets 2-5 are all "high metal content" types... one of them even has a pristine metal rich ring system.

Planets 6-9 are various gas giants, some of which also have metal rich rings with pristine reserves.


The tenth planet looked worthless at first, but I investigated anyway as it had a ring system. I was not disappointed:

This ice giant has two separate rings. An outer ice ring and an inner asteroid ring, rich in metals.

All in all, this star system was very much worth the exploration time spent. And on top of that, I got a couple of very nice screenies for my album :)

Upon return to Pratchett's Disc, I was a couple of millions richer and became a "Trailblazer".... just for heading out a couple of hundred lightyears and scanning every star system on my way there and back, as well as sweeping the general area around the Coalsack nebula for valuable systems.
 
Last edited:
really interesting read :)
Like most CMDRs, I have screenshots aplenty now...but have yet to stumble across how to take them with my own ship in them...any tips for that?
thanks.
 
Thanks to you all for your positive feedback, it is nice to have my work appreciated :)

@withnail7: In your controls menu under "options" you can add a hotkey or key combination to the activation of the "Debug camera". Once activated, you can fly it like a drone. The camera, once activated, will always spawn above your ship, facing forward. You have to manually fly it into position to make a screenshot with it. If you use SweetFX or Reshade like me, you wanna use the printscreen function (and paint or photoshop or some other graphics program) to make screenshots instead of the ingame hotkeys F10 and Alt-F10.

The camera has a maximum distance limit to your ship, too... so keep that in mind ;)

Another tip for would-be explorers thinking about waiting to kit out an Asp: You don't need to.

The main advantage of the Asp is the jump range, which you only need if you want to explore high above or below the galactic plane, cross the voids between the spiral arms or reach the systems on the Outer Rim.

30+ ly of jump range is for advanced exploration. To reach the core or many of the prominent, spectacular nebulae along the main path of our spiral arm, you only need 20-25 ly range.

Have a look at these builds for entry level exploration ships I mentioned in another thread.

After having returned to the Alliance in order to try and gain allied status with them, I started bounty hunting in the "Reckless" until I got word of a community goal in the TSU system: "Gather exploration data and turn it in at Ziemkiewicz Ring."

This was my chance to and the only little nudge I needed to go on a second exploration trip. This time I wanted to visit all the nebulae I had seen through a telescope as a kid: The Pleiades, California Nebula, Orion, Running Man Nebula, Barnard's Loop, the Horsehead Nebula...

This time, though, the "Reckless" and her 16 ly of jump range would not be enough. I didn't want to kit out an Asp as I deemed it too expensive, but I wanted to be prepared for a longer journey this time, and I wanted to plan my trip a little more carefully.

So after playing around a bit on the EDShipyard, I modified a cute little Hauler for deep space exploration at Ziemkiewicz shipyards, and called it "Lady Jocelyn":


And as you can see here, she turned out to do her job quite well:


At first, I just wanted to collect the valuable data for known earthlikes from the public list, so I browsed the list and found the system HIP 18119 with 3 earths orbiting each other in the same system. Searching it in the galaxy map, I realized it was located halfway towards the California Nebula.

So this is how I planned my route:

2nd Journey.png

And these are a few snapshots from my first major stop on tour:

HIP 18119

View attachment 28174

I can only imagine how the first discoverer must have felt... :D

Anyway - the system is, obviously, a goldmine in itself. Three earthlike worlds in the habitable zone, two of which revolve around a common gravitational point, both of them orbited by a third one...

All other planets are high metal content types:


That means for this system alone, I have more than 100k cr worth of data. And at this point, my journey had just begun...

Next stop: California Nebula!

California Nebula.png
 
Last edited:
Welcome to the explorers' club commander!

Intrigued by the Vulture choice. What kind of FSD range is on that ship? (I've been travelling so long I've not seen a Vulture in the shops yet)
 
Welcome to the explorers' club commander!

Intrigued by the Vulture choice. What kind of FSD range is on that ship? (I've been travelling so long I've not seen a Vulture in the shops yet)

Mostly A-rated with C-rated sensors and life support, it had a jump range of 16 ly. That was enough to reach the Coalsack Nebula, and as long as one does not venture where star density gets very low, I assume it would also suffice to get to the core... but I prefer a jump range roughly around 25 ly - 30 if in an Asp.

The fuel tank is also a factor that has to be considered. You are forced to plan your route very carefully in a Vulture, because you cannot make many maximum distance jumps before you have to fuel up again. However, if you are careful, you can go exploring in almost any ship, I am sure. The Vulture wasn't my first choice - I had hoped I could equip an Asp when arriving at Pratchett's Disc - but they didn't have any Asps, nor any good exploration equipment. So I took what I had brought with me.
 
cheers for the camera tips...will gen up & get snapping!
PS. I take it that we cannot name our ships in the game at all?...just in our heads??
cheers
 
Approaching California Nebula

Rule of thumb: The closer you get to a nebula, the more interesting the skybox becomes:


However, a fair warning to all graphics freaks: Nebulae suffer a bit from LOD issues that seem to be part of the engine, at least in its current state. From some angles and distances even the prettiest nebulae look like mushy, low-res textures instead of detailed 3D models:


The California Sector is rich in systems that are ripe for terraforming and colonization. One of these systems is

California Sector HR-W D1-4

View attachment 28342

As you can probably identify by now if you have read my tips and hints above, this system, apart from the couple of ice planets on the outskirts, has a fair amount of high metal content planets and one blue ocean world in the middle of the habitable zone. Most of the planets here seem to have atmospheres, which increases the likelihood for finding terraforming candidates. If you DS a system and your map shows something like this, it is worth making a sector sweep and surface scanning all bodies except the icey ones.

Which is exactly what I did, and in fact, all of the inner planets are high metal content types, with the exception of the waterworld.

1st Planet - High Metal Content.png5th Planet - High Metal Content with rocky moon.png6th Planet - High Metal Content.png7th Planet - High Metal Content with rocky moon.png

Planets 1, 5, 6 and 7. 5 and 7 have a single rocky moon, too.


Planets 2 and 3 turned out to be terraformable (!) high metal content twins. Twin planets are two planets, often of similar size, orbiting a common gravitational axis point. Unlike a planet with a moon which is just a smaller planetoid orbiting the larger body.


The waterworld turns out to have a weather system similar to Earth, and is an excellent candidate for future terraforming, too! Any waterworld is always a profitable choice for a detailed surface scan, but being a candidate for terraforming seriously ups the profits on this :)
 
Last edited:
My personal take on exploration builds - better safe than sorry!

Every explorer has a different take on how to build an exploration ship. Most people will say it is all about the jump range and the fuel tank, they will ditch the shields to squeeze one more lightyear out of their FSD, and leave as many module slots empty as possible.

Which is totally fine. You can do that. And you will probably survive. The game isn't half as punishing as people think. A lot of forumites congratulate me for going exploring in a Vulture - as if that was a feat. As if it had been any more dangerous for me than for people flying a maximized Asp.

Truth is: It was easy as pie. Just took a little longer. But I was in it for the journey, not for a rush to a goal. So I enjoyed it anyway.

Recently, a lot of threads have popped up in the newcomers forum asking about exploration builds. "What do I need for my first trip?".

The answer is simple:

1.) The bare minimum

- the best and largest fuel scoop you can afford
- the best FSD you can afford
- at least a basic discovery scanner

Boom. That's it. That's far from being optimal (!), mind you - but it totally works. However, while exploration is probably the least dangerous profession in the game, it still has its dangers. And that is where my rule: "Better safe than sorry" comes in.

What could possibly get you killed when you go out exploring?
- flying into the "body exclusion zone" of planets at high speeds (-> hull and module damage)
- overheating while fuel scooping or getting too close to a sun (-> hull and module damage)
- getting shot to pieces by NPC or Player psychos while trying to leave or reenter inhabited space
- getting stranded without fuel and without a possibility to refuel

So what can you do to reduce or counter all these dangers?

2.) Never leave port without protection

- carry at least the smallest and lightest (D-grade) shield available for your ship (maybe even boost it with D-grade shield boosters) so you don't take any direct hits to hull while fleeing from an assailant.
- carry at least one B-rated auto maintenance module, if you can afford it and have the space for it. Why B-rated? Auto maintenance modules don't weigh anything, same as fuel scoops. So you can choose the one with the largest supply of resources (ammo), which is the B-rated one.
- carry at least one heat sink launcher. Two if you are planning a long trip, e.g. into the core. Put each of them in a separate fire group, so you don't accidentally fire them without need.

Also: no matter how big your tank and your fuel scoop are, always plan your trip ahead along scoopable stars, so you can fuel up before you run out! The galaxy map has a function to filter systems by star type. All types from M up to A can be scooped. All types below M cannot be scooped. Keep this simple reminder in mind: "KGB FOAM" These are the letters of all scoopable stars.

To all people who say "I would love to go exploring but I can't afford an Asp yet", here is a list of exploration builds I did for myself, experimenting with EDShipyard.

[Faulcon de Lacy Sidewinder Scout Vessel]

Peek_of_the_Week_42.jpg

U: 0I Heat Sink Launcher

BH: 1I Lightweight Alloy
RB: 2D Power Plant
TM: 2D Thrusters
FH: 2A Frame Shift Drive (~20 ly)
EC: 1D Life Support
PC: 1D Power Distributor
SS: 1D Sensors
FS: 1C Fuel Tank (Capacity: 2)

2: 2A Fuel Scoop (26s to fill)
2: 1C Detailed Surface Scanner
1: 1C Advanced Discovery Scanner

Cost: ~2.3 million (the scanners are really expensive)

Pros and Cons: This ship has been used to cross the galaxy before, so yes, you can use it. No problem. You will be very vulnerable in it, though... either you take a shield OR a detailed scanner. No room for repair modules, so you have to be extra careful. 20 ly are a decent enough jump range for a small vessel such as this.
---------------------------------------------------------------------------------------------------------

[Zorgon Peterson Hauler Explorer]

Art1-dec11-14-main.jpg

U: 0I Heat Sink Launcher

BH: 1I Lightweight Alloy
RB: 2D Power Plant
TM: 2D Thrusters
FH: 2A Frame Shift Drive (~25-28ly)
EC: 1D Life Support
PC: 1D Power Distributor
SS: 1D Sensors
FS: 2C Fuel Tank (Capacity: 4)

3: 3A Fuel Scoop (22s to fill)
3: 1C Detailed Surface Scanner
2: 2D Shield Generator
1: 1C Advanced Discovery Scanner

Cost: ~ 3 million

Pros and Cons: With a Hauler, you get good jump range and the ability to carry a shield and still be fully equipped for exploration. You have to decide whether to carry a shield OR an auto maintenance unit though. Depends on where you are going and how long you plan on being out there.
-----------------------------------------------------------------------------------------------------------

[Zorgon Peterson Adder Explorer]

latest

U: 0I Heat Sink Launcher

BH: 1I Lightweight Alloy
RB: 2A Power Plant (-> downsized 2A is better than 3D against heat AND lighter!)
TM: 3D Thrusters
FH: 3A Frame Shift Drive (~25-27ly)
EC: 1D Life Support
PC: 2D Power Distributor
SS: 3D Sensors
FS: 3C Fuel Tank (Capacity: 8)

3: 3A Fuel Scoop (45s to fill)
3: 3B Auto Field-Maintenance Unit (4300 units of "ammo")
2: 2D Shield Generator
2: 1C Detailed Surface Scanner
1: 1C Advanced Discovery Scanner

Cost: ~4.4 million

Pros and Cons: This is the first exploration ship that you don't have to make any compromises on.

Pro-Tip: Always take the smallest A-grade power plant you can (that still has enough power for all your systems) if you want to reduce heat danger while fuel scooping! ;)

-----------------------------------------------------------------------------------------------------------

[Faulcon de Lacy Cobra Mk III Explorer]

Elite_dangerous_beta_2-6.jpg
U: 0I Heat Sink Launcher

BH: 1I Lightweight Alloy
RB: 3A Power Plant
TM: 4D Thrusters
FH: 4A Frame Shift Drive (~25-27ly)
EC: 3D Life Support
PC: 3D Power Distributor
SS: 3D Sensors
FS: 4C Fuel Tank (Capacity: 16)

4: 4A Fuel Scoop (46s to fill)
4: 4B Auto Field-Maintenance Unit (5900 units of "ammo")
4: 3D Shield Generator
2: empty (!)
2: 1C Detailed Surface Scanner
2: 1C Advanced Discovery Scanner

Cost: ~8.8 million

Pros and Cons: In addition to the multifunctionality of the Adder, the Cobra has an excellent boost speed and is thus very good at avoiding combat with attackers inside the inhabited zone.

Pro-Tip: You only really need one (!) auto field maintenance unit per ship. Unless you constantly suffer from bad luck, jumping right between two close binary stars that will rip you from supercruise and cook you alive, you won't be needing a second repair module. Just take the one with the highest ammo supply with you and you should be right as rain.

-----------------------------------------------------------------------------------------------------------

[Lakon Type-6 Explorer]
maxresdefault.jpg

U: 0I Heat Sink Launcher
U: 0D Shield Booster

BH: 1I Lightweight Alloy
RB: 3A Power Plant (needed for heat dissipation)
TM: 4D Thrusters
FH: 4A Frame Shift Drive (~28-30ly)
EC: 2D Life Support
PC: 3D Power Distributor
SS: 2D Sensors
FS: 4C Fuel Tank (Capacity: 16)

5: 5A Fuel Scoop (27s to fill)
5: 5B Auto Field-Maintenance Unit (7300 units of "ammo")
4: empty
4: empty
3: 3D Shield Generator
2: 1C Detailed Surface Scanner
2: 1C Advanced Discovery Scanner

Cost: ~8-17 million (largely depending on your fuel scoop. read below!)

Pros and Cons: Without an A-rated power plant, the Type 6 overheats very quickly, so you absolutely need to have one. If you want to take the maximum number of Auto Field Maintenance Units with you, always deactivate them until one is needed. Filling the two empty slots with AMUs will increase the cost to 20 million and power usage above 100%. As said above, there is no need for such overkill. If you want to reduce the costs, you can take a lower grade fuel scoop. Rule of thumb: If the time to fill your tank is below 1 minute, you are well equipped. A D-rated size 5 fuel scoop takes 48 seconds to fill a 16 ton tank and is much cheaper... so much that you will be able to afford this build at 8 million credits instead of 17 million (!!!).

IMPORTANT: if you need to use an auto field maintenance unit, first drop from supercruise and come to a relative stop (= 0 m/s). THEN activate it. Not while in supercruise. You will otherwise be emergency dropped and take additional damage before repairing.

-----------------------------------------------------------------------------------------------------------

[Lakon Asp Explorer]

maxresdefault.jpg

U: 0I Heat Sink Launcher
U: 0D Shield Booster

BH: 1I Lightweight Alloy
RB: 4A Power Plant
TM: 5D Thrusters
FH: 5A Frame Shift Drive (~33-35ly)
EC: 4D Life Support
PC: 4D Power Distributor
SS: 5D Sensors
FS: 5C Fuel Tank (Capacity: 32)

6: 6B Fuel Scoop (42s to fill)*
5: 5B Auto Field-Maintenance Unit (7300 units of "ammo")
3: 3D Shield Generator
3: empty
3: empty
2: 1C Detailed Surface Scanner
2: 1C Advanced Discovery Scanner

Cost: ~26 million

Pros and Cons: The ultimate exploration ship.

*taking an A-rated fuel scoop would only reduce the scooping time 6 seconds but would also make this ship roughly double as expensive as it already is.

-----------------------------------------------------------------------------------------------------------

[Gutamaya Imperial Clipper/Explorer]
2759590-imp_cutter_ice.jpg

U: 0I Heat Sink Launcher
U: 0D Shield Booster

BH: 1I Lightweight Alloy
RB: 4A Power Plant
TM: 6D Thrusters
FH: 5A Frame Shift Drive (~25ly)
EC: 5D Life Support
PC: 6D Power Distributor
SS: 5D Sensors
FS: 4C Fuel Tank (Capacity: 16)

7: 7D Fuel Scoop (22s to fill)
6: 6B Auto Field-Maintenance Unit (8900 units of "ammo")
4: empty
4: empty
3: empty
3: 3D Shield Generator
2: 1C Detailed Surface Scanner
2: 1C Advanced Discovery Scanner

Cost: ~36 million

Pros and Cons: Unlike the Asp, this ship cannot land on outposts (at least not currently, until outposts with large landing pads are introduced). You don't need a 7A Fuel scoop as it is madly expensive and decreases the scooping time by only 10 seconds. 22 seconds is already excellent. Also: Similar boost speed to the Cobra. You can decrease the price significantly by taking a 4B AMU instead of a 6B, if you are on a tighter budget.

-----------------------------------------------------------------------------------------------------------

You can, of course, also kit out an Anaconda for exploration and get the highest jump range in the game with it... but people who can do that don't need any help any more in this game, I am sure :D
 
Last edited:
cheers for the camera tips...will gen up & get snapping!
PS. I take it that we cannot name our ships in the game at all?...just in our heads??
cheers

Sadly, ship names are all head canon.

And since you brought it up :) my ASP is "Dread Wolf" and my Vulture, "Heart of Mythal." After my current exploration trip I want to rank up, get a Clipper, and that will "Inquisitor." There is a theme to my names. :)

- - - - - Additional Content Posted / Auto Merge - - - - -

Commander Sirocco: You really need to get this stuff over on the Guides subforum. It's wonderful stuff!
 
So after all the advice - here's some more eye candy for you

California Sector HR-W D1-7

View attachment 28497

This binary star system is basically two star systems in one. The stars are moderately far apart, each with their own set of planets, and both stars are orbiting each other. I love binary systems such as this - you effectively get two for the price of one. What's not to like? :p

Isn't it just a lovely set of colourful marbles? I like the blue ones myself... :cool:


The primary star is a big white F-type. Its heat has scorched the inner planets... barren as they are, they resemble our own Mars back home in Sol - well, before it was terraformed, anyway :D. All of them are high metal content types:


The primary star has no less than four planets orbiting inside its habitable zone. Two of them are terraformable high metal content planets, two of them are waterworlds with indigenous life, also candidates for terraforming:

There's that warm, fuzzy feeling you get when you have scanned halfway through the first half of a binary system and already found several terraformable worlds :)

And another pair of high metal content planets outside the habitable zone of Star 1.

A few thousand lightseconds away is star number 2, a yellow K-type with a metallic asteroid belt:


It is orbited by high metal content planets, mostly... e.g. Planet 2A, 2C, 2F, 2G and 2H:


2B and 2D are terraformable:


2E is another terraformable world, an ocean covered planet with a weather system similar to Earth, and the scan shows ocean-born indigenous lifeforms:


The outer planets are a small class I gas giant...:


It has a rocky ring with pristine mineral reserves.

And there is also a ringed ice giant on the outskirts. While I am out here, I am giving it a look-over too. Just for good measure:

Honestly... the best part of exploring is finding lots of gorgeous planets such as these and adding them to my screenshot collection :p

As you can see in this last final picture, I am getting closer and closer to the Californian Nebula:

 
Last edited:
Back
Top Bottom