You are using an out of date browser. It may not display this or other websites correctly.
You should upgrade or use an alternative browser.
You should upgrade or use an alternative browser.
I need help understanding this information. Can anyone explain this to me?
- Thread starter XCaliber
- Start date
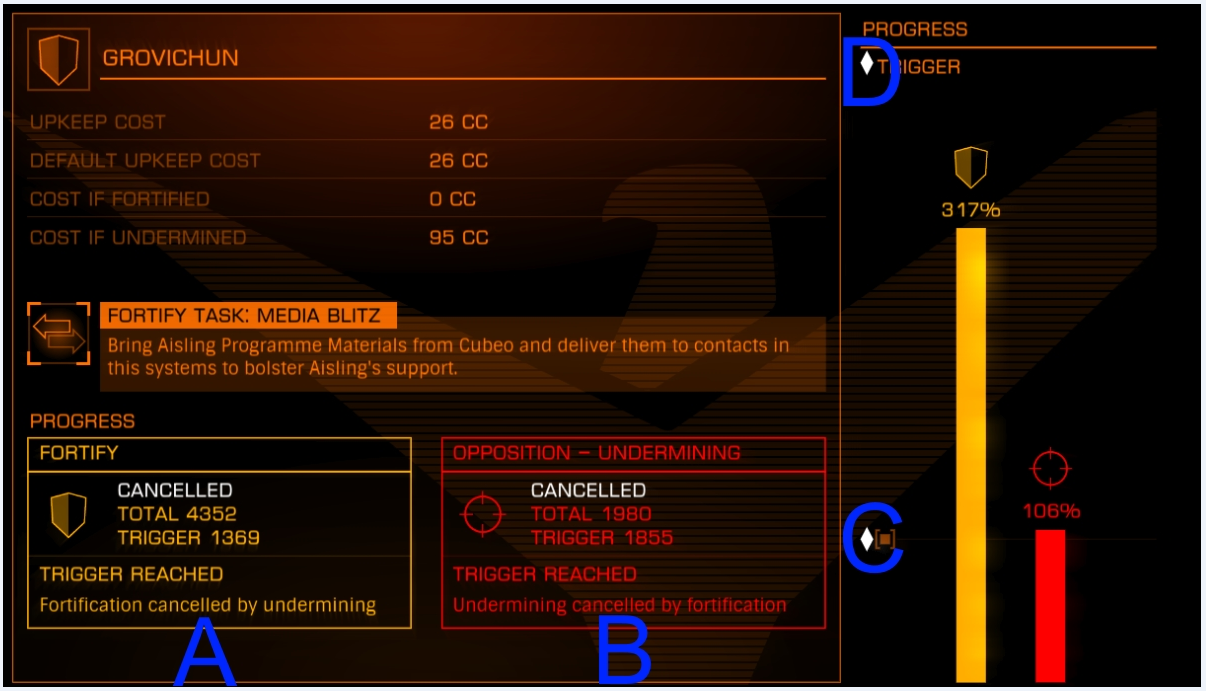
A - relates to the number of garrison supplies taken to 'Grovichun' from the capital system of the power by players. In that screenshot it reached the trigger of 1369 already.
B - relates to the amount of undermining done by other powers in the system, it is players doing stuff like attacking certain ships and/or retrieving their cargo.
If A trigger is reached but B trigger isnt then the system is 'Fortified' at the end of the PP week.
If B trigger is reached and A trigger isnt then the system becomes undermined.
In your example both triggers are reached so they cancel each other out.
C is just a marker on the graph pointing to the trigger point (imagine horizontal line across the 2 bars in the graph)
D is just saying that the diamond shape is the trigger point as I described.
A shows the amount of fortification points and the required amount (trigger) for the system to be considered fortified. Anything above that is a waste time and efforts.
B shows the same for undermining. Again, anything above the trigger is a waste of time and efforts.
If both triggers are reached, the fortified and undermined state cancel each other out.
C shows the trigger on the diagram (I believe it's both for fortifying and undermining as those are shown in percents, so trigger would mean 100% for both).
D is a legend for the diagram, explaining how C is the trigger.
Guess, I'll have to add an interface part to my Popular Guide to Powerplay, huh?
Guess, I'll have to add an interface part to my Popular Guide to Powerplay, huh?
that would be great!
- - - Updated - - -
that would be great!
A - relates to the number of garrison supplies taken to 'Grovichun' from the capital system of the power by players. In that screenshot it reached the trigger of 1369 already.
B - relates to the amount of undermining done by other powers in the system, it is players doing stuff like attacking certain ships and/or retrieving their cargo.
If A trigger is reached but B trigger isnt then the system is 'Fortified' at the end of the PP week.
If B trigger is reached and A trigger isnt then the system becomes undermined.
In your example both triggers are reached so they cancel each other out.
C is just a marker on the graph pointing to the trigger point (imagine horizontal line across the 2 bars in the graph)
D is just saying that the diamond shape is the trigger point as I described.
thanks Fireclown