Community Event / Creation The Svadilfare: Building a sci-fi simrig

Looks extremely impressive! You guys ought to be designing office chairs for the sore-rump executive who has everything.

Thank you, trust me no sore rumps in this one :)

I tried screwing the pads to the seat tonight and testsat it for a while and I must say I couldnt have wished for more comfort. With a future headrest, I might consider sleeping in it!

Annoyingly, a very basic amateur mistake made itself noticed tonight; Ive made the pads too wide so the sides cant be fitted!
I was so careful measuring the pads, but forgot to add a little due to the vinyl adding to the width of the pads, which sums up to a good few millimeters sticking out on each side…Damn myself…

Simple enough, though, ill have to redo at least the middle pieces somewhat thinner and it will work out. Ill get around to that sooner or later, but for now ill move on to next step which will be to reassemble the frame properly, get the sides cut to shape and mounted, and then begin filling/sanding. Somewhere along the way ill begin work on the headrest and the hatches on the backside.
So expect any updates for awhile to be somewhat boring as its just the same thing over again ;)


Also WinterWalker, i begin to have an idea of what to do with the name patch!


mjHICk4.jpg
 
Thank you, trust me no sore rumps in this one :)

I tried screwing the pads to the seat tonight and testsat it for a while and I must say I couldnt have wished for more comfort. With a future headrest, I might consider sleeping in it!

Annoyingly, a very basic amateur mistake made itself noticed tonight; Ive made the pads too wide so the sides cant be fitted!
I was so careful measuring the pads, but forgot to add a little due to the vinyl adding to the width of the pads, which sums up to a good few millimeters sticking out on each side…Damn myself…

Simple enough, though, ill have to redo at least the middle pieces somewhat thinner and it will work out. Ill get around to that sooner or later, but for now ill move on to next step which will be to reassemble the frame properly, get the sides cut to shape and mounted, and then begin filling/sanding. Somewhere along the way ill begin work on the headrest and the hatches on the backside.
So expect any updates for awhile to be somewhat boring as its just the same thing over again ;)


Also WinterWalker, i begin to have an idea of what to do with the name patch!


That's a shame.Still,I'm sure it won't take too much sorting out.It's handy you mentioning it though,because although it may seem like a fundamental mistake it's quite likely I would have done the same,but now I shall be more aware.It looks comfortable enough to sleep in too,I must say!

I like what you've done with the patch too.When I order one from Winterwalker,i'll have to dirty it up a bit though haha.
 
Taking shape and looking good :D

Starting to eye up my chair with a view to embedding my joysticks in the arms... seat looks close enough already, but the Vesa mounts don't exactly look pretty :D
 
Looking great Enride! Yes, plenty of opportunities to make mistakes on the seat but the rest of the build should be much easier to build - no allowing for 'foam seepage' and irregular material widths :) Liking the badge position too! I'm planning on gluing my keyring emblem in approximately the same place.
 
Also WinterWalker, i begin to have an idea of what to do with the name patch!

I guess if any of your friends come around .. wanting to play elite dangerous ..
they'd better build their OWN seat first ..
that this one is yours is very clearly labelled :D

I like what you've done with the patch too.When I order one from Winterwalker,i'll have to dirty it up a bit though haha.

Get them while they're hot! ;)

I've just been looking at my back balance, so it will be a while before I get started on anything this substantial. Am really liking how this seat is shaping up though.

I have ordered a TFT panel for a spare Arduino instead .. I thought it might be fun to try to generate a kind of "pretend" artificial intelligence, and make myself a "Gerty" (with a view towards embedding in an arm rest, or maybe retasking as a control panel at later date)

Still mulling over the AI approach, but perhaps a variable combination, that reads from switch / keystrokes (need to write some python, a new language for me) but adding in some random number generation ... so for instance, arming a fire group, might trigger either a worried or surprised face? I will draw the line at having Gerty ask me if I'm hungry though .. (I'm always hungry)

Moon_sci-fi_Kevin_Spacey_Gerty.jpg
 
Im on mobile so havin difficulties quoting but thanks for the feedback and thought everyone, i appreciate it alot!
In the pic the name patch is only placed to show the concept, when done its gonna be sewed into the pad.
This is my seat! Theres many like it, but this one is mine...!! ;)

Cmdr Mick, its all wood and mdf, 16mm on the supporting parts and 12mm o the rest.
MDF is easy to work with and cheap to buy, and as long as its glued/screwed tightly it will be as stable as can be.
Ive followed tioos advice on building with mdf using strips of wood/batons and it makes it really sturdy!

Edit:
So now were doing AI:s!!?? :eek:
Where will this end!!?

edit2:

Reassembly in progress, as you can see by the mess in my little workshop corner :)

41JuqI9.jpg


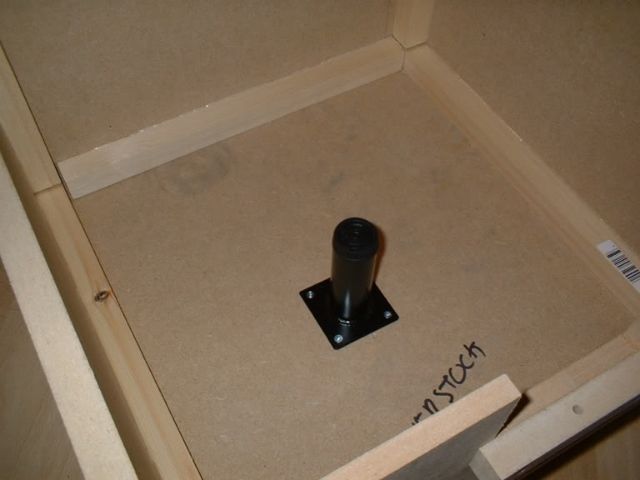
One of the good things about working at various old (and new) construction sites/facilities is that you might run into some "stuff" that makes great DIY material!

I spotted this among a pile of trash today and figured it should make a good mounting point for a buttkicker

HXXxtNL.jpg
 
Last edited:
It's good to take it apart - it shows all the hard work that's gone into it!

Just a bit of advice based on experience with a Buttkicker gamer and mounting it using a very similar approach; I don't feel it will effectively transmit vibtations through the seat - particularly as it's so well padded. If it's the Gamer you're considering, it may prove to be a costly investment for little effect. Much better to save and get one of the much larger ones which is designed to be used with a settee/sofa. This is what I used on my R-Pod MkI - it turned out to be a fruitless exercise unfortunately:


Edit: I ended up mounting it directly to the steel plate under the seat - metal transmits vibrations very nicely, MDF much less so.
 
Last edited:
It's good to take it apart - it shows all the hard work that's gone into it!

Just a bit of advice based on experience with a Buttkicker gamer and mounting it using a very similar approach; I don't feel it will effectively transmit vibtations through the seat - particularly as it's so well padded. If it's the Gamer you're considering, it may prove to be a costly investment for little effect. Much better to save and get one of the much larger ones which is designed to be used with a settee/sofa. This is what I used on my R-Pod MkI - it turned out to be a fruitless exercise unfortunately:

Edit: I ended up mounting it directly to the steel plate direcly under the seat - metal transmits vibrations very nicely, MDF much less so.

Argh, you dont say…
Yes, it is indeed the gamer2 edition im thinking about. There is only one store ive found where I live from which I can order it, and its at a resonable price, but if I want the LFE edition instead, even with the Mini transducer, its gonna cost me at least the double :/

Would it help to add rubber feet/isolators to the bottom of the seat?
And possible to add a metal plate or metal bars underneat the seat and mount the BKG to those?

edit:
Im looking at your r-pod and im thinking, you have a sparco seat mounted to the base on which you initially mounted your lfe, in my case it will be mounted directly on the seat, under my butt.
Im kind of worried now because I have it on order waiting for stocks to resupply but if im gonna cancel I should go ahead and do it immedietly :/
 
Last edited:
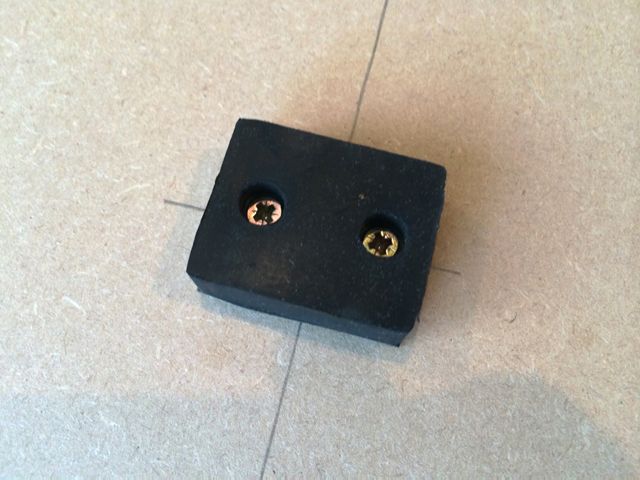
Isolators definitely help. I fitted some to the MkII on the seat base to help localise the vibration:


They're designed for a specific load / weight so try and take that into account if you can.

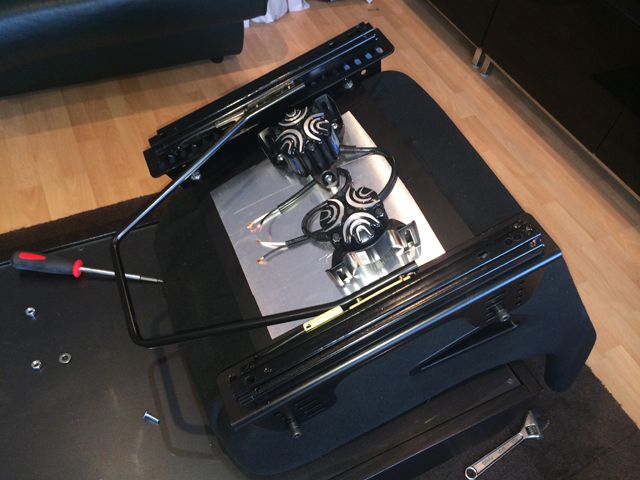
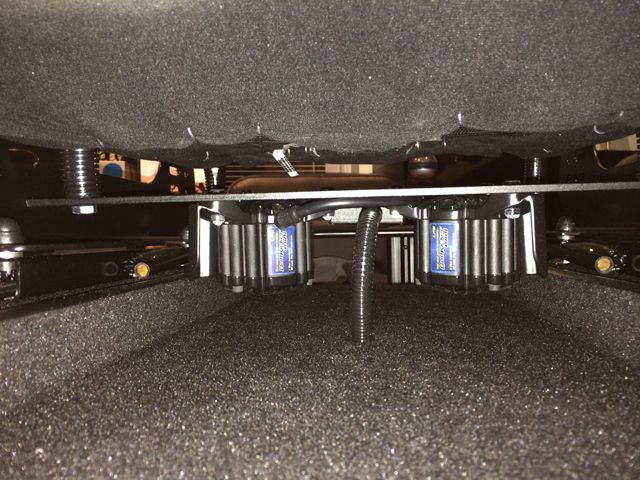
A metal plate would assist greatly. On the MKII build, I ended up mounting a couple of mini LFE's to a 4mm aluminium plate and bolted that directly onto the base of the seat frame to ensure the whole frame received the effects.


It may start to get complicated with plates etc. You may also have more success than me but I didn't want to take any chances with the MkII.

Edit: I don't want to scare you off, just trying to manage any expectations you may have about using the gamer for this application with such thick seat padding.

Edit 2: I think the mini LFE's may be the best compromise but again I don't think that would guarantee great results. You could run 2, 1 on the base and 1 in the back of the seat.

Edit 3: Another thing to consider is the way the panels are attached. Screws would further limit the vibration :( Just thinking this issue through a bit ...
 
Last edited:
Tioo, thansk for taking the time for such detailed and informative replies, youve given me things to consider and helped me find a level of expectation probably more realistic then i initially had.

Unfortunatly, unless i go the diy route, the cost for going anything other then the BKG will be overly expensive.
In any case, ive decided to cancel the order for now and rethink the idea.

In the end i might go for the BKG anyway but ill at least research the possibilities.

Thanks again for the advice, you might have saved me alot of money and frustration :)

Edit:
Do you think the buttkicker simulation kit would work better?
It seems to be the same size transducer but mounted more directly onto the seat.
 
Last edited:
Hi Enride, yes, I think the mounting for this unit would definitely be better for this application.

Some things to consider for the Buttkickers are the frequency response and impedance.

Gamer:

Frequency response: 10 - 250 Hz
Impedance: 2 ohms

Mini CT (from simkit):

Frequency Response: 5-200 Hz
Nominal Impedance: 2 ohm


Mini LFE:

Frequency response: 10 - 350 Hz.
Nominal Impedance: 4 ohms.

This specifically points to the amplifier needed to drive either the Gamer of the Mini CT which be able to handle an impedance of 2 ohms. A dedicated Buttkicker amp as part of a kit will of course be able to handle it. Other amps (if you're thinking of upgrading in the future) need to be selected carefully otherwise they could be easily damage. Also, the Mini LFE is much easier to drive and has a far greater response range. That said, the CT does handle frequencies down to 5 Hz.
 
Last edited:
As I no longer have access to the workshop I used earlier, work will now continue in whatever venue I may utilize for various stages. Right now its more woodworking (cutting, sanding, grinding) so Ill be using my cold storage outside. With winter moving in its gonna limit the days I can do resonably decent work out there but so far its pretty mild and warm for this time of year.


Next step was glue and screw the backpieces on, but first I had to cut the holes that will later be covered but act as "maintanence hatches" now and in the future.

Setting up the router!
wcsrePG.jpg


After jigsawing, routing and a quick sanding of the edges, i screwed them into place with a good amount of glue.
DJ9gr3s.jpg


Quick tip: Be generous with the glue when working with wood, but be sure to wipe any excess away before it dries, dry woodworking glue can be very hard to sand down and youll save yourself alot of work!


Next is attaching the sides. Ill do this without glue now, to have them mounted as I remake the seatpads, and then theyll be taken off and cut into shape, where the estetical detail will be cut as well.
First I had to route the bottom edges of the sidepieces to be perfectly straight, then i had to grind some uneven edges down before they could be fitted properly.


Making sure no screws intersect the future cutouts!
o8JOBhw.jpg


Thatll be enough for today, it took some time cleaning up and wiping the dust off. And this is what the seat looks like now:

Front
jXSAh3I.jpg


back
0hJUJJz.jpg


Ill take this opportunity to apologize for the bad quality of the pictures, but its the way its gonna be! ;)
 
Last edited:
The speed at which you're getting through this puts me to shame. The build is taking shape nicely now, love the shape and the hatches look great too. It looks like it's going to be one sturdy and very comfortable build as well. Fantastic job mate!
 
The speed at which you're getting through this puts me to shame. The build is taking shape nicely now, love the shape and the hatches look great too. It looks like it's going to be one sturdy and very comfortable build as well. Fantastic job mate!

Thank you, but I dont know about speed as it feels im wasting alot of time just scratching my head wondering "how the hell do I do this then"!
Then again, having access to that workshop earlier sure gave me a good initial rush so its all good! Im learning as I go along and thats why its so fun :)

Let me tell you, this damn thing is starting to put on some weight! I always knew this and though it doesnt matter, when its done its not gonna be moved around a whole lot. But while building and hauling this around, its heavy duty.

Knowing this, if I could go back I would try and keep the weight down somehow but its no return now!
I shudder at the original idea of having 4 stands at length!

Yep, MDF is mightily heavy stuff. Do think about those furniture glides I mentioned in a previous post - they will really help with moving it around. Anyway, as we discussed before, in general heavy = solid = better! Building is fun and I'm really glad you're enjoying it.

When you finally get it to how you want it to be, you're going to have tremendous fun with it :)
 
As I no longer have access to the workshop I used earlier, work will now continue in whatever venue I may utilize for various stages. Right now its more woodworking (cutting, sanding, grinding) so Ill be using my cold storage outside. With winter moving in its gonna limit the days I can do resonably decent work out there but so far its pretty mild and warm for this time of year.


Next step was glue and screw the backpieces on, but first I had to cut the holes that will later be covered but act as "maintanence hatches" now and in the future.

Setting up the router!
wcsrePG.jpg


After jigsawing, routing and a quick sanding of the edges, i screwed them into place with a good amount of glue.
DJ9gr3s.jpg


Quick tip: Be generous with the glue when working with wood, but be sure to wipe any excess away before it dries, dry woodworking glue can be very hard to sand down and youll save yourself alot of work!


Next is attaching the sides. Ill do this without glue now, to have them mounted as I remake the seatpads, and then theyll be taken off and cut into shape, where the estetical detail will be cut as well.
First I had to route the bottom edges of the sidepieces to be perfectly straight, then i had to grind some uneven edges down before they could be fitted properly.


Making sure no screws intersect the future cutouts!
o8JOBhw.jpg


Thatll be enough for today, it took some time cleaning up and wiping the dust off. And this is what the seat looks like now:

Front
jXSAh3I.jpg


back
0hJUJJz.jpg


Ill take this opportunity to apologize for the bad quality of the pictures, but its the way its gonna be! ;)


That is really looking special and as TIOO mentions is going at a great pace! Well done so far - loving the hatches! :D
 
Sorry for the lack of updates, currently im redoing the pads to proper size and with hopes of getting them to look a bit better, but ive also been somewhat tired the last few days and havent really got alot done. But Im looking forward to having some more time the coming weekend so it might be time to start the sanding/filling process.

I ended up ordering a buttkicker simulation kit. Win or lose, im gonna try do the best out of it.

Ill just leave at that, need to catch up on some sleep, but ill be back with some pics when the pads are done.
 
Hey Enride, don't sweat. Building is pretty time consuming and tiring, particularly if you have a busy life also. I would be interested to hear how the Buttkicker works out :) Hope you manage to get a good rest and come back refreshed.
 
Back
Top Bottom