Community Event / Creation Uncle Brigetiol's DIY Playground. Tips,Tricks and Unicorns

Hi,

I've learned a lot, since I play Elite. There are lots of small things, which can improve the gaming experience. I really enjoyed to discover all this, and was thinking a lot about sharing them. But what is better: to make a good Chili con carne for my friends, or teach them, how to make one, what are the secret ingredients?

Anyway, sharing is always good, so lets start with something!

I have a triple monitor setup. Earlier I played simracing games a lot, so I learned and experienced a lot to make the feeling as real, as possible. First thing was there to adjust properly the angles of the sidemonitors. But the sims I've played have a special graphic-engine, they can render the 3 monitors separately. That's why you have an option in these games to adjust exactly the position, angles, distance, bezel of your triples. But in case of 'non-sim-special' games, the engine renders only for one display, no matter, how wide it is (5760x1080 in my case). But I like experimenting, I tried with 120degrees, like with the simgames, the result was terrible. Tried with 165degrees, which is similar like a huge curved monitor. Better, but not ok. At the end, I adjusted the three monitors in one line, without angling. The visuals are proper, feeling is perfect:)
Here is a link, with a much better and detailed explanation, if you would like a more in-depth and more professional article about this. By the way, the author, Avenga76 is for me the Yoda of Simracing[smile]:
http://www.isrtv.com/forums/topic/19244-bad-triple-monitor-support-in-project-cars-explained/

Another useful magic trick is, to use the DVI-D connections of the monitors , instead of HDMI, or any other connection. I tried it, two displays with HDMI, one with DVI, and surprisingly, the DVI had "real", deeper black color, compared to the ones with HDMI, those were definitely more painfully gray. I have on my videocard one DVI-D output, that goes with a DVI-D->DVI-D cable tho the center monitor, and have Display Port outputs on the videocard, they are connected with DisplayPort->DVI-D cable to the sidemonitors. Very impressive positive result! I tried to find a more scientific explanation for this, but the common answer was: HDMI and DVI are the same, except that DVI doesn't have sound. OK. My experience tells me, that HDMI has sound, and doesn't have real, deep black. Theory vs. reality. I can test only my monitors, this is my case, maybe on different monitors this is not an issue, but for me, it helped.

That's it for today, I hope, you enjoyed it[smile]
 
Hi,

For today, something completely different: center console.

For first, the most important: if you want to make customizations like this, be sure to have the knowledge and experience to make these steps! Electricity is dangerous, if something goes wrong, you can set your room on fire! I have done these things for 20 years on DIY level, started with car audio installations when I was 20 years old, participated on car audio competitions, learned a lot from professionals. Check everything 3 times, before you power on the system, isolate every cable properly, solder them well! Ask for help from an expert. It is not a shame to ask for help, the shame is to set your room on fire!

This is something, which was originally made for the racing sims, but I think, it fits well into a spaceship too. The idea was to make a car-like center console. What do have in a real (race) car on the cc? Climate control unit, a few buttons, ignition, start-stop button, radio head unit. I wanted to use it with these functions, not just looking like a console with fancy buttons.

cons1.jpg

cons2.jpg

I used an old, stripped down computer chassis as a base. The fan control unit (fortunately with the colors of Elite[smile]) fits this way to original mounting position, so that is done. I ordered the cheapest start button with ignition switch, and an additional switch module, really a few bucks. At the bottom, there is the control unit of the Logitech z906.

The front panel is an MDF plate, covered with a material, which is normally used for example in car-audio installations, to cover panels, subwoofer boxes, etc. I really like this, it is sticky, flexible, has a soft touch, and can hide small imperfections[smile]. First, drawing the lines for the jigsaw. Climate control and button panels were easy. In case of the Logitech unit, it was a bit tricky. I searched for a picture on the net, a front view. Then just resizing to have the real dimensions on the printed paper. First print it, as it is, measure the width on the picture, measure the width of the real unit, resize the picture, print, check if it fits, correct it, if necessary, done. Cut out the "hole" fore the control unit on the printed paper, and use this as a guide on the MDF plate to draw the guide for the saw. Cut the holes on the plate, check if the units fit. Cover with the soft sticky black material.

Wiring is the next. The easiest part is the Logitech unit, no additional wiring[smile]. I wanted to use the start button to turn on the computer, so i just had to cut off the original power button cable from the button of the old computer chassis, it already has the connections to the motherboard. If needed, make it longer with soldering additional cable (usually it will be needed). Solder the free ends of the cable properly to the start button's connections, connect the other end to the motherboard's power button pins, test it, done. In my case, to the ignition switch is the reset button connected with the same method. Remember, that the original computer chassis buttons are push buttons, so if you want to replace them, preferably use push buttons. It will work also with a switch, like my custom reset button, but in this case I have to turn on, then turn off the switch to have the push button effect, which is basically an impulse.

The three other switches are used to turn on/off USB devices. I used a simple male-female USB cable, cut the wire, looked for the red-black cable (data cable is not needed for charging!).

usb.jpg

Solder, done. The USB male is connected to a charger, in the female part I connected the original usb cable of my Android tablet. On my tablet I use the Autosleeper Auto power ON-OFF app, it can turn on the device if power is on, send to sleep, if power is off. A little bit complicated, than the original on/off button on the tablet, but much more masculine to turn on my tablet with a rocket arming switch[smile] .

The fan controller need only power supply on a Molex connector. I simply searched for an old Molex male/female cable, cut it to have the two ends separately, soldered an additional 1 meter of cable to make the whole cable longer to reach from my computer's PSU to the center console. Check, if the fan controller needs 5V or 12V! I think, it is on 5V, but check everything before soldering, connecting.

molex.jpg

Basically, that is it about the center console. As you can see (or you will see, as i go trough all the parts of my cockpit), first i try to finalize all parts separately. Adjust the monitors, adjust the audio part, make components needed like the center console, console to hold the HOTAS, the keyboard, console for mouse, coffee table/drink holder, dashboard with buttons, displays, and so on. Then I would like to figure out the most ergonomic and comfortable position for all of these. AFTER everything is in a position i like, and all components work fine, maybe I start to build a proper cockpit, which looks like a spaceship cockpit, not like a barebone prototype[smile]. Fortunately, there are amazing examples on this forum regarding professional DIY cockpits, they really inspire me and motivate to go one step forward!

Best regards!
 
Hi,

Today would be a good day to talk about the audio. As I mentioned earlier, I my previous hobby was car audio. There are two main areas at the competitions, sound pressure (or Who's got the loudest sub-woofer), and sound quality. Booth of them are very challenging, and require high level of knowledge. I preferred sound quality, it was more useful to me, while I was sitting in a traffic jam (usually it was a daily routine). After a few years of experimenting on my own I met a very high skilled specialist. He is a musician too, for the first time it was amazing, when he listened a test CD in my car, then told me, that "we need +3 decibel at 500hz, -8 above 12khz...". And he was right. We worked together for a few years, with very tight budget, so we had to compensate the lack of money with ideas. I've learned from him a lot, not just how to build an installation, but how to listen to music. We had regular competitions, in the jury there were conductors, pop musician veterans, and so on. The common thing was, that all of them loved music. And I was in a lucky situation, where real enthusiastic, professional musicians were my "teachers".
When I started to build my rig, for the first time of course, I wanted to have a good 5.1 amplifier, good speakers... but then, back to Earth. This is a sim-rig, not an audiophile corner, my budget is limited, so after some research I found the Logitech Z906. There are cheaper systems, better systems, but in a sim-rig, this is optimal for me in case of cost/quallity. The sound is relatively dynamic, clear, crispy, bass presence is there, so o.k. for gaming, not to mention, that it is Dolby Digital certified, and the amp has digital input channel too. The reviews about it said, that it is fine for gaming, not so fine for listening music. Because of the speaker diameters, it was no question. 8" sub and 3" satellites can't reproduce a linear sound. In my car I had a 10", a pair of 6", a pair of 3", and a pair of 1" speakers. But let's stay at the first steps.

Positioning. Subwoofer is practically the less sensitive for positioning, but it is worth to try a few different places, worth to try, how it sounds, if the speaker looks towards the wall, or against the wall, turn left/right, until you hear the loudest bass from your sitting position. There are testsignals on youtube, a constant 60Hz sine-wave is perfect for this. It is worth to make this adjustments, because it is for FREE, but can improve the experience greatly.
Center is again obvious, above the monitor or under the monitor. I prefer it above, there is more free place, the point is, that it should look towards your ears. Or eyes. Imagine it as a flashlight, all satellite speakers should light towards your ears. Around a simrig it is not always comfortable to place them like this, it might need a little extra work, but it is worth to do it if you want to enjoy the full frequency spectrum, what the speakers can offer!
Front speakers. I think, they should be appr. 1meter far from your ears to give give you enough wide "stage". Height should be at ear-height, and of course, they should look towards the ears.
Rear speakers possibly at the same height and distance, like the fronts. Because they will usually give only some some surround effect (like when docked at a spacestation, or a ship is flying towards you and passes away), they have less important role, than the front ones. Mine is attached to the pilot seat, next to my head, appr 15cm far from my ears.

Software adjustments. I have the Realtek HD Sound manager, bat all sound managers should be similar. First, room correction. Simply measure the distances from your head to the speakers, then adjust these at the Room correction sheet. As I observed, it doesn't influence the volume (some DSPs can modify the volume of each speaker based on the distance). It is better to experiment with these settings while the game is running, the basic speaker test option not worked properly. Thumb rule, that if possible, try only to decrease the volume, if you modify it. For example, if the center is too weak, better decrease all other speakers volume, until it fits. Small thing, maybe not worth to follow, I just like to fiddle with small details. So, in my setup, I have -10dB on the rear speakers, because they are very close to my ears. Funny is, that -10 was not enough, I had to additionally decrease it with a few dBs on the Logitech control unit. It is well balanced, if you don't hear them always, but when you enter a spacestation, you have a nice, "hangar" feeling, the voices surround you. Rear speakers are only for support, they are not the yelling ones! Besides these, I only use the Speaker fill (it gives the stereo sound a little "surround feeling") option. If you use only Elite, as a sound source, you don't need this, but I have webradio running in the background, and it just sounds better this way.

That's it for today, next time I will post some pics, and talk about the "modding" possibilities of the audio system.
Looking back at this post, it might seem unnecessary to waste time for small, or very small little improvements, like these. But for me, it is a hobby, I try to use my knowledge, try to take care about the details, try to bring out the maximum of the assets I have. A good way to use my free time. I enjoy it[smile]

Best regards!
 
Hi,

the audio tour goes on! Modding, what I did, is not a deep scientific electronics thing. Honestly, I don't no anything about printed circuits, and all the tiny parts on it[smile]. I previously mentioned, that the z906 is more a gamer set, not a music-listening device. Because music for me is important, I tried to improve this part. The satellites are 3" one-way speakers in a small box. Roughly, it can reproduce the most frequencies for human speech. But in music, there are hi-hats, kick drums, lots of instruments. So we should cover the frequencies (theoretically) from 0Hz to as high as possible, like 20kHz. I know, that the human ears can't hear the lowest and highest freqs, but you can FEEL them. You can feel the vibrations with your bones, with your body. Go to a curch, and listen to the organ (I mean, the instrument[smile]). The sound fills the whole building. Go home, and listen organ music on your best home equipment. Usually, the experience is not even close. If it is close, you are lucky, don't spend more money for your audio system[smile]! Or go to a live jazz concert, preferably to a small club. Even, if you prefer electronic music, with "artificial" instruments, samples, it is (or should be) balanced to cover the whole frequency spectrum. Electronic music is an art too (if it is done well, and with passion), for me, it doesn't really matter, if there are real, "analog" instruments, like guitars, or digital samples. You can create with booth of them bad music. Or amazing music. It depends on the musicians.
So, back to the real world. The unbelievably complicated mod was to replace the front speakers[smile]. But with something similar. It would sound very strange, if I replace them with some serious, large hi-fi speaker boxes. Because they would "rule" the system, and the supporting speakers (rear, center, sub) would be too weak, to play the supporting role. So, I had to find something similar. I have an Edifier 2.1 set. It has 2 way speakers, 2" and roughly 3,5" in a wooden box. Much better for music, than only a 3" speaker in a plastic box. I already modded them, replaced the wires inside the box (usually, the weakest point in case of cheap speakers are the wires), and filled the boxes with noise reductive wad (usually, there is absolutely no wad, or a very minimal amount). This is the second weak point in this price category. The wires and the wad can make great improvements for very small money, and it takes an hour to do the job. There is also a thumb rule, that sound like this: if you build an audio system, for example for 100 Credits, you will have to buy wires for at least 10 credits. So roughly, the z906 costs 300 Euro, then be brave to spend 30 Euro to replace all the wires, cables. I mean all of the speaker-to-amp wires and the cable from the amp to the soundcard. Put some wad into the boxes. Done.
So, the fronts replaced, "tuned". Very nice surprise, that the Logitech amp can handle new speaker quite well! Tried it with a more serious amp, no great difference (in case of these small speakers, it is no wonder). The main thing is, that the whole system sounds still well balanced, AND music reproduction improved a lot!

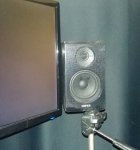
Pics. You can see the dust everywhere, this means, that the project is still WIP. I have an Obutto Revolution rig with the factory speaker mounts. I like the Obutto, because it is massive. Made from metal. Welded. Maybe a little bit more massive, than it is really necessary. But that is what I like[smile]. I could hit it with a hammer without being afraid of destroying anything (of course, I usually don't hit it with a hammer. It is just good to know, that I could. It is massive). I think, it will do the job for the next 50 years. You can see, I use additional plastic speaker mounts to be able to adjust the best angle for the speakers. They are the most simple wall mounts for small satellites. And yes, you are right, I haven't replaced all the wires yet, like I said, WIP. The funny thing below the Edifier is a tripod camera stand, comes very handy, if you have to support something temporarily. Or permanently. A really cheap, but useful "tool". You can also notice, that I don't use the original mounting screw of the z906 satellites. Instead, I drilled an additional hole and use normal screws. Reason is simple: couldn't find a special screw in the local hardware store for the original screw-nut. And I'm too lazy to go to the town for a few screws[smile].

Center speaker

center.jpg

center2.jpg

Front

front1.jpg

front2.jpg

frontsupp.jpg

Rear

rear2.jpg

rear.jpg

Best regards!
 
Hi,

yesterday found this cockpit. I feel like a greenhorn apprentice[smile]

https://www.youtube.com/watch?v=157MvKdzp6A

The targeting computer idea is Whhhoa! It brings back memories, Star Wars, A new hope, trench-run...

I also wanted to bring some Star Wars feeling into my cockpit, but my fantasy (and budget) stopped at a wallpaper for the MFD:

forumwp.jpg

Good to know, that there is always a step further.
 
Hi again,

audio tour part 3. There are a few frequencies, which are not covered yet. I have the highs, the mids, and partially the lows. Due to the specs of the z906, it goes down until 35Hz. Practically, that means, that it I can hear something coming out from the woofers, when a 35Hz signal is played, but much not as loud as like on 100HZ. Non linear. The response curve looks something like this (it is just similar, not exactly the z906 subwoofer):

subresp.jpg

These are the physical limits of a speaker. What can I do, to enjoy the lowest sounds, like when hyperspace jump, or during the fight the explosions, the guns firing? Adding an additional, larger diameter sub! Fortunately, I never drop out my old assets, I still have my 12" sub from the old times, it was working first in my car, then came into my living room. I just had to add an amp to it to make it an "active" subwoofer. It is very simple to install to a passive subwoofer box, et voila, you can use it with any 5.1 home theater amp. Most of the 5.1 amp don't have an amplified channel for the sub, they have only an RCA output for an active sub.

The amp looks something like this, just cut the hole on the box, connect the cable, done.

subamp.jpg

The tricky part was, how to get the sub-channel signal for it. You can do it with physical Y cables, but in this case the signal strength also will be halved, so booth subs will sound weaker, lots of dynamics will be lost. Not to mention, that the sub and the center is on the same output, it makes it even more difficult. But I have a 7.1 on-board sound-card, and 3 unused connections (mic, line-in, and the side-speakers). Realtek Sound manager can't be used for this, at least I couldn't find a way to "clone" the sub channel. But there is a solution!

https://www.reaper-x.com/2012/02/13/how-to-remap-retasking-realtek-onboard-jacks-ports/

For first, I had to read it several times to "translate" it for my goal, cloning the sub channel. It worked (changed side speakers to sub), and I assume, it would work for example to change Line-in to sub also. Give it a try!

So, additional sub connected, signal strength is fine. Adjusting is the next. Again, well balanced sound is what I was looking for. My "teacher" told me, the best subwoofer is, which is not noticeable. It should just do its job in the background. Sounded strange, because when I installed my first sub, I was happy, that I have one, and wanted to hear it all the time (and, honestly, I wanted all the people on the street to hear, that I have a sub). So, adjusting. There is a low pass filter on the amp, a gain, and phase. The 8" sub of the z906 goes down linearly until roughly 40-50Hz. So I started with a 45Hz on the LPF, and very low gain. You can find a test signal here:

https://www.youtube.com/watch?v=qNf9nzvnd1k

In this case, it is enough to check it from 0 to 100Hz. Here is where the fun begins! Start listening, and adjust the gain and LPF, until there are no disturbing "holes" or "peaks". My goal was to have a linear frequency reproduction, if you want to have more "fat" bass, adjust it to your taste. There is no general recipe. It is like cooking. Find your own taste!

There is one thing left in case of sub frequencies: feeling of vibrations. Tactile transducers are our friends in this case. You can experience the effect at better cinemas for example. If you hear an explosion, or a very low sound effect, and the chair is literarily vibrating. There are again many possibilities, the choice is yours. There are dedicated tactile transducers for supporting the Home Theater or music listening experience. There are ones for gaming, like the Buttkickers, and so on.

Two very good articles about this:

http://www.baudline.com/erik/bass/tactile_faq.html
http://www.baudline.com/erik/bass/tactile_report.html

I simply bought a used, old stereo amp for it. Connection is the "hardest" part, but very simple. The transducer needs the full sub frequency, which is coming out from the sound-card. The sub 12" woofer needs only the lowest ones. The amp of the 12" sub has an output, and the amp for the transducer also. The difference is, that the amp of the 12" will output the signal "handled" by the LPF (so only under 45Hz), but the other has a full range output. From here, it is simple: cable coming from sound-card goes to the transducer amp directly, then from its output (in my case it is the RECORD TAPE) goes to the subwoofer amp. Not much to adjust, only volume. In Elite, the System scan effect is the strongest, so I adjusted the volume for that. If it is too loud, shakes out my breakfast, and feels distorted. Try to find a comfortable feeling, when you are not scared to use the system scan, but can feel the explosions, when fighting:) In Realtek Audio Manager there is an option to use Bass Management. I leave it unchecked, prefer it this way. If you turn it on, it will send more audio signals to the sub channel, you can feel even the thrusters rumbling all the way, can feel the the effect, when you touch the ground while docking... I tried this way too, but it was too much for me. About choosing an amp, there are recommendations in the previous articles. Depends also of course on the transducer you choose. Based on the FAQ's recommendations (20W-100W), I simply calculated the average, 60W. So, a 2x60W stereo amp will do the job. If a stronger one is available with an acceptable price difference, I would buy that (like I did). Imagine to drive on the highway, with a city car, 1.000 cc engine, with a speed of 130kmh. It will rev around 4000/min. Imagine driving an American muscle car in the same situation, with a 5.700 cc engine. It will rev on 1500-2000/min? Never had the opportunity to try, but I'm sure, the V8 will "live" much longer, with less service, simply, because it is not running permanently on its limits.

What I really enjoyed during this sessions, was the moment, when after hours of connecting wires, editing registry, testing with the test signals I started Elite. If things were done properly, with patience (and they were![yesnod]), then came the Whhooaaa! experience! So I would recommend to be patient, if you start to modify something, starting Elite should be last step. Starting the meal with the dessert and cigar would just ruin the fun.

Best regards!
 
Hi,

another interesting video for today morning.

https://www.youtube.com/watch?v=SHdWjyRAIfU

I like this, because many reasons. Nowadays, when VR headsets are available, of course I think a lot about this new possibility. It is amazing, I'm sure. I would really try it. I'm sure, I would enjoy it very much. But what about my center console? What about my MFDs? What about my dashboard? What about my cat, if he walks into the room? What about the small little "gifts" made by my daughter, which surround me in my "man-cave"? What about the experience, when my daughter is playing Rayman Origins on my desktop computer, while I'm exploring the universe? What a coincidence, that on this video a daddy is playing Elite with his daughter[smile]...
So for me, in my case this is the non plus ultra of visualization. I'm sure it is more expensive, than the VR version, but dreams are for free[smile]. Again, this is a tailor-made solution for me. Comparing VR to curved-canvas-projectors is like comparing a sturdy off-road vehicle to a high speed sports-car. If you live in the mountains, and you have to go somewhere, on a gravel road, the choice is obvious. If you live next to the "Autobahn", in a small city, the choice is again obvious. Booth of them are perfect for the environment which they were designed for.

Regarding my simrig, today I'm a little bit in trouble. Because I talked about displays, and audio, with those I'm happy now, won't change much in the near future. The dashboard is my actual focus point. But it is changing on every week. Until it is not finished, can't go for the next steps (I could, but I like to concentrate on one thing at a time). So I think, it is better to talk about the "philosophy" of my dash/controls first. Or how a simple dashboard will be tailored to my personal needs. How it will transform to a dashboard to MY DASHBOARD.
First of all it is important to know about me, that I like simple things. If there is a complicated process, I'm too lazy to learn and do the complicated steps over and over again. I prefer to strip it down to the basics. What are the "inputs", and what "output" should I get at the end. And then rebuild the whole process from zero, as simple as it can be. I think ergonomics+simplicity=efficiency. I think, efficiency is the most important in life. Carpe diem. Live for the moment. Live in the moment. Or it is in a different form in the movie "Broken flowers":

"The Kid: So, as just a guy who gave another guy a sandwich, you have, like, any philosophical tips or anything, for a guy on a-kind of- road trip?
Don Johnston: You asking me?
The Kid: Yeah.
Don Johnston: Well, the past is gone, I know that. The future, isn't here yet, whatever it's going to be. So, all there is, is, is this. The present. That's it."

Okay, so this is the thing, what I think, could make a difference between a dashboard and MY DASHBOARD. What is the goal? I'd like to enjoy flying trough the Universe. In a laid back style, with music, easy, intuitive controls, everything as simple as it can be, having only the important information around me. I imagine myself in the role of a 24th century pilot, who earns the credits for living with his spaceship. It would be the most important thing, to have time for thinking about the strategy, how I would earn money, react on the sudden changes. I don't want to get lost in difficult controls of the spaceship, I'm just not the guy for doing repetitive button pushing sequences.

So, I look around, what do I have to realize this project:
-Cougar MFDs,
-the T.A.R.G.E.T software with wide possibilities of programming the MFDs,
-2 android tablets
-1 tablet PC
-1 old android phone
-Thrustmaster HOTAS T-Flight X
-few rest from simracing, like a Logitech G27 (the shifter panel looks very promising), Thrustmaster shifter, maybe I can convert them to a spaceship too

I prefer physical buttons, the Cougars have 58, the HOTAS has 12... That should be more, than enough. Also, on the Cougars you can program more layers. Almost infinite amount of buttons [smile].

Today, this looks like more a "philosophy" lesson, than a simrig description. What I'm trying to say, if you put time, effort in something, if it's possible, why not make it with style. With your own style. This can make it unique. This makes the difference between average and personal. I think, creating something unique, something, that expresses your personality can make you really proud!

Best regards!
 
Hi,

after talking a lot about my approach, suddenly I had many interesting ideas about making my spaceship even more MY SPACESHIP[smile]. I had very funny ideas for EDDI, started to implement them, now I'm in the testing/honing phase. The docking request-landing sequence is, where I want to make things more alive. If I tell you, that Airplane II - The Sequel is one of my favorite movies, you can imagine, how 'serious' things are going to happen[smile]. I talked about ergonomics, finally took a deep breath and reorganized my button layout on the Cougars, honed the macros a little bit. Fine tuned the audio system. I realized, in theory I can talk about patience and precision, but in real life, there is always something, what I've missed to finish. I'm a lazy guy.
So, now I work hard, to be able to present you at least something semi-finished, but coherent heap of ideas about building a tailor made, personalized spaceship.

Just a little sneak-peek:

mfd bal v10 logos_forum.jpg

It was hard to find proper, spaceship-dash looking widgets for the Androids. Them why not chaos? Isn't that more proper, for a lazy, cool space-commander? And what is more cool, than stickers on the dashboard? A few stickers to remind me about my favorite movies. If I already have quotes from them in EDDI (and I have a lot[yesnod]), than at the end, this will be a colorful, but solid mixture.

So, more content coming, be prepared!
 
Hi,

another video, which proves, that I'm a rookie[smile]. Never played Zelda, but an amazing example about creativity!

https://www.youtube.com/watch?v=glZnkpIDWSE

So, back to the world of spaceships. First question in case of a dashboard is, what do I need? What functions do I use? If I want to have a very stripped down, simple, ergonomic design, this is the first step. Another approach is to have buttons for all available functions. That is also interesting, but not my taste. In my case, important to notice, that I mainly do sightseeing tours to earn money, do delivery missions to earn reputation. A little bit of asteroid mining to have stuff for the engineer upgrades. I do powerplay a little bit by delivering aid packages. I prefer to help people in real life too, I'm not a bounty hunter type. At this moment that's it, who knows, what I'll do in the future, but now, these are my main activities. So, I first collected a few functions for the buttons, which seemed to be useful. Then testing for weeks. There were function I never used, functions I missed. Rearrange button bindings. Test again. Rearrange. Test. O.k., roughly I have all the useful buttons bidden, all useless eliminated. Now I need macros. I hate to make sequences of button pushing over and over, just to reach one function. So collected all these sequences, translated into scripts. Tests, honing, fine-adjustments, tests... They are still not perfect, but in most cases they do the job. I have pen and paper always in front of me, while playing. When I notice, that something could be improved, make notes. Half an hour of gaming(testing), then Alt+Tab, modifying. Testing. Making notes... and so on.

By the way most important is the HOTAS bindings. Those are the REALLY most important functions for me. I'd like to keep my hands on the HOTAS as much, as possible, I don't like to play a crazy octopus. So I can reach the most important functions from the HOTAS, this is the primary control section. Button box is mostly secondary.

HOTAS bindings look like this:

hotas.jpg

I hope, the link works:

http://www.mcdee.net/elite/binds/pkwvre

The "secondary" button layouts look like this:

left

mfd bal v10 logos for.jpg

right

mfd jobb v10 logos for.jpg

A few words about the arrangement. The main idea is to have the "flight-related" buttons on the right (I'm a right-handed), "station, or system related" on the left. Cosmetics is the second priority. A compromise to have a functional, but solid looking dashboard. The third priority is not to have empty holes, that's why there is for example weapon color placed. It will be there, until I find some more useful.
The design is now is called "stickers". In the future, I would like to place the PC G19 app window onto the right panel, like this:

dash2.jpg

This setup works, but makes a great load to the GPU. With the green buttons I have total control on the G19 PC app, amazing to be able to open youtube videos, change radio stations, works like a real head-unit. Fantastic app from MagicMau! Until I find a solution for the high GPU usage, the simple Android wallpaper mode works, I can still use the buttons to change radio stations, adjust volume just with a push of a button.

O.K., so about button functions. Some of them are obvious, some need a bit of explanation.

MSSN TGT : mission target. Is used, when docked, looking for new missions. When I look into the detailed mission description, push this, and starts a script to go to system map. Here is the most important info for me about the target station: distance to star. I don't really understand, why I have to dig so deep in the menus, it could be shown in the short mission description too. The world is not perfect.
ACCPT MSSN : if distance to star is acceptable, with this I can accept the mission. With this two scripts I eliminated at least 50 unnecessary button pushes/station in average. Not to mention, that this way my HOTAS will "live" a few years longer.
PLAY : In the main menu selects play, solo mode.
PAUSE : used during the game, when pressed, goes out to the main menu.
STOP : used during the game, when pressed, saves and exits to desktop. Very simple, small things, but make life much easier.
FST PROP,... : Like I said, I play a bit of powerplay. It is a pain to fill my cargo hold of 400t manually with the packages of 15t-20t-25t of stuff. So, these are pushed on the Power contact screen. Roughly 20 push with script Vs. 80-100 push, when done manually.
FULL SRVC :used at the stations, refuel, repair, restock, repair ship integrity. Again 1 push Vs. appr. 10.

DOCK REQ : the "classic" docking request function. In my case it also turns the radio volume down, there is a lot of talking by the sip computer at the stations.
IGN : the opposite of dock req, pushed when docked, presses launch, and retracts gears at the end. There is a little bit of playing with the Cougars LEDS meanwhile, something countdown-like. Then restores original radio volume.
MSTR VOL, MUTE: controls for the Windows master volume
ENTER FIGHT : does everything what is needed when I got interdicted. With one push.
PRST : pursuit mode while enemy tries to escape from fight. Full thrusters, rest of power on weapons, no shield charge.
EXIT FIGHT : opposite of ENTER FIGHT, + sets power distributor to full shield charge
FULL SPEED : Thrusters on max, rest is on shields, no weapon charge
MINING : rarely used, full wpn, rest is on shields.

O.K, I have collected the needed functions, scripts. They are arranged by priorities. Button layout defined. HOTAS layout is defined. So next time, macros 'n stuff are coming on! If you don't have Cougars, or any special programmable keyboard, doesn't matter. There is the Roccat Power Grid app for Android. For free. There are many fan-made layouts, my favorite is this, created by Anublex. There ar already 4 optional buttons for macros:

http://www.roccat.org/en-HU/Products/Gaming-Software/Power-Grid/Store/Grids/Programs/Windows/729/

roccat.jpg

You can easily create your own "button box" with 24 buttons (and you can swipe it if you want even more buttons), edit the background, use personalized buttons, add sounds... A great tool. You can even add a music player control panel, and if you dig real deep into the codes, you can give the media player a personalized skin!

I modified it this way, looks something like this:

roccat mod.jpg

Best regards!
 
Hi,

based on the approach I was writing about, I suddenly felt great motivation to improve a lots of things. Tried to tweak a little bit the buttons and scripts, but mainly I'm working now in EDDI. Especially on arriving/leaving stations. In my way. Alive, vivid, varied, funny. This is the only opportunity for a commander to talk with somebody in the space (at least in solo mode), so let's make it alive! I have to test it a lot, because of timing, random chattering around the stations, etc. As soon it is at least in beta state, I'll share them.

By the way, I'm a little stuck at one point with EDDI. There is the Enter normal space script, it looks by default like this

{Pause(5000)}

{OneOf("{ShipName()} has", "")} {OneOf("left supercruise", "{OneOf("entered", "returned to", "dropped to")} normal space")}

{if event.bodytype = 'Planet':
{OneOf("near", "close to", "in the vicinity of")} planet {P(event.body)}
|elif event.bodytype = 'Star':
{OneOf("near", "close to", "in the vicinity of")} star {P(event.body)}
|elif event.bodytype = 'Station':
{OneOf("near", "close to", "in the vicinity of")} {P(event.body)}
}.

I would like to disable the speech, when Interdicted. It sounds very strange in the middle of a fight for me. Do you have any ideas? I would really appreciate any help!

And now, something completely different: on my Thrustmaster T.Flight HOTAS X. there is an indicator (a click, or whatever. If you own one, you know, what I'm talking about) at 50% throttle. Cool. I adjusted the throttle in Elite to Full range, only forward mode. So, when I push it forward, I feel, when it is on 50%, don't have to fiddle with it when I slow down in hyperspace, or enter fight. But the "sweet-point" for max maneuverability, and fastest approach speed in hyperspace (7 second thingy) is not at 50%, its a bit more, 55-60%. For the HOTAS X there is no dedicated software to adjust deadzone, or any parameters, but I wanted to have the "click" at the "sweet-point". There is a simple solution. In WIN7, go to the calibration menu of the HOTAS (devices and printers-T.Flight HOTAS X-properties-settings-calibration). When you are asked to push the throttle fully forward, DON'T push it fully forward, only until roughly 90%. Finish the calibration, restart computer. Check during slowing down in hyperspace. At 50% throttle originally the counter is at 10seconds. With the new calibration it should be less, when you set the throttle to the "click" position. If you are not happy with the result, calibrate again to your taste. Done:)

Best regards!
 
Hi,

I talk about personalizing sim-rigs. Tailored to your personality.

Now, this rig is a tailor made one! With lots of DIY, creativity. The owner can be really proud: "Hey, this is MY sim-rig!"

https://www.youtube.com/watch?v=nHSEfDhOHlU

Just another quick tip: if you use Cougars, there is a possibility to auto-start T.A.R.G.E.T. with a specified layout. Modify the file path and filename for your config in Notepad, save it as WHATEVER.bat. Put this batch file's shortcut to the Startup menu. Next time you turn on the computer, buttons are automatically assigned[smile].

@echo TARGET Script launched..
@echo 1/2) Calling Script from TARGETGUI..
@Start "" "C:\Program Files (x86)\Thrustmaster\TARGET\x64\TARGETGUI.exe" -r "C:\eliteswapped.fcf"
@timeout /t 1

Not my idea, found on a forum for flight-sims. I don't want to reinvent the wheel, if there are kind (and more skilled) people, who share their knowledge, I happily accept and use these ideas. I think, this is called with other words: teamwork.

Best regards!
 
Hi,

still working hard on the EDDI scripts. On the weekend, our cat decided to spend some time in the spaceship, so I had to look around for some other "project". Besides, I'm proud, that the cat likes to have rest in my spaceship [smile]. Comfortable seat, chill-out or rock 'n roll music during the whole day...

So, I was curious, what could I do with my unused, good old Logitech g27 shifter panel. Since I had some time, I disassembled it, because I don't need the shifter in the spaceship (it would be funny tough to attach 25-50-75-100% throttle to the first four gears[smile]). But seriously, what I wanted to implement is having dedicated buttons to move around in the menus. Comfortably. I have a d-pad on the joystick, but to be honest, it is has a fragile feeling. When I use it, I always have a feeling: just don't push too hard, it can break in every moment. So I looked around the web, how to properly disassemble it, and removed the shifter unit. Fortunately, there was room next to the joystick to install it temporarily with the original clamps. Connected the shifter panel to the wheel, the wheel to the computer. In this setup I don't have to attach the external PSU to the wheel. At this moment, pedals are not connected, but maybe later they can be modified to rudder pedals.

Things are placed, connected, it is alive. Let's go to adjust buttons! But the joystick d-pad is already attached in Elite, and I still want to use it as a secondary solution. I have to use the keyboard inputs. After a little research, I have found the Xpadder software. Maybe it is possible with Logitech profiler too, but Xpadder is more universal. And it is free too, at least the older versions. And that's enough, it does the job. I attached the d-buttons, menu tab buttons, OK-back, and to the red buttons system menu, target panel, comms, system panel. That covers everything to move around the menus. And extends the life of my d-pad on the HOTAS.

It feels very comfortable! Especially at stations. I have now at least 9 empty place on the Cougar for more macros to make gaming more easier.

Now the right side of the cockpit looks like this (it is a just a prototype for experimenting, proper panels will be the final step!):

g27forum.jpg

You can build your own button box too, it is quite "simple". At least much cheaper, than to buy a plug and play button box.

http://www.racedepartment.com/threads/simple-gamepad-based-buttonbox.68675/

https://marcushwang.wordpress.com/2011/12/16/how-to-build-a-button-box-for-ps3-and-pc/

You can find more, detailed descriptions on the web.

Best regards!
 
Morning!

I tested for a few days the g27 shifter panel. I was surprised, how quickly I got used to it. I would call it the "Station Control Pad". As soon I'm docked, take off my had from the joystick, and with the g27 pad I can move in the menus very intuitively. A little bit of mods in the assignments. Now it looks like this:

g27forum2.jpg

Xpadder can handle macros too, so I attached the Mission target (when in detailed mission description, it goes to system map to check dist.from star), and Accept mission (when on sys map, and I like the dist. from star value, goes back to description and accepts mission).

Another great news is, that my birthday is near, and my wife surprised me with a Thrustmaster 16000m HOTAS :D! I really like the Warthog, but it cost almost 3 times more, and is not sci-fi enough. The 16000 HOTAS is made of plastic, but has a proper sci-fi look and inside it has the technology of the Warthog. I feel lucky [smile]!

fullof.jpg

It was very easy getting used to the smoothness and precision. On the throttle first I really missed the "click" at 50%, but then realized, how precisely adjustable the throttle is, so after a few days I already forgot about the "need for click". It is a bit trickier to getting used to the amount and tininess of several buttons and finding the optimal mapping. New challenge[smile]!

In the background, I'm working on my EDDI personality diligently. Stewardess! Weather report! Commercials! Wisdom! Funny Facts! Bad jokes! '80s bad*ss style!

Best regards!
 
Hi,

Fate has funny tricks to make me move my ... [smile]. I was shocked about the amount of buttons and d-pads of the T16000. Yesterday I started my computer, and one of the Cougars stopped working. In the devices menu I saw 2x F16 MFD 1, instead of MFD1 and MFD2. Played a bit with the drivers, unplugged, replugged, still the same. Checked them on an another computer, still the same. It is less painful, than when my T500RS steering wheel broke down after one year. It was a bit more expensive. Now I understand, why an original Playstation controller costs, what it costs. It seems to be expensive, but my PS1 controller still works, my PS2 and PS3 original Sony controllers still work, like on the first day. Interesting, but my Logitech G27 wheel still works. My Logitech Driving Force GT wheel is still working, its appr. 15 years old. And I used all of them a whole lot! I hope, I will have more luck with the T16000.

So back to the bright side of life. I decided not to buy an another Cougar pack, instead reworked my dash. Fortunately, I have lots of unused buttons on other devices [smile]. Internet is big. Internet is huge. I tried to find a sticker template for the G27 shifter, to make it more scifi. IT EXIST! Not just a sticker, but a template to edit!

View attachment 117501

This is how I imagine it for my cockpit. Just need to buy sticker-paper for the printer. The texts will be of course orange colored!

I had to rethink the button layout too, and the whole dash design. This is what came out after a day:

DASH NEW.jpg

On the left side tablet I have now the scientific looking animated bars, the most important thing in any spaceship (Audio Glow Visualizer), and can run ED TradePad for trading info. The right side is modified too, I took off the cover and placed the Cougar to the right side of the tablet, instead of the center. Added the two instrument panels to the background, I use Full Screen Pic Viewer to hide the upper-lower android bars. Now I have some kind of symmetry again[smile]. The positive side of having everything in black on the dash is, that it can look quite solid at the end.

So testing time is coming, fine adjustments...etc.

Keep on Elite-ing!
 
Morning!

And now for something completely different...

Besides Elite my great hobby are cars. When I was around 18 years old, I saw the movie Manta, Manta, and was totally crazy about it.

manta-manta-01.png

I was this angry as a teenager.

mantamantaindex-1.jpg

I wanted to belong to somewhere. Wanted to be a part of a team. Like this.

Manta.jpg

I wanted a car like this [smile]

266328_mantamanta2-1.jpg

I wanted to be happy like this.

So I was a real car enthusiast at that time, with lots of dreams, and no money. Then later, I had a chance to buy a Manta. It was 21 years old, in terrible condition. Basically, it was able to move from A to B (sometimes), but nothing more. All the people told me, I'm crazy to buy and drive a scrap like this. Once, I was driving with my girlfriend, the car stopped at a traffic light. A fuse went out, no problem, I had some wires and tools in the glovebox (essential for driving the Manta). Quickly stripped a wire, bridged over the fuse, and ignition, start. No problemo, a Manta is like this, this is the feeling[smile]! I really loved that car as it was. Unfortunately, I was the only one:S

Yesterday I watched the latest episode of Mighty Car Mods, and realized, that the problem is not with me, on the other side of the globe, there is a whole country with the same thinking as I do:

https://www.youtube.com/watch?v=ZJPqe1baowA

People, who have dreams, use what they can find, have creativity to combine very different things together to live the way they like.

I'm writing about my personal, tailor made DIY cockpit, and I think, it is important to know the philosophy, what is behind all that. I'm now in a very fortunate situation to be able to play around with "hi-tech" gadgets. I was very lucky to go to university, get a degree, work at multinational companies, earn money not just for everyday life, but to be able to finance my hobby. This video above reminds me, how lucky I am.

From this point of view, I can laugh, that the central lock in my car gets stuck sometimes, and the heating is weak[smile]

Best regards!
 
Hi,

Good things happened during the holidays! I found a way to make my "broken" MFD panel alive! (booth panels were recognized as MFD 1 instead 1 and 2). I downloaded the latest unified driver from Thrustmaster, although Win7 recognized my panels by itself. That driver gives the opportunity to adjust the panel ID numbers. Now I understand, my LEDs sometimes turned on-off by themselves, this happened to the ID number too. Ghost in the Shell (or loose soldering of connection cable). And my laziness for not using specific drivers. Anyway, it was a good possibility to re-think the dash a little bit. I saw some very pro dashes for Star Citizen, like this one:

dash starcitizen.jpg

I used a cover in my previous version for the screens, but it disturbed me to hide partially the screens. now here is what I did:

dash_latest.jpg

Besides this, I started to read about VoiceAttack, because I like the feature, that it can play sounds on a button-push (until now i used a flash of the LEDs as "feedback"). But I really miss some Star Trek style bleeps. Downloaded the trial version, played around a bit, created a few commands with sound-feedback, with bleeps, with speech responds. I liked it much more, than LED flashes[smile]. The voice command seems very handy for VR (or mandatory), but if I have so many buttons, it makes not much use for me. It can start macros for events (coming from EDDI), it is cool, but I prefer to make this by myself. So, many very cool features, but I was curious, if there are other apps. I found Voice Macro here on the Forum. For my needs it seems to fit: plays sounds, runs macros, can give TTS speech responds, can handle joystick buttons. And who knows, what else! So for first, I'll give it a try!

The EDDI script is starting to work like I imagined. I have now support in case of testing from Cmdr. Bookmite, so the project is speeding up[smile]. The file is now almost 200 KBytes, lots of text is inside!

Best regards!
 
Hi,

I'll try to keep the balance between sad and happy, between serious and funny. Like a good Jedi knight :) . So, I uploaded the actual version of my EDDI profile 'Silvia' to:

http://snafets.de/elite/eddi_scripts/index.php?show=18

Like I wrote in the description there, don't expect tons of data. There are guys who know better than me, how to dig out info with tricky programming from databases. I used a few scripts of them as they are, or modified them. Great thanks goes out to the original authors! Other texts were mainly collected from the Internet, I just edited and combed them together.

This "co-pilot" is formed to my personal taste. I mean, there are for example jokes. In my case, jokes are about marriage. Because I'm married. Life is easier, when we can laugh at ourselves :) There is a "wisdom" collection. Those ones are important for me, I carefully selected them. Gandhi, Yoda, Frank Herbert, Einstein, etc... And so on (quite a varicolored company, I know[smile]) . I tried to make separate functions for more easy editing (their names start with "text..."), so if you prefer jokes about school-life, you can replace them quickly.

This is a censored version, the movie quotes from Predator, Aliens, Dirty Harry, etc. don't use words like "nasty little pixie" originally. Replace those too, if you like the authentic versions better.

The personality is not complete, not perfect, but if I can make trough it only one of you smile a little bit, than it worked, and I'll be happy [yesnod] !

Best regards, have fun!
 
Hi,

You mean these? If I understood your question correctly, those are real screens with buttons on the outside. A few pics and more details:

dash_latest.jpg

8" tablets, with 1280x800 resolution, just fit perfectly for the Cougar button-frames. They have now static pictures. In the middle there is a 6" old Android phone, running the ARX G19 app. Buttons are Thrustmaster Cougar Pack.

I experimented with Spacedesk android app to use one of the tablets as pc secondary screen too, again with the G19 app, the pc version. It worked, but was using lots of GPU :S.

attachment.jpg

I managed to attach control buttons for the G19 app to the Cougar later, it was like a real multimedia head-unit.

attachment3.jpg

this is an even older version, running Roccat Powergrid on the phone, G19 app on the tablet.

attachment1.jpg

Best regards!
 
Back
Top Bottom