THE OWL NEBULA
The Road to GCRV 6897
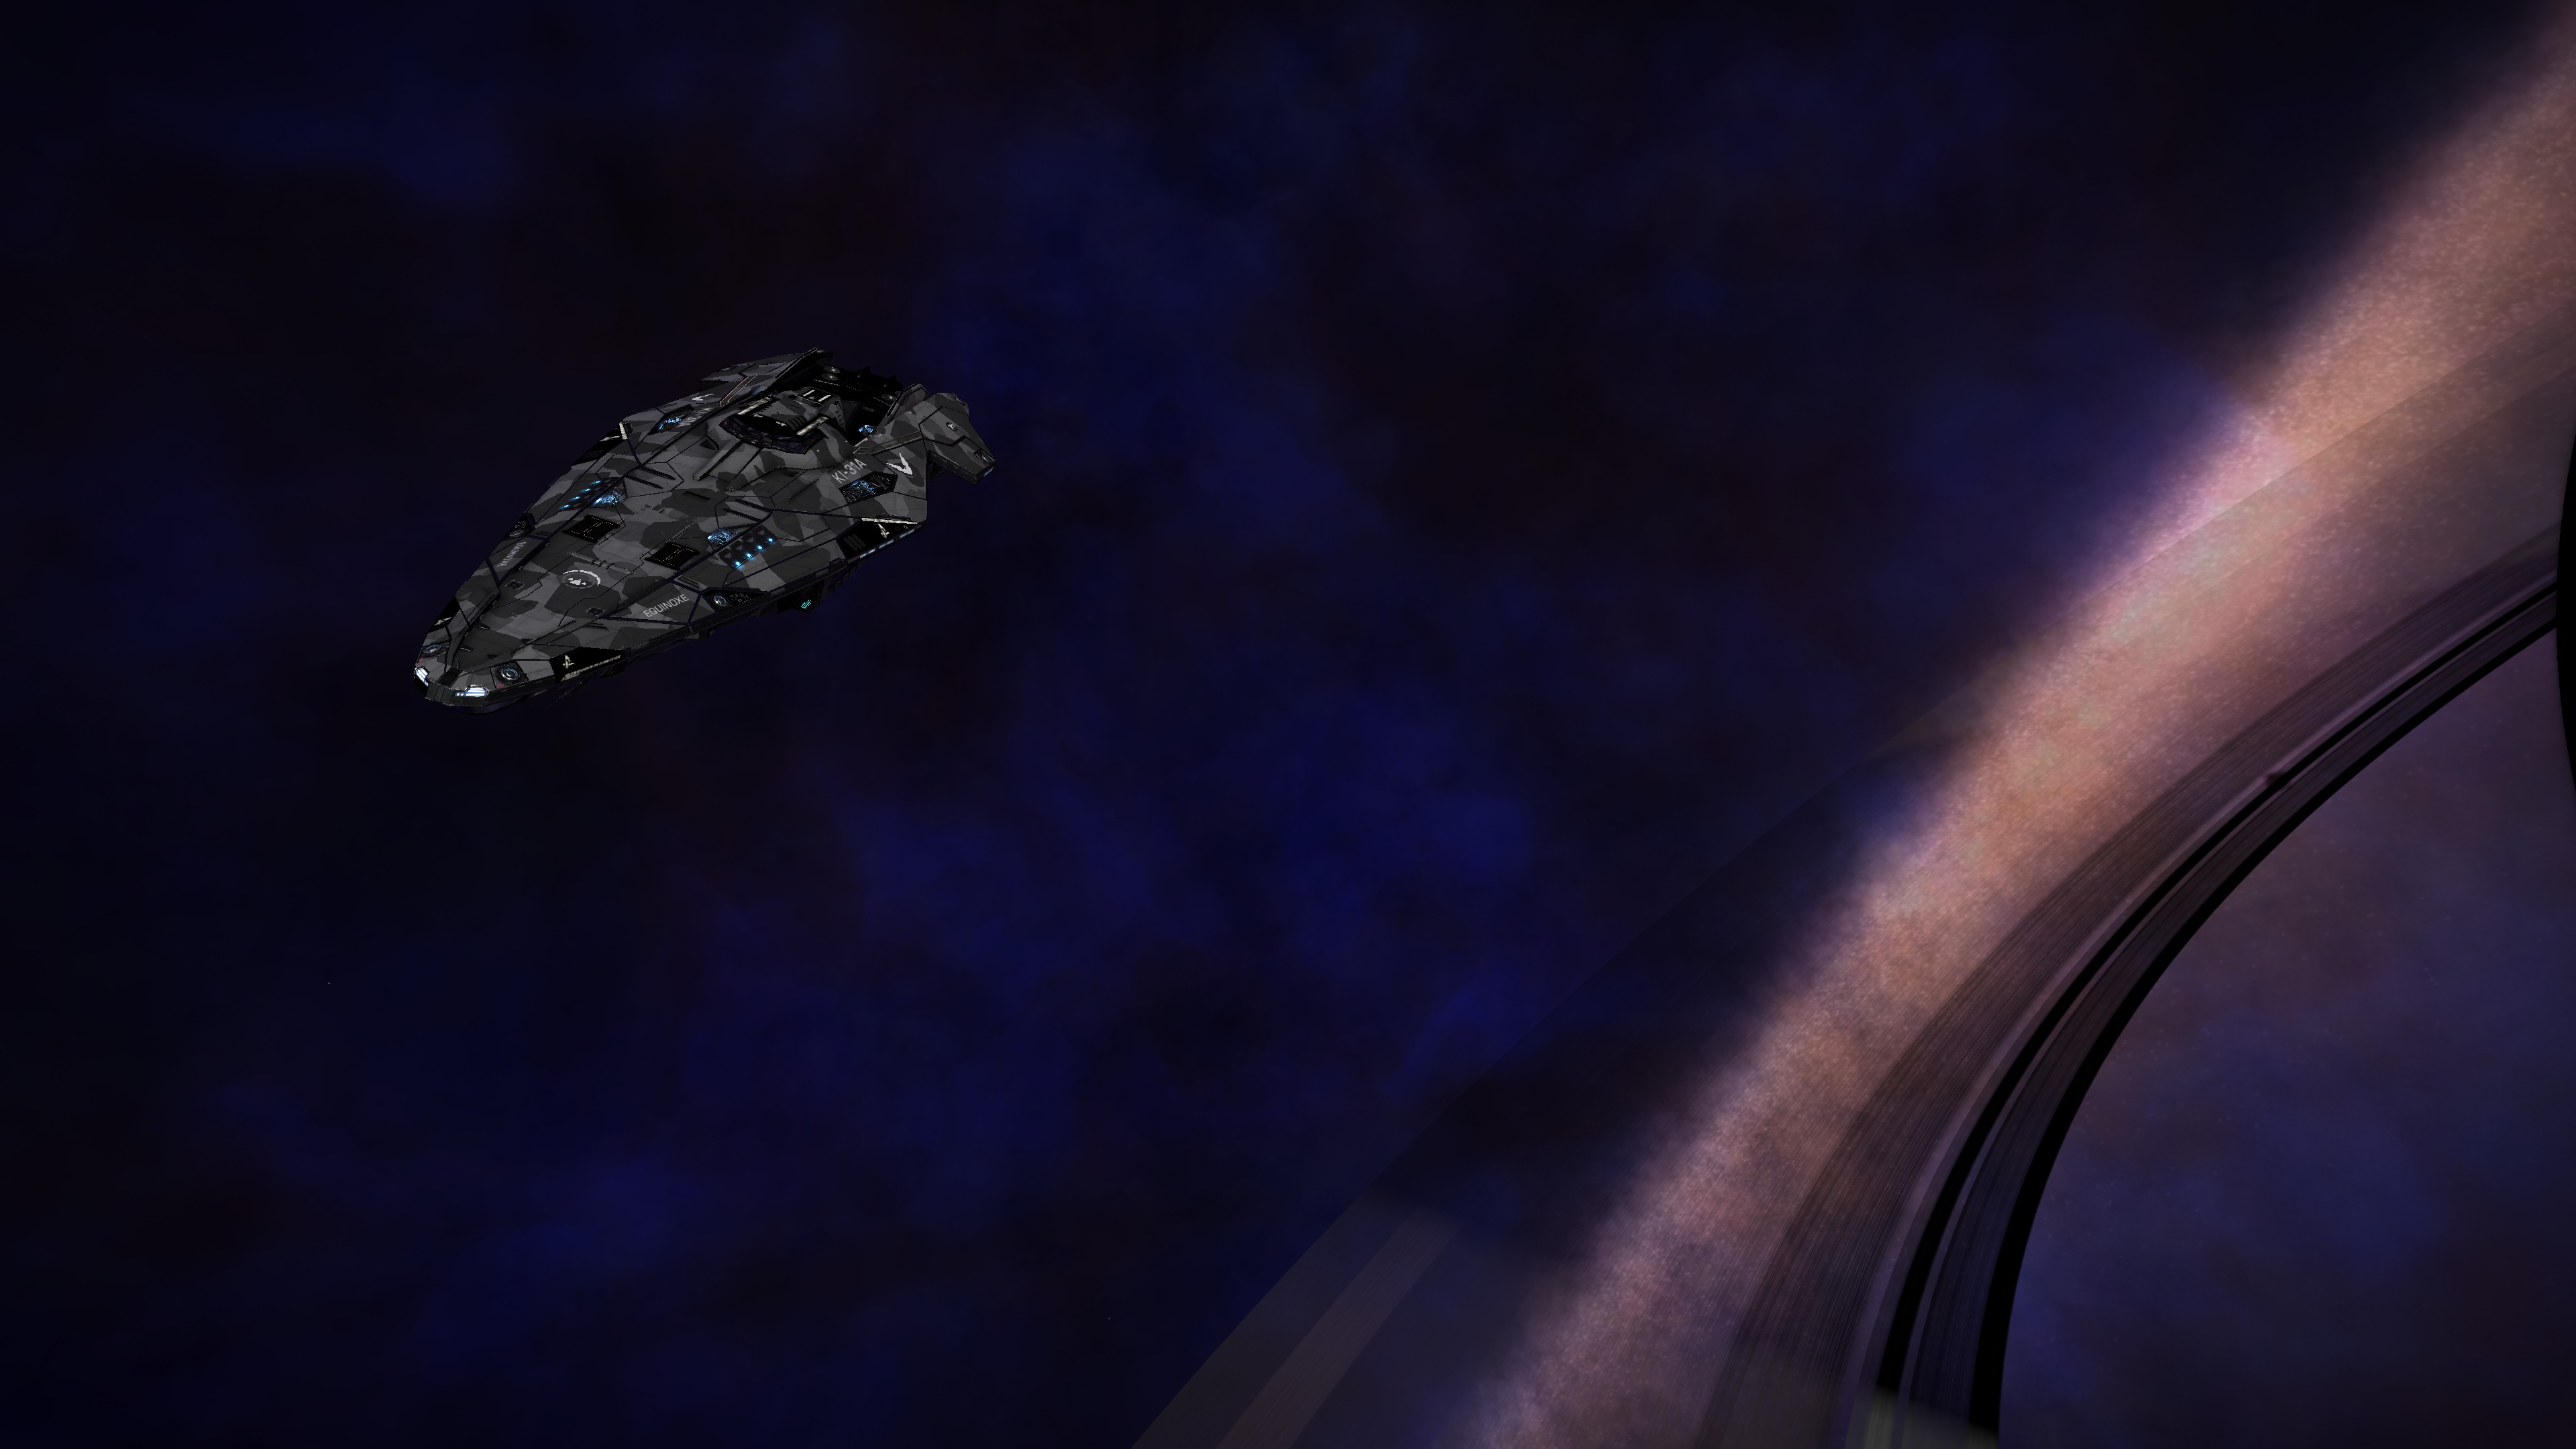
Prepared by Commander Kelanen Alcatraz
[IMGUR]RO4zXQe[/IMGUR]
Introduction
Greetings, Commanders!
This is a theoretical route in order to reach the previously unreachable GCRV 6897 (Owl Nebula) by utilising the new Guardian Frame Shift Drive Booster.
I am Commander Kelanen Alcatraz, I want to start this thread off by asking if Commanders have any issues reply to this thread.
I really wanted to get this information out there, so if there is anything that needs amending please let me know.
This thread was compiled with the purpose of informing all commanders, whom are avid explorers as to how to reach GCRV 6897, the previously unreachable Owl Nebula by utilising the new Guardian FSD Technology.
There is also a Google Document at the bottom of this thread where this information is much more clear.
CONTENTS[/SIZE]
ANACONDA OUTFITTING GUIDE https://s.orbis.zone/e35
ANACONDA SUPPORT OUTFITTING
DIAMONDBACK EXPLORER OUTFITTING - https://s.orbis.zone/e38
MINIMUM JUMP RANGE - 74.73LY
EXAMPLE JUMP RANGE
RECOMMENDED JUMP RANGE - 77.50LY
FSD INJECTIONS REQUIRED
[FAST ROUTE]
FSD INJECTION MATERIALS BREAKDOWN
[FAST ROUTE]
FSD INJECTIONS TOTAL MATERIALS REQUIRED
[FAST ROUTE]
FSD INJECTIONS REQUIRED
[EMERGENCY ROUTE]
FSD INJECTION MATERIALS BREAKDOWN
[EMERGENCY ROUTE]
FSD INJECTIONS TOTAL MATERIALS REQUIRED
[EMERGENCY ROUTE]
FAST ROUTE TO GCRV 6897
EMERGENCY ROUTE TO GCRV 6897
SPECIAL INFORMATION IN GCRV 6897
RETURN ROUTE TO CEOS
EMERGENCY ROUTE TO CEOS
SPECIAL INFORMATION IN CEOS
If any issues / queries, contact me on:
Discord (A Fallen Commander Expedition) is now closed.
Frontier Forums: Kelanen Alcatraz
In-Game: Kelanen Alcatraz
Google Document: https://docs.google.com/document/d/1IGIq1ELElVEtr3ibgtcav5bTjgC0dD3zNgrzsXA5V2I/edit?usp=drivesdk
-- Commander Kelanen Alcatraz
The Road to GCRV 6897
Prepared by Commander Kelanen Alcatraz
[IMGUR]RO4zXQe[/IMGUR]
Introduction
Greetings, Commanders!
This is a theoretical route in order to reach the previously unreachable GCRV 6897 (Owl Nebula) by utilising the new Guardian Frame Shift Drive Booster.
I am Commander Kelanen Alcatraz, I want to start this thread off by asking if Commanders have any issues reply to this thread.
I really wanted to get this information out there, so if there is anything that needs amending please let me know.
This thread was compiled with the purpose of informing all commanders, whom are avid explorers as to how to reach GCRV 6897, the previously unreachable Owl Nebula by utilising the new Guardian FSD Technology.
There is also a Google Document at the bottom of this thread where this information is much more clear.
CONTENTS[/SIZE]
Outfitting Overview
Anaconda Outfitting Guide
Anaconda Support Outfitting Guide
Diamondback Explorer Outfitting Guide
Jump Range
Minimum Jump Range
Example Jump Range
Recommended Jump Range
FSD Injections Requirements
Fast Route Injection Requirements
FSD Injections Required
Detailed Materials Breakdown
Total Materials Required
Emergency Route Injection Requirements
FSD Injections Required
Detailed Materials Breakdown
Total Materials Required
Route Information To GCRV 6897
Fast Route from IX - GCRV 6897
Emergency Route from IX - GCRV 6897
Special Information for in GCRV 6897
Route Information Returning from GCRV 6897
Fast Route from GCRV 6897 - CEOS
Emergency Route from GCRV 6897 - CEOS
Special Information for when in CEOS
I significantly recommend utilising the Anaconda, this section of this document will inform you of how to outfit one correctly.
Being able to jump 149.46Ly (74.73Ly) or higher is going to require engineering.
I will share my setup, adjust it as you will, but make sure you read through this guide first.
The outfitting should look something like this:
(Please click the image to see it)
[IMGUR]yws1rv7[/IMGUR]
Hardpoints
1D RAILGUN - Lightweight Grade 5
A Railgun is not required, however it is strongly recommended to allow for further fuel control.
Experimental Effect - Plasma Slug
This is because of the ability to dump fuel, so if you are tight on jump range and you have to conduct a jump on fumes (as fuel may be too heavy), this will allow you to reduce your weight and therefore increase the jump range.
Utility Mounts
No utility mounts are required for this trip, as such I do not recommend any.
- It is understandable if a Heat Sink Launcher is desired, although the trip is not far and jump range is priority.
Core Internals
1C LIGHTWEIGHT ALLOY - Heavy Duty Grade 5
This is a given, as this module does not have any mass, and as such is the most ideal for this internal.
Engineering Modification - Heavy Duty Grade 5
This is not required in anyway, however it is just worth mentioning as it will increase the armour of the ship without any mass increase.
2D POWERPLANT - Overcharged Grade 1/2/3
This is the lightest option available, and will be able to successfully power the essential systems, however this may be dependant on your outfitting and power priorities as the exact details of the Guardian Boosters power draw may require additional engineering modifications.
This is required to power the essential systems, in which to reach GCRV 6897, only the following needs to be online:
• 4D Thrusters
• 6A Frame Shift Drive
• 5D Life Support
• 5H Guardian FSD Booster
• Fuel Scoop (Can be turned off/on as required to use Sensors)
- Advanced Discovery Scanner & Detailed Surface Scanner are always online.
The following modules can be kept offline when travelling to GCRV 6897 / CEOS:
• 1D Power Distributor
• 8D Sensors
• Cargo Hatch
• Planetary Vehicle Hangar (If any of you are planning on bringing one and your outfitting allows you the 74.73Ly Jump Range).
• 7A Fuel Scoop / Life Support (When entering CEOS, in order to turn Sensors online).
I tend to fly with my power priorities as I have just described, for the more experienced amongst you, remember you can also cycle life support as well if you require.
Experimental Effect - Stripped Down (-10% Mass)
This is to further reduce the weight of the PowerPlant and increase jump range further.
4D / 5D THRUSTERS
4D Thrusters - Strengthening Grade 1
In order to achieve the weight requirements to fit 4D Thrusters, note the following:
• Your Anaconda has to be outfitted with very light components, as too heavy components and your mass will exceed the maximum mass 4D Thrusters can launch with.
• You may have to potentially engineer the modules as I have described as well first.
• The 4D Thrusters must have been engineered for the experimental effect that increases OPTIMAL MASS.
- This can be done by fitment of the 4D Thrusters on a Diamondback Explorer, Engineering the 4D Thrusters for Clean/Dirty/Strengthening, take note that some may decrease optimal mass, experimental effect as listed below.
Experimental Effect - Drive Distributors (+10% Optimal Mass)
- Engineering for Drive Distributor experimental effect will mean the thrusters maximum mass they can launch with is increased.
• This trip will require the ability to execute a jump potentially without having the tank above 8T (149.46Ly), and I would advise having enough fuel to execute two optimal jumps.
Once this is done, the Thrusters should be able to be fitted onto your Anaconda, take note of the mass of your Anaconda and the maximum mass of the Thrusters.
5D Thrusters - Strengthening Grade 1
If you can jump 74.73Ly with 5D Thrusters then it is your preference if you would find it more convenient to outfit 5D Thrusters as opposed to 4D Thrusters.
Experimental Effect - Stripped Down (-10% Mass)
- Engineering for Drive Distributor experimental effect will mean the thrusters maximum mass they can launch with is increased, if utilising 5D Thrusters this is not required and as such I advise Stripped Down for 5D.
6A FRAME SHIFT DRIVE - Increased Range Grade 5
This is an absolute must to achieve the required 74.73Ly (149.46Ly) Jump Range required.
Experimental Effect - Mass Manager
I have multiple 6A FSDs and have experimented with each experimental effect on the Anaconda, even with as minimum mass as possible to the Anaconda.
5D LIFE SUPPORT - Lightweight Grade 4
This is the lightest option possible for the Anaconda's life support, in order to maximise jump range.
For those which plan to use 5A/B/C Life Support and 4D Thrusters, take note that there isn't a lot of mass you can play with before your thrusters won't launch.
1D POWER DISTRIBUTOR - Charge Enhanced Grade 1
As this trip is short and we want to maximise jump range, boosting is not required - I never fly with boost in my Anaconda, and do not think this is required at all.
If you plan on landing on a planet, use a very light descent and take note of your acceleration at straight and level flight (0° Pitch) and increase pitch accordingly.
This engineering modification is just so that the stripped down experimental effect can be applied.
Experimental Effect - Stripped Down (-10% Mass)
The other options are not usable, as even with a higher capacity experimental effect, boosting still will not be possible due to the fitment of a 1D Power Distributor.
Stripped Down means lighter module, higher jump range.
8D SENSORS - Lightweight Grade 5
Sensors are not required to even be online for this trip unless docking, and as such can be kept offline until then.
This means that they can be the lightest option possible, as high grade sensors are not required.
4C INTERNAL FUEL TANK
This is to give a maximum fuel tank capacity of 16T, this I recommend most as:
There is a jump which will require execution of the jump on 'Fumes’ (149.46Ly), as such I recommend following my instructions here:
SPHUEDU UN-T D3-0 -> 63.14Ly Jump -> SPHUEDU TN-T D3-0
You do not want to fuel scoop at SPHUEDU UN-T D3-0.
The jump into SPHUEDU TN-T D3-0 uses No Boost and will reduce your fuel.
SPHUEDU TN-T D3-0 -> 100.23Ly Jump -> HD 238061
You do not want to fuel scoop at SPHUEDU TN-T D3-0.
This jump into HD 238061 uses a Grade 2 Boost, and will reduce your fuel.
HD 238061 -> 115Ly Jump -> HD 107322
You do not want to fuel scoop at HD 238061.
This jump into HD 107322 uses a Grade 3 Boost, and will reduce your fuel.
HD 107322 -> 149.3Ly Jump -> HD 105057
You will want to fuel scoop at HD 107322 slowly.
This jump into HD 107322 used enough fuel now that your total fuel is BELOW 8T.
This is so that you can fuel scoop slowly to approximately 8T - 8.5T of Fuel Capacity and then stop fuel scooping.
This is to get the jump range required so that you can execute the 149.46Ly jump.
(I have annotated this on the routes so you know when it is advised not to Fuel Scoop)
OPTIONAL INTERNALS
7A - 4C - 1E FUEL SCOOP - No Engineering
This is really dependant on your budget, however in this instance you may want to actually consider a lower class Fuel Scoop - Hear me out:
- If you make a jump, and then need to conduct a jump on fumes, but you're below your optimal jump fuel requirement (8T), you may only want to fuel scoop slightly and slowly so you don't instantly refill and then you can't make the next jump.
- When Fuel Scooping, keep an eye on your jump range as you're scooping and turn your fuel scoop off/on as you require.
I wouldn't advise a 1E, as it will take a significantly long time to fuel scoop, as such a 4C would be more adequate and potentially a better choice then a rapid-scooping 7A.
I also do not advise Shielded or any engineering as it can increase power draw, and with already having a 2D PowerPlant it's critical that power draw is kept to a minimum.
5H GUARDIAN FSD BOOSTER
This module will increase your jump range, although stated as +10.5Ly it may not be a solid increase, just because your jump range was 70Ly does not mean it will be 80.5Ly.
The 5H Guardian FSD Booster weighs 1.3T, so just be aware of that!
DETAILED SURFACE SCANNER - No Engineering
This is optional, you do not require one but I very much recommend one as it's quite a unique trip.
I've never engineered the Detailed Surface Scanner due to the weight increase, although I understand if you utilise an engineering modification, just take note if utilising 4D Thrusters of the mass requirement.
ADVANCED DISCOVERY SCANNER
This should be an obvious option to bring, however I know that there are Commanders that believe the ADS is too heavy, but I highly recommend it as without it you will not be able to identify any astronomical bodies in GCRV 6897 or along the way.
This concludes my outfitting guide for the Anaconda, if there are any questions / tips / advice other Commanders have, let me know.
ANACONDA SUPPORT OUTFITTING
This section is directed towards those Commanders that have outfitted correctly to achieve above The Recommended Jump Range.
This information is more pertinent to expeditionaries or wings conducting a trip to GCRV 6897 where there are Commanders on the expedition / in wing that fall into any of these categories:
• Diamondback Explorer's with jump ranges around
74.73Ly.
• Anaconda's with jump ranges around 74.73Ly.
• Limited fuel capacitance jumping into GCRV 6897.
These Commanders will be able to execute a jump into GCRV 6897, however it is unlikely these Commanders will be able to jump back out.
For more information on this, please refer to:
Anaconda - Core Internal - 4C Fuel Tank
Diamondback Explorer - Core Internal - 3C Fuel Tank
For the reason listed above, I recommend there are Commanders which are also expeditionaries or in-wing with these Commanders that have an Anaconda that has a Maximum Jump Range of 78.50Ly.
This is to be able to comfortably execute the jump and carry a 1D Fuel Transfer Limpet Controller and a 2E Cargo Rack to be able to synthesis Limpets to transfer fuel.
The following is a build with the minimum requirements to support other Commanders with fuel:
(Please click the image to see it)
[IMGUR]tw8URQr[/IMGUR]
ADDITIONAL OPTIONAL INTERNALS
1D Fuel Transfer Limpet Controller - G5 Lightweight
This will allow for other Commanders to be able to be refuelled in GCRV 6897, take note that the required fuel to jump back out will range from:
5T for Diamondback Explorers
8T for Anacondas
This means that a fast fuel transfer limpet is not required.
Grade 5 Lightweight Engineering Modification is to reduce weight, therefore increase Jump Range.
2E Cargo Rack
This is so that Limpets can be synthesized 4T at a time.
Limpet Synthesis
The required materials for synthesizing four limpets at a time is listed as:
Iron: 10
Nickel: 10
The following is my last recommendations for a maximum support outfit:
Additional Fuel Tanks can be fitted.
- Note that the maximum mass of the Anaconda with 4D Thrusters is limited to 520T.
Increase Jump Range as much as you possibly can.
- If you are planning on refuelling other Commanders in
GCRV 6897, this means less fuel is taken by the FSD
upon jumping into GCRV 6897.
Remember - In-Flight Fuel!
- Just because you may only need 6T to jump back out,
doesn't mean transfer all your fuel par 6T.
DIAMONDBACK EXPLORER OUTFITTING - https://s.orbis.zone/e38
I significantly recommend utilising the Anaconda, however this section of this document will inform you of how to outfit a Diamondback Explorer correctly.
Being able to jump 149.46Ly (74.73Ly) or higher is going to require serious engineering for the Diamondback Explorer.
I will share my advised setup, adjust it as you will, but make sure you read through this guide first.
The outfitting should look something like this:
(Please click the image to see it)
[IMGUR]Y7DD9sr[/IMGUR]
Hardpoints
1D RAILGUN - Lightweight Grade 5
A Railgun is not required, however it is strongly recommended to allow for further fuel control.
Experimental Effect - Plasma Slug
This is because of the ability to dump fuel, so if you are tight on jump range and you have to conduct a jump on fumes (as fuel may be too heavy), this will allow you to reduce your weight and therefore increase the jump range.
Utility Mounts
No utility mounts are required for this trip, as such I do not recommend any.
- It is understandable if a Heat Sink Launcher is desired, although the trip is not far and jump range is priority, especially with the Diamondback Explorer.
Core Internals
1C LIGHTWEIGHT ALLOY - Heavy Duty Grade 5
This is a given, as this module does not have any mass, and as such is the most ideal for this internal.
Engineering Modification - Heavy Duty Grade 5
This is not required in anyway, however it is just worth mentioning as it will increase the armour of the ship without any mass increase.
2D POWERPLANT - Overcharged Grade 1
This is the lightest option available, and will be able to successfully power the essential systems.
I do not advise Low Emissions for the Diamondback Explorer due to the slight mass increase, however there is spare power with this build if you prefer.
This is required to power the essential systems, in which to reach GCRV 6897, only the following needs to be online:
• 4D Thrusters
• 5A Frame Shift Drive
• 3D Life Support
• 4H Guardian FSD Booster
• 3A Fuel Scoop (Can be turned off/on as required to use Sensors)
- Advanced Discovery Scanner & Detailed Surface Scanner are always online.
The following modules can be kept offline when travelling to GCRV 6897 / CEOS:
• 1D Power Distributor
• 3D Sensors
• Cargo Hatch
• 3A Fuel Scoop / Life Support (When entering CEOS, in order to turn Sensors online).
• Autofield Maintenance Unit (Only needs to be online as required to use)
I tend to fly with my power priorities as I have just described, for the more experienced amongst you, remember you can also cycle life support as well if you require.
Experimental Effect - Stripped Down (-10% Mass)
This is to further reduce the weight of the PowerPlant and increase jump range further.
4D THRUSTERS - Strengthening Grade 1
This is the lightest thruster option possible for the Diamondback Explorer, and there is no requirement to go any higher grades for this expedition.
Experimental Effect - Stripped Down (-10% Mass)
- Engineering for Stripped Down experimental effect will mean the thrusters mass is reduced further and unlike the Anaconda, 4D Thrusters can be utilised without using drive distributors and as such I advise Stripped Down for 4D Thrusters.
5A FRAME SHIFT DRIVE - Increased Range Grade 5
This is an absolute must to achieve the required 74.73Ly (149.46Ly) Jump Range required.
Experimental Effect - Mass Manager
I have multiple 5A FSDs and have experimented with each experimental effect on the Anaconda, even with as minimum mass as possible to the Diamondback Explorer, and Mass Manager is still the preference for my outfitting here.
3D LIFE SUPPORT - Lightweight Grade 4
This is the lightest option possible for the Diamondback Explorer's life support, in order to maximise jump range.
1D POWER DISTRIBUTOR - Charge Enhanced Grade 1
As this trip is short and we want to maximise jump range, boosting is not required - I never fly with boost in my Anaconda, and do not think this is required at all.
If you plan on landing on a planet, use a very light descent and take note of your acceleration at straight and level flight (0° Pitch) and increase pitch accordingly.
This engineering modification is just so that the stripped down experimental effect can be applied.
Experimental Effect - Stripped Down (-10% Mass)
Stripped Down means lighter module, higher jump range.
However, for those which are serious about being able to boost and really want to be able to, this is the required modification:
Alternative Engineering Modification - Engine Focused Grade 5
This is so that the engine capacitance can be increased as high as possible to get to boost-level engine capacity, you should now be able to boost and as such I advise the same experimental effect.
3D SENSORS - Lightweight Grade 5
Sensors are not required to even be online for this trip unless docking, and as such can be kept offline until then.
This means that they can be the lightest option possible, as high grade sensors are not required.
3C INTERNAL FUEL TANK
This is to give a maximum fuel tank capacity of 10T (with the addition of a 1C Fuel Tank in Optional Internals), this I recommend most as:
- There is a jump which will require execution of the jump on 'Fumes’ (149.46Ly), as such I recommend following my instructions here:
SPHUEDU UN-T D3-0 -> 63.14Ly Jump -> SPHUEDU TN-T D3-0
You do not want to fuel scoop at SPHUEDU UN-T D3-0.
The jump into SPHUEDU TN-T D3-0 uses No Boost and will reduce your fuel.
SPHUEDU TN-T D3-0 -> 100.23Ly Jump -> HD 238061
You do not want to fuel scoop at SPHUEDU TN-T D3-0.
This jump into HD 238061 uses a Grade 2 Boost, and will reduce your fuel.
HD 238061 -> 115Ly Jump -> HD 107322
You do not want to fuel scoop at HD 238061.
This jump into HD 107322 uses a Grade 3 Boost, and will reduce your fuel.
HD 107322 -> 149.3Ly Jump -> HD 105057
You will want to fuel scoop at HD 107322 slowly.
This jump into HD 107322 used enough fuel now that your total fuel is BELOW 5T.
This is so that you can fuel scoop slowly to approximately 5T - 6.5T of Fuel Capacity and then stop fuel scooping.
This is to get the jump range required so that you can execute the 149.46Ly jump.
(I have annotated this on the routes so you know when it is advised not to Fuel Scoop)
OPTIONAL INTERNALS
3A - 1E FUEL SCOOP - No Engineering
This is really dependant on your budget, however in this instance you want to actually consider a lower class Fuel Scoop - Hear me out:
Scenario:
If you need to conduct a jump on fumes, but you're below your optimal jump fuel requirement (5T Hard Limit without Deep Charge).
You will want to fuel scoop slightly and slowly so you don't instantly refill and then you can't make the next jump because you have too much fuel, and therefore too much weight.
When Fuel Scooping, keep an eye on your jump range as you're scooping and turn your fuel scoop off/on as you require.
This is especially apparent with the 149.46Ly Jump, where a Diamondback Explorer can only make the jump with only 5T - 6.5T in the fuel tank.
I wouldn't advise a 1E, as it will take a significantly long time to fuel scoop, as such a 3A would be more adequate and a better choice then a rapid-scooping 4A.
I also do not advise Shielded or any engineering as it can increase power draw, and with already having a 2D PowerPlant it's critical that power draw is kept to a minimum.
Refer to my Diamondback Explorer Outfitting - Core Internal - 3C Internal Fuel Tank and Diamondback Explorer Outfitting - Hardpoints - 1D Railgun section for more information on this.
4H GUARDIAN FSD BOOSTER
This module will increase your jump range, although stated as +9Ly it may not be a solid increase, just because your jump range was 65.76Ly does not mean it will be 74.73Ly.
The 4H Guardian FSD Booster weighs 1.3T, so just be aware of that!
1C FUEL TANK
This is advised with the 3C Fuel Tank in order to get a total fuel tank capacity of 10T.
Refer to my Internal Fuel Tank section for more information on this.
DETAILED SURFACE SCANNER - No Engineering
This is optional, you do not require one but I very much recommend one as it's quite a unique trip.
I've never engineered the Detailed Surface Scanner due to the weight increase, although I understand if you utilise an engineering modification, just take note of the mass requirement.
ADVANCED DISCOVERY SCANNER
This should be an obvious option to bring, however I know that there are Commanders that believe the ADS is too heavy, but I highly recommend it as without it you will not be able to identify any astronomical bodies in GCRV 6897 or along the way.
This concludes my outfitting guide for the Diamondback Explorer, if there are any questions / tips / advice other Commanders have, let me know.
MINIMUM JUMP RANGE - 74.73LY
In order to make the longest jump - 149.46Ly with a Grade 3 Boost, 74.73Ly is required to reach GCRV 6897 One-Way / With extreme difficulty.
You MUST be able to jump this, so aim to have your maximum above this, I highly recommend as a minimum 77.50Ly.
Even with a maximum jump range of 74.73Ly, even jumping with the optimal fuel amount only, you may still fall slightly short on your optimum jump distance.
- For instance, when I outfit my Anaconda (Without Guardian FSD Boosters) with just 8T Fuel Tank, no optionals, hardpoints or utilities, my maximum jump range is 73.75Ly, but I can only jump 73.69Ly leaving a 0.06Ly discrepancy I can't remove.
EXAMPLE JUMP RANGE
This is an example jump range, to demonstrate how a 149.46Ly jump range can be achieved:
No Boost(s) / Standard Jump Range:
71.14 (74.73)
__
Boost Ranges:
Grade 1:
88.92 (93.41)
Grade 2:
106.63 (112.1)
Grade 3:
142.28 (149.46Ly)
Please check your own statistics in-game, as these are presumptive.
Before the Guardian FSD Boosters, I could execute a jump of 73.69Ly (147.38Ly), and fell short, there is no other way around this.
You MUST be able to execute a jump of 74.73Ly (149.46Ly) for a one-way trip / extreme difficulty.
RECOMMENDED JUMP RANGE - 77.50LY
The reason I recommend above 74.73Ly is most notably because of this factor:
The last jump into GCRV 6897 may require 7-7.5T of fuel (146.50Ly Jump) AND be a jump on fumes / Less than 16T of fuel - meaning that you may not have enough fuel to jump back out, or an extremely narrow margin of fuel capacitance to get right.
This, combined with GCRV 6897 being Star Class W and therefore not scoopable, would mean jumping into GCRV 6897 on fumes AND jumping back out on fumes.
- For instance, if the Jump requires 5T of fuel less then the maximum 16T to reduce the weight enough to get the range to be 146.50Ly to conduct the jump, and takes 7T of fuel to execute the jump, this leaves you with 12T gone from when you are in GCRV 6897.
This means there is only 4T left in your fuel tank at a non-scoopable star - Without the 8T required to jump back out.
As a result, if you want to conduct a return trip and not just get to GCRV 6897 one-way, I strongly recommend having a jump range close to 77.50Ly.
Any questions at all with this, refer to the Thread or to the contact details I'll leave on the last page.
FSD INJECTIONS REQUIRED
[FAST ROUTE]
However, this many boosts is required in order to reach GCRV 6897, as well as to return from GCRV 6897:
Grade 1 Boosts Required: 0.
Grade 2 Boosts Required: 4.
Grade 3 Boosts Required: 12.
Grade 1 Boosts Required: 0.
Grade 2 Boosts Required: 4.
Grade 3 Boosts Required: 12.
[FAST ROUTE]
Grade 1 (+25%): 0 Injections Required
Carbon: 1 Required Total: 0
Vanadium: 1 Required Total: 0
Germanium: 1 Required Total: 0
__
Grade 2 (+50%): 4 Injections Required
Carbon: 1 Required Total: 4
Vanadium: 1 Required Total: 4
Germanium: 1 Required Total: 4
Cadmium: 1 Required Total: 4
Niobium: 1 Required Total: 4
__
Grade 3 (+100%): 12 Injections Required
Carbon: 1 Required Total: 12
Germanium: 1 Required Total: 12
Arsenic: 1 Required Total: 12
Niobium: 1 Required Total: 12
Yttrium: 1 Required Total: 12
Polonium: 1 Required Total: 12
[FAST ROUTE]
Total Materials Required in order to use the minimum amount of FSD Injections required in order to follow the Fast Routes to GCRV 6897 and return to CEOS:
Carbon: 16
Vanadium: 4
Germanium: 16
Cadmium: 4
Niobium: 16
Arsenic: 12
Yttrium: 12
Polonium: 12
Carbon: 16
Vanadium: 4
Germanium: 16
Cadmium: 4
Niobium: 16
Arsenic: 12
Yttrium: 12
Polonium: 12
[EMERGENCY ROUTE]
These are the FSD Injections required in order to reach GCRV 6897, as well as to return from GCRV 6897:
Grade 1 Boosts Required: 4.
Grade 2 Boosts Required: 4.
Grade 3 Boosts Required: 8.
Grade 1 Boosts Required: 4.
Grade 2 Boosts Required: 4.
Grade 3 Boosts Required: 8.
[EMERGENCY ROUTE]
Grade 1 (+25%): 4 Injections Required
Carbon: 1 Required Total: 4
Vanadium: 1 Required Total: 4
Germanium: 1 Required Total: 4
__
Grade 2 (+50%): 4 Injections Required
Carbon: 1 Required Total: 4
Vanadium: 1 Required Total: 4
Germanium: 1 Required Total: 4
Cadmium: 1 Required Total: 4
Niobium: 1 Required Total: 4
__
Grade 3 (+100%): 8 Injections Required
Carbon: 1 Required Total: 8
Germanium: 1 Required Total: 8
Arsenic: 1 Required Total: 8
Niobium: 1 Required Total: 8
Yttrium: 1 Required Total: 8
Polonium: 1 Required Total: 8
Carbon: 1 Required Total: 4
Vanadium: 1 Required Total: 4
Germanium: 1 Required Total: 4
__
Grade 2 (+50%): 4 Injections Required
Carbon: 1 Required Total: 4
Vanadium: 1 Required Total: 4
Germanium: 1 Required Total: 4
Cadmium: 1 Required Total: 4
Niobium: 1 Required Total: 4
__
Grade 3 (+100%): 8 Injections Required
Carbon: 1 Required Total: 8
Germanium: 1 Required Total: 8
Arsenic: 1 Required Total: 8
Niobium: 1 Required Total: 8
Yttrium: 1 Required Total: 8
Polonium: 1 Required Total: 8
[EMERGENCY ROUTE]
Total Materials Required in order to use the minimum amount of FSD Injections required in order to follow the Emergency Routes to GCRV 6897 and return to CEOS:
Carbon: 16
Vanadium: 8
Germanium: 16
Cadmium: 4
Niobium: 12
Arsenic: 8
Yttrium: 8
Polonium: 8
Carbon: 16
Vanadium: 8
Germanium: 16
Cadmium: 4
Niobium: 12
Arsenic: 8
Yttrium: 8
Polonium: 8
(Please click the image to see it)
[IMGUR]rmBIkqP[/IMGUR]
[IMGUR]rmBIkqP[/IMGUR]
(Please click the image to see it)
[IMGUR]44ZyRq4[/IMGUR]
[IMGUR]44ZyRq4[/IMGUR]
Congratulations, you made it - That’s awesome! It really is, from what was originally unreachable is now reachable, but there’s a few things important in this system that need to be considered:
It potentially took almost completely half a tank by my estimates if your jump range is close to the minimum, potentially if lower then my recommendation of 77.50Ly, you may not have enough fuel to jump back out.
On top of this, even if you acknowledged and calculated the fuel capacitance so you have enough to jump back out - Remember, in-flight fuel may cause you to be unable to jump back, so it’s important you have a high jump range.
Here's a list of things to do whilst in GCRV 6897:
• Scan the system with the Advanced Discovery Scanner.
• Check the system map for the star / any planetary bodies.
• Scan the main star and any other planetary bodies you wish to scan.
• Check your fuel capacitance, turn off your Fuel Scoop to reduce power draw and therefore fuel usage.
• Enjoy the view of the Owl Nebula!
RETURN ROUTE TO CEOS
(Please click the image to see it)
[IMGUR]1sUmM0M[/IMGUR]
[IMGUR]1sUmM0M[/IMGUR]
(Please click the image to see it)
[IMGUR]dDVrEdf[/IMGUR]
[IMGUR]dDVrEdf[/IMGUR]
The final thing I would advise is for the Universal Cartographics to be sold at CEOS.
Thanks for completing this trip, it took a significant amount of planning to formulate this, please be understanding if some of these statistics are slightly inaccurate.
The routes were also calculated using a 3D Distance Calculator, so there may be very slight discrepancies.
I wanted to share all this information as best I can so that I can give back to the community that gave me amazing support recently with losing my Dad (Commander Brutal Deluxe).
I'm planning on holding a memorial service when I'm back from overseas, Frontier are being really supportive and putting a memorial in-game, anyone interested please join the Discord Group below.
I'd like to say that although I can't currently complete this trip patiently, I hope you Commanders can.
Discord (A Fallen Commander Expedition) is now closed.
Frontier Forums: Kelanen Alcatraz
In-Game: Kelanen Alcatraz
Google Document: https://docs.google.com/document/d/1IGIq1ELElVEtr3ibgtcav5bTjgC0dD3zNgrzsXA5V2I/edit?usp=drivesdk
-- Commander Kelanen Alcatraz
Last edited:
") though I'm still finishing the DECE then I'll give it a shot.
though I'm still finishing the DECE then I'll give it a shot.