Nearing completion on the seat back:
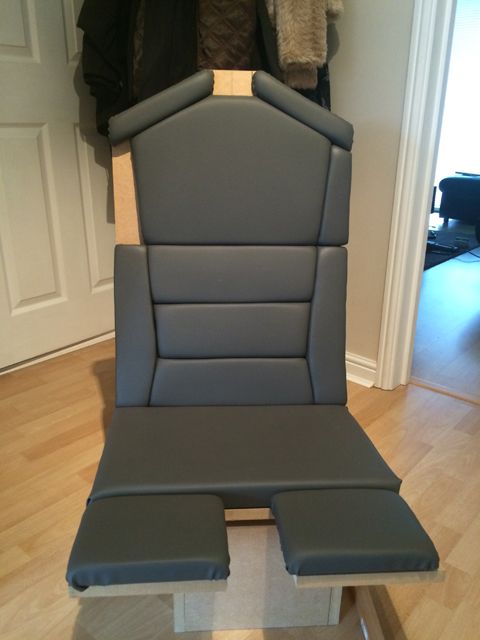
My staple gun has gone kaput

My staple gun has gone kaput
Last edited:


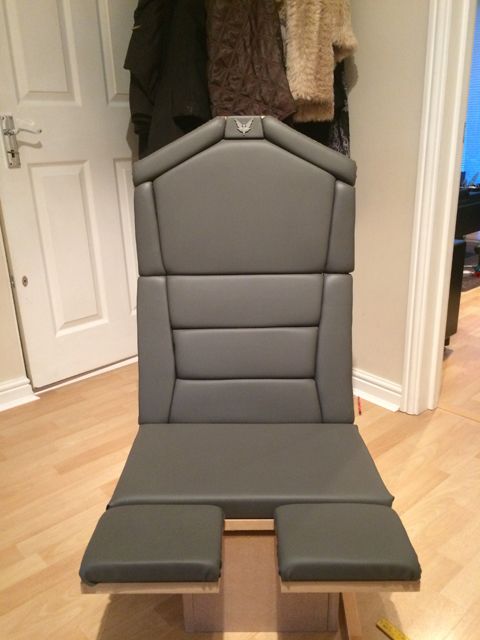
I made the plate for the gap between the shoulder sections. This is where the keyring badge will go. It's just stuck on with a sliver of double sided tape at the moment to show the effect:
I still need to tidy things up a little and paint the base black:
Thanks Enride. I will get some more MDF sheet tomorrow for the sides ... almost there. I still need to reconfigure the bottom panels. The back is at a point where it's really comfortable. The main seat pad less so. I will be shortening it so it extends less. I will add a layer of the foam I used for the back for some additional comfort. I'm going to make a thinner panel which will sit between this shortened main base panel and the 2 front pads. This will be angled upwards (about 45 degrees) to create a shallow bucket seat. The front pads will be shortened also. I've spent a great deal of time on the shape of the seat and want to get it right.
Additionally, I want to drop the back of the seat another 2.5cm. I'm still not completely happy with the recline angle. With these changes, I won't have the tendency to slip forwards in the seat. I want to get in, get comfortable and stay put!
What's next up for you?
The seat is looking exceptional - well done!
Had a random thought about it the other day: I've noticed that after I've played a session using my Saitek X52 Pro that the stick and throttle no longer sit straight on the desk. They tend to move as I use them, and both end up turned slightly inwards. In other words, with my shoulders and elbows out rather than all aligned my natural tendency is to twist them in. It's a bit like those 'natural keyboards' where they have the left-hand keys and right-hand keys in a sort of open v shape.
Have you noticed this or considered it? Your HOTAS units will be aligned dead straight with no room to move. I truly hope they remain comfortable for you!
I noticed this too, so while my throttle is still aligned straight, my joystick is angled to the right (insert crude joke here) and I built my support platform for it accordingly.
Drill slightly bigger holes then use big washer the other side, that way you can adjust then clamp up.
Been following this for a while, love your work.
My sole contribution would be to ask if you're going to file off the chain ring loop at the top of the Elite emblem key fob? I don't think it's part of the emblem design and it's only there to hold the chain.
Yeah I'm sad I know....
Not sad at all. I was trying to cast that little inconsistency out of my mind ... I have thought about it but hadn't struck on an easy way to do it. I'll give it some thought .... damn you
While you think about reaching for the file / cutters / soldering iron? Potentially could the little loop be possible site of a blinking led, indicating the seat is "operating" properly? .. either emergency life support is on, standing by or (non Ironman mode) auto eject system is active? ;p
Man, stop giving me such great ideas! That really is a very cool thought Winterwaker!
 Seriously thinking about the LED ... as I continue to redo the lower seat pads this morning.