First piece for the weekend. Lower seat panel:
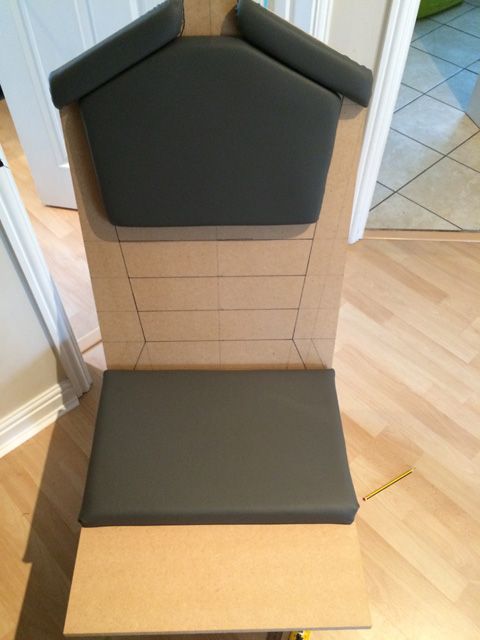
I needed to make this to ensure all the other back pieces fit together properly.

I needed to make this to ensure all the other back pieces fit together properly.
")


For the dashboard, I looked around at parts and boards but eventually plumped for a Derek Speare Designs P1 which I promptly tore apart, re-wired and re-assembled.
http://www.derekspearedesigns.com/p1p2.html
It worked out very cost effective - international shipping was included in the price.
It's a shame that they're not looking to support these types of devices. Looks like the iPac is the way to go for any button boxes as that is a keyboard emulator. I will update previous posts with a warning.
Thereisonlyone
Progress looking great!
Will the angled pieces on the sides of the backrest be a different color?
FD MUST make ED allow for more controllers or I will be a major gamebreaker for me :/
Cant see any reason or even complications to add support for it...
Nice one, jealousy setting in haha.
The wife's letting me use most of the garage for a cinema/games room, I'll have a half decent 7x10 "pod/room" to do something with.
Thanks for the regular updates, it's a very interesting project to watch.
Thanks and yes, a real shame it doesn't currently support these controllers.
If Windows sees the controller, they why not use joy2key, Xpadder or similar?


Front leg pads have been fabricated:
Top view:
I will start on the stowable console section tomorrow. It will obviously sit between the 2 front pads.
Feedback? Comments? Opinions? All welcome.
Fantastic work!
Two questions;
How is the stability? I was going throught previous pics and was wondering if your gonna strenghten the overlapping parts of the bottom so it doesnt break if you sit diwn a bit offcenter?
And the backrest, wont it flex if you put your weight backwards?
Im not calling you fat mate, just challenging the sturdiness of mdf
And secondly, how did you screw the pads to the backrest? Just carefully measured screws straight in from the back?
