You are using an out of date browser. It may not display this or other websites correctly.
You should upgrade or use an alternative browser.
You should upgrade or use an alternative browser.
Community Event / Creation The C-Pod: A DIY Command seat (build log)
- Thread starter ThereIs0nly0ne
- Start date
Strange you should say that, I try and make my designs futuristic military - don't know why though
I'm not going to weather it. If it was more of a show piece, I may have considered it. Technique-wise, I'm a fan of dry brushing (sorry, the model in this pic is extremely small). Basically remove practically all of the paint from the brush and run it over raised areas. Just keep going until it is highlighted sufficiently:
That's the building done for today :smilie:
With you all the way on the futuristic military,oh yes!
")
I think dry brushing is one of the best ways to achieve the "Popping" effect.Also I like the hairspray technique for scratches and wear,although I don't know how well it would work on a larger scale such as this.
LOTR?
Mr Onlyone Kenobi, lol
I had to look up the hairspray technique. Looks interesting! Yes, LOTR.
I had to look up the hairspray technique. Looks interesting! Yes, LOTR.
In a way it's so simple, but just with the cut-outs and bevelling the edges it takes on a whole lot of personality. Really enjoying this, and the fact here is progress on a regular basis. Watching a long build like the Millenium Falcon cockpit on the RPF forums just takes so long. This is more fun
I know someone mentioned this previously in the build but are you considering having a list at the end of materials, tools and some sort of guide? Personally I won't be building anything more than maybe some armrests for my office chair, but I'm willing to bet there will be a fair few people who would be interested.
As for my armrests, this thread has at the very least made me want to add some detail, edges, maybe some textures rather than two bits of wood
Keep it up Commander - it's looking good!
Mr Onlyone Kenobi, lol
I had to look up the hairspray technique. Looks interesting! Yes, LOTR.
I just realised,"The hairspray technique" has a slight whiff of the suspect.Might have to get me one of those patches
and on a lighter note, have finished my deep immersion project, going to order this http://www.ebay.co.uk/itm/FORD-TRAN...CommercialVehicleParts_SM&hash=item1e927954aa
for I, I sir fly the Hauler don'cha know
Haha that's great. I love how the Hauler's dash looks like it is the inside of a regular, every-day kind of car. Those little air vents. Great stuff
In a way it's so simple, but just with the cut-outs and bevelling the edges it takes on a whole lot of personality. Really enjoying this, and the fact here is progress on a regular basis. Watching a long build like the Millenium Falcon cockpit on the RPF forums just takes so long. This is more fun
I know someone mentioned this previously in the build but are you considering having a list at the end of materials, tools and some sort of guide? Personally I won't be building anything more than maybe some armrests for my office chair, but I'm willing to bet there will be a fair few people who would be interested.
As for my armrests, this thread has at the very least made me want to add some detail, edges, maybe some textures rather than two bits of wood
Keep it up Commander - it's looking good!
Thanks Armante. Regarding the regular updates, the 'Terminator technique' is what I choose to use as a way to describe my approach my projects - 'I absolutely will not stop, ever, until I am done'
It's very easy to take your foot off the gas and leave things unfinished. I'm very lucky that I have a supportive wife who encourages me to make these contraptions - the only thing she doesn't like is mess which helps me to get the job done in the smallest amount of time possible, albeit without rushing.I will compile a summary of all the materials, tools and techniques used. One of the main reasons I'm doing this is to hopefully give people the motivation to build something. I remember some of the first arcade machines I'd seen people build and initially though that I didn't have the knowledge or skill to do it. It's really just a case of jumping right in and getting started.
If anyone reading this thread has any questions or comments or is thinking about doing something similar, please do jump in. I would certainly be happy to provide feedback or suggestions. As mentioned before, I find interaction to be extremely motivating particularly when I'm procrastinating a little.
I have been following this thread diligently. Loving your skill and vision! What is the cost like on materials for all this?
Thanks Dinuvian
Running costs so far:Material - £50
MDF - £34
Wood strips - £8.50
Torches - £2
LED displays - £3
Foam - £10
Power supply for the Displays - £3.50
Ribbed rubber sheet (1m x 1m) - £23
Total so far £134
The material is a lot more than I was expecting but once you start ...
To complete, I will need:
Acrylic sheet (probably around £7)
MDF - another £40
Wood strips - £25
Supports for the rudder pedals - may use table legs but I haven't decided yet -£15
Blackboard vinyl (I already have this) - £16
Paint and varnish (I already have this) - £15
Sandpaper - £5
Car body filler (I already have this) - £7
Aluminium bars (I already have these) - £7
LED light strips with power supply £18
It should come in at £289 (say around £300) if I was buying everything but I have some of the above. My estimate for this was around £200 - £250 and excluding the costs for what I already have, the total is £244. There may well be other ideas to incorporate as I go along.
To be honest talking of arcade machines makes me think of my unfinished one. I just havent quite got my head around how I'm going to do the last bit... so it's sitting unfinished in my lounge room and has been almost a year.
What's the last bit Gomisan? I'm curious!
A complete,total and utter lack of knowledge for one thing
I want to,as simply,cheaply,and easily,install a few buttons/toggle switches to the inside of the 'pit,and have a couple of LED's to signify that the switch has been changed.I also want a few LED's which have no apparent purpose,but come on when I flick a switch.
It needs to be cheap,because to cut a long story short,I was thinking about the younger generation who will probably play this game on release,and wanted to show it was possible to do with limited resources etc...Blue Peter with knobs on if you like.
The only things I have are a few LED's,an Arduino Mega (which I haven't even opened yet,and LED strip(although even I can do that one)
Well, you're on the right lines with your Arduino. I'd suggest you open that box up ..
Do a few tutorials (here) from the Arduino pages. The mini programs that control Arduino, are called "sketches," familiarise yourself with the first few, which deal with buttons and LED's .. and you'll also work out how to connect your Arduino to your main computer.
Many functions are possible if you search around Arduino forums and support.
Here's one solution though .. Keyboard.write() [ here ] it turns inputs from Arduino into ASCII key presses .. in other words, assign a key press from any switch you connect to Arduino, giving the same ASCII key press (works like a keyboard) a function in the Elite Dangerous set up, as you would any other key.
Getting the LED to fire up you can either do in software or even put it in series with the switch, though that may depend on the voltage needed by the LED, Arduiono usually runs on a small 3V .. MAYBE 5V but check that on the Mega specs.
(You can control any voltage ultimately but may need more parts (transistor) for that .. a good source for hobby parts in the UK, cheaper than Maplin) is PROTO-PIC ( here )
and ps. If you like this post/ want more advice ...
ANY donations to my (basic rig) build are gratefully received, under my signature
Last edited:
Yes, the cost isn't too bad considering the materials being used. Hopefully I can keep it around this mark.
First job for today is to remove the joystick from the mounting plate and apply it to the lower MDF piece. The mounting holes require a 6cm square and use m4 bolts if anyone needs to know.
Lining things up can be tricky when drilling by hand so I always allow a little wiggly room. I also need to recess the bolts into the panel so they wont interfere with the mounting mechanism.
Recesses drilled (washers are used to strengthen and avoid the bolt carving into the MDF):
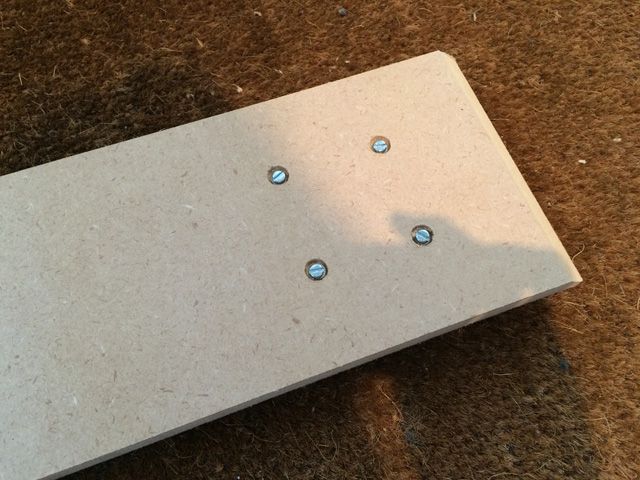
I always mark the drilling points from the side which will attach to the peripheral. That way, I know it will be more accurate.
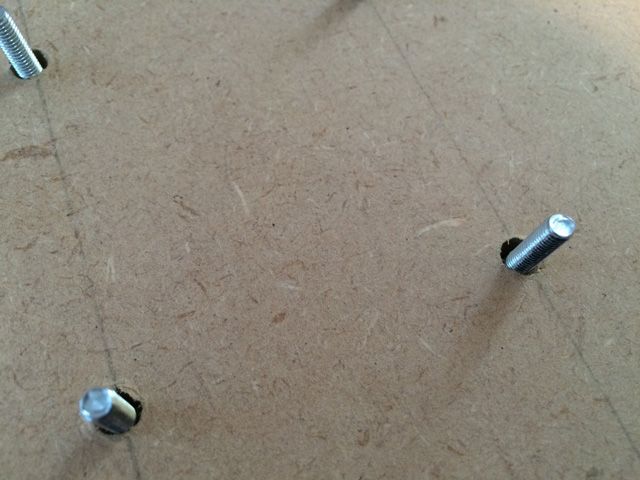
Everything lines up ... except the bolts are around 5mm to long. Damn.

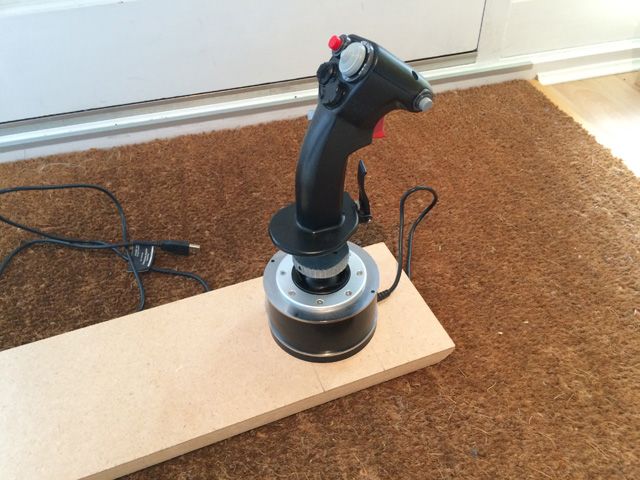
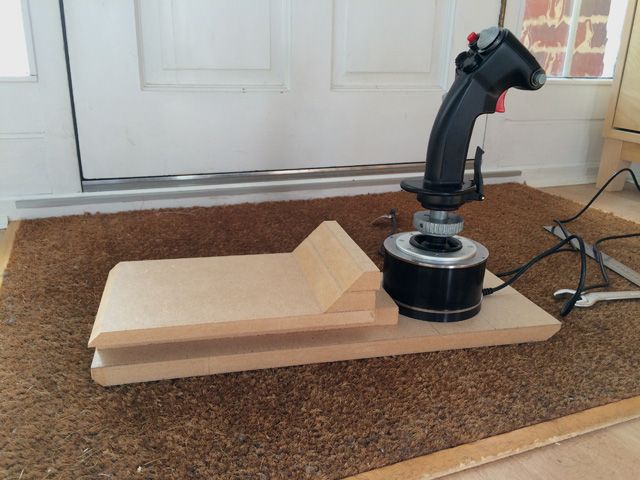
A few more pieces cut for the stick case. This will have a different profile to the throttle - there will be more of a tail to this. The reason is to balance the stick in the middle of the front, taller section.
I've also purchased a couple of Neutrik connectors to allow the HOTAS to be plugged in:
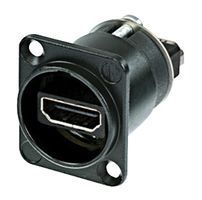

I've also purchased a couple of Neutrik connectors to allow the HOTAS to be plugged in:

Last edited:
Well, you're on the right lines with your Arduino. I'd suggest you open that box up ..
Do a few tutorials (here) from the Arduino pages. The mini programs that control Arduino, are called "sketches," familiarise yourself with the first few, which deal with buttons and LED's .. and you'll also work out how to connect your Arduino to your main computer.
Many functions are possible if you search around Arduino forums and support.
Here's one solution though .. Keyboard.write() [ here ] it turns inputs from Arduino into ASCII key presses .. in other words, assign a key press from any switch you connect to Arduino, giving the same ASCII key press (works like a keyboard) a function in the Elite Dangerous set up, as you would any other key.
Getting the LED to fire up you can either do in software or even put it in series with the switch, though that may depend on the voltage needed by the LED, Arduiono usually runs on a small 3V .. MAYBE 5V but check that on the Mega specs.
(You can control any voltage ultimately but may need more parts (transistor) for that .. a good source for hobby parts in the UK, cheaper than Maplin) is PROTO-PIC ( here )
and ps. If you like this post/ want more advice ...
ANY donations to my (basic rig) build are gratefully received, under my signature
Crikey! That is an massive help! it is just possible you've saved me here.+1 for a start.I reckon anyone else checking out this guys great work,and who feels inspired by it,will find that advice invaluable also.
Donations wise...Well I was given this special bean yesterday in exchange for only £100 (dodgy Tesco eh) but I would gladly reward you with it after your help.
Thanks Dinuvian
Material - £50
MDF - £34
Wood strips - £8.50
Torches - £2
LED displays - £3
Foam - £10
Power supply for the Displays - £3.50
Ribbed rubber sheet (1m x 1m) - £23
Total so far £134
The material is a lot more than I was expecting but once you start ...
To complete, I will need:
Acrylic sheet (probably around £7)
MDF - another £40
Wood strips - £25
Supports for the rudder pedals - may use table legs but I haven't decided yet -£15
Blackboard vinyl (I already have this) - £16
Paint and varnish (I already have this) - £15
Sandpaper - £5
Car body filler (I already have this) - £7
Aluminium bars (I already have these) - £7
LED light strips with power supply £18
It should come in at £289 (say around £300) if I was buying everything but I have some of the above. My estimate for this was around £200 - £250 and excluding the costs for what I already have, the total is £244. There may well be other ideas to incorporate as I go along.
What's the last bit Gomisan? I'm curious!
This is actually very reasonable indeed.The MDF is much more pricey than you would think isn't it? What thickness of sheeting (MDF) are you using again?
Regarding the powers supply,(that looks dirt cheap) what is the voltage of that then,and without taking your whole day up,do you have a brief explaination on how to wire it up? Electronics is absolutely my failing,parents would not let me sneeze anywhere near anything at all that didn't have a wind-up key.
Yes, it's not too expensive tbh. The racing simulator ran to about £2500 (including the equipment)! 18mm MDF is being used for most of the build with 12mm for some sections.
The power supply was bought from eBay (Argos on-line). It was £3.45 and comes with an adapter to screw in wires. Really cheap if you ask me.
http://www.ebay.co.uk/itm/221436532672?_trksid=p2059210.m2749.l2649&ssPageName=STRK:MEBIDX:IT
Im very impressed by your woodworking and how fast you are progressing!
The design look really great, and every picture you show more pieces that look professionally cut! If you hadnt told us, I would believe these to be cut at a cnc-table!
Thanks Attackmack. It's far from CNC perfect but I do spend as much time a is practical making sure everything lines up. Things are often out by the odd mm but if it's overcut slightly, it's easy to rectify once the finishing is started. Some of the pieces have to be cut with a jigsaw as well as they're too small for router work.
More pieces cut:


I'll start the sides next.
Great work keep it coming.
Quick question are you able to change/disconnect the Joystick if its fails without total disassembly?
Quick question are you able to change/disconnect the Joystick if its fails without total disassembly?
Great work keep it coming.
Quick question are you able to change/disconnect the Joystick if its fails without total disassembly?
Cheers Adam. Yes, the rear portion of both these cases are covers rather than fixed. The throttle will be screwed in from the top so it'll be easy to lift out. The bolts for the stick should be accessible from underneath for removal also. I'm still figuring out how to ensure the covers don't slide but it's really just a matter of cutting a few small retaining pieces.