You are using an out of date browser. It may not display this or other websites correctly.
You should upgrade or use an alternative browser.
You should upgrade or use an alternative browser.
Community Event / Creation The C-Pod: A DIY Command seat (build log)
- Thread starter ThereIs0nly0ne
- Start date
Marry me. Then we can share your cockpit")
It looks REALLY good assembled .. I mean really good.
How do you feel about your 6mm decision at this point?
Think it looks a little tricky in photo but surely fingertips tell the truth ..
Marry me. Then we can share your cockpit
Lol, I may need to look for an alternative soon. My wife's looking at the mess I'm making with a raised eyebrow
It looks REALLY good assembled .. I mean really good.
How do you feel about your 6mm decision at this point?
Think it looks a little tricky in photo but surely fingertips tell the truth ..
Thanks Winterwalker. It seems fine but time will tell. I have an idea to try some 2mm plastic card which should be good to drill but I'll leave it as is at the moment - I'm very pleased with it. The dimensions of the holes from the template seem spot on which is great.
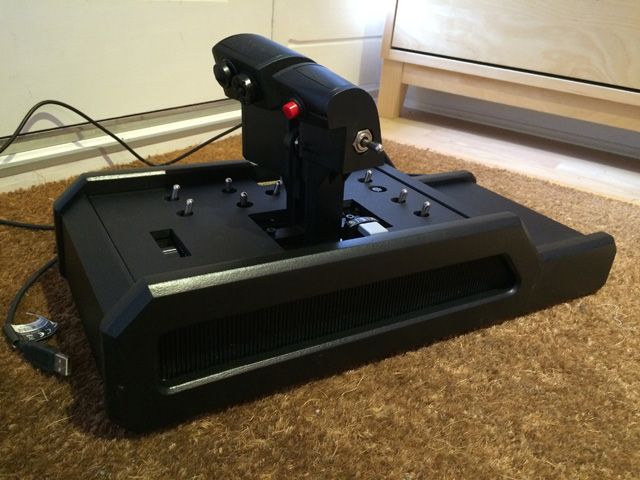
I notice though that the switches is quite a bit down from the coverplate. Also, do the toggles have enough freedom of movement, it almost looks as if they are resting on the side of the holes?
Whatever the case, it looks fantastic and I wouldnt ever dream of remaking them, but if you do then cutting the holes in an oval shape could solve the potential issue!
Whatever the case, it looks fantastic and I wouldnt ever dream of remaking them, but if you do then cutting the holes in an oval shape could solve the potential issue!
I notice though that the switches is quite a bit down from the coverplate. Also, do the toggles have enough freedom of movement, it almost looks as if they are resting on the side of the holes?
Whatever the case, it looks fantastic and I wouldnt ever dream of remaking them, but if you do then cutting the holes in an oval shape could solve the potential issue!
Or counter-sunked
Anyone fancy trying a test purchase of a name badge [ link ] for me?
First to pm me gets their money returned (and a free badge)?
I'd like to know if the instructions are clear and (more importantly) if the add of name and address to paypal donation message works OK?
I notice though that the switches is quite a bit down from the coverplate. Also, do the toggles have enough freedom of movement, it almost looks as if they are resting on the side of the holes?
Whatever the case, it looks fantastic and I wouldnt ever dream of remaking them, but if you do then cutting the holes in an oval shape could solve the potential issue!
Cheers Enride. All the switches seem to be clear of the sides of the holes - just! I may pick up a couple of sheets of plasicard anyway and try just for the hell of it
Finally finished the panel after pretty much a full day's work. There is still some additional work to do to integrate it into the case more effectively.
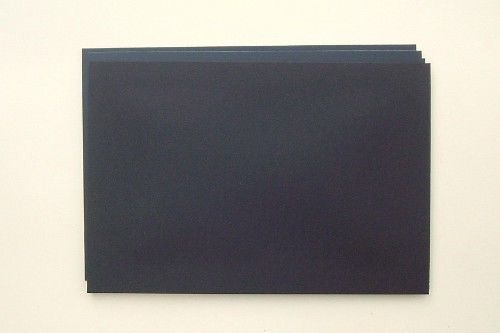
Covered with vinyl:
Edges painted (thumbs used to wipe any seepage on the surface - messy business):
Top in-place:


I have been trying to find this thread for a couple of days.Not sure why it wasn't showing anywhere.Anyway,truly outstanding man!
I have been trying to find this thread for a couple of days.Not sure why it wasn't showing anywhere.Anyway,truly outstanding man!
Thehy moved it from General to Fan Creations a couple of days ago, I couldnt find it either but luckily had it subscribed!
Finally finished the panel after pretty much a full day's work. There is still some additional work to do to integrate it into the case more effectively.
Covered with vinyl:
Edges painted (thumbs used to wipe any seepage on the surface - messy business):
Top in-place:
Amazing!
Which company is selling this stuff?
Perfect quality!
I wanna buy one! :smilie:
Seeing it, 1 thought rushed through my mind..
Tank cockpits!!!!
Keep up the good work!!
Hmm.... if ED implemented optional 'hold for on' functionality for various buttons that are currently only toggles, you could use conventional double throw on-off switches and add illuminated negative labels via the second channel that only lit up when e.g. the Landing Lights were switched on or the Cargo Scoop was deployed...
I have been trying to find this thread for a couple of days.Not sure why it wasn't showing anywhere.Anyway,truly outstanding man!
Glad you managed to find it again Ven. Welcome back
Amazing!
Which company is selling this stuff?
Perfect quality!
I wanna buy one! :smilie:
Seeing it, 1 thought rushed through my mind..
Tank cockpits!!!!
Keep up the good work!!
Thanks very much Silent Run. It does look a bit tank-like with the general shape and ribbed rubber inserts.
Hmm.... if ED implemented optional 'hold for on' functionality for various buttons that are currently only toggles, you could use conventional double throw on-off switches and add illuminated negative labels via the second channel that only lit up when e.g. the Landing Lights were switched on or the Cargo Scoop was deployed...
Indeed. It would be great to have better support for these switches. Hopefully ED can sort it out. Illuminated labels would be very nice, I have to say.
I won't be able to make much progress today unfortunately.
I did order some 2mm plasticard sheets yesterday so will be making a thinner panel. Cost £4.

Glad you managed to find it again Ven. Welcome back
Thanks very much Silent Run. It does look a bit tank-like with the general shape and ribbed rubber inserts.
Indeed. It would be great to have better support for these switches. Hopefully ED can sort it out. Illuminated labels would be very nice, I have to say.
I won't be able to make much progress today unfortunately.
I did order some 2mm plasticard sheets yesterday so will be making a thinner panel. Cost £4.
aaaaaw….so what are we gonna watch today then!??
Will you be continuing on the seat the coming week or the pods?
Last edited:
aaaaaw….so what are we gonna watch today then!??
Will you be continuing on the seat the coming week or the pods?
We're going to see some more progress on your design hopefully
I need some more epoxy so have to wait for that to arrive before I can permanently assemble the cases. Once here, I will progress in the evenings. I will also have a go at making the thinner panel when the plasticard arrives. Artwork will also be progressed but I'm also quite linking the plain look of the panels. I also need to figure out the best way of making the lids secure - I have some ideas on that.
Whoops, missed this part of the post. I really should stop scrolling past and just looking at the pictures. ^_^ *off to find the measurements of your throttle*Thanks and not yet Tyrope! I'd be very interested in seeing what you can come up with. Generic labels would be great for now
edit: found a template image that'll do nicely in This post I hope winterwalker doesn't mind me taking his image as a base.
Last edited:
Whoops, missed this part of the post. I really should stop scrolling past and just looking at the pictures. ^_^ *off to find the measurements of your throttle*
edit: found a template image that'll do nicely in This post I hope winterwalker doesn't mind me taking his image as a base.
Thanks for that Tyrope, I'd be very interested to see what you can come up with
Whoops, missed this part of the post. I really should stop scrolling past and just looking at the pictures. ^_^ *off to find the measurements of your throttle*
edit: found a template image that'll do nicely in This post I hope winterwalker doesn't mind me taking his image as a base.
Not at all .. grab any of them ..
recommend you verify the hole spacings though, I lifted the original from another site,
here
and haven't measured the throttle switch positions myself ..
Last edited:
Thanks for that. I've decided to use the same source, to make sure there's no "copy of copy" errors.Not at all .. grab any of them ..
recommend you verify the hole spacings though, I lifted the original from another site,
here
and haven't measured the throttle switch positions myself ..
I suggest other CMDRs who are thinking of pitching their ideas to do the same.My inspiration was the overhead panels in modern airliners, like the Airbus A320-214 and the Boeing 777
After upscaling to 1000px width (1620 height) I've got quite the room to work with (Also to ensure that 1-2 pixels off doesn't impact the final product too much) I've got a nice template (magenta = cutout areas):

Found a nice font to use, free for personal use. Dodger on dafont. This of course can be changed pretty easily.
Now, for the dummy labels:

Last edited:
Rafe Zetter
Banned
I did order some 2mm plasticard sheets yesterday so will be making a thinner panel. Cost £4.
I was going to say another alternative is I have a sheet of 3mm thick aluminium / acrylic / aluminium sheet that I would have been willing to cut a bit from to mail to you as a "reward" for the time you've been taking to do this thread and show everyone, but it seems you won't need it.
I think the 2mm will be better as the rotary switches seem to have drowned in the 6mm thick stuff
- but your work work won't be wasted as now you have a sturdy template for any new cover you want to make.