Community Event / Creation The C-Pod: A DIY Command seat (build log)

Glad you made this change. Have you tried drilling this stuff, last time I did, many years ago, I had to make a sandwich of it between metal (or wood). Granted I was drilling quite large holes.

Yeah, ive tried drilling 3-6mm of this and its sooo easy to crack it. Drills with shallow cutting angle, lowspeed and as you say sandwiching the plastic and it might be fairly easy.
Then again, 2mm shouldnt be much of a problem.

Just make sure you wear safety glasses, when this cracks i wouldnt want to catch a splinter in the eye!
 
Thanks everyone for your ongoing help and contributions. I've worked a bit with plasticard (HIPS) before and found it ok to drill holes in. As has been mentioned, the bit and drilling speed is important. I intend to drill a small pilot hole and a spade bit so believe that will work ok. I will clamp it down before starting and wear my goggles :cool:
 
Last edited:
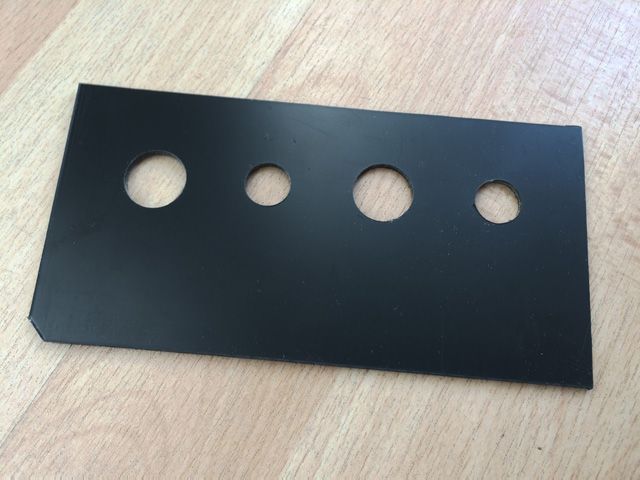
I remembered I had some pieces of HIPS in one of my project bags in the attic so I went to fetch it to test the drilling process out. Any potential concerns I may have had were completely unfounded. Using a spade bit with the plasticard clamped in place, holes were drilled with extreme ease. I used a power drill/driver for this which allows me to go pretty slowly. The holes came out superbly well. As with any cut using plasticard (drilling or scoring/cutting) there's always a slight lip around the edges. This can easily be removed with a decent medium/high grit sandpaper.


Back to work tomorrow :(

Edit: I have removed the screws from the throttle fascia and the panels still seem to be held in-place. I now don't have to concern myself with drilling holes for those. That was one of the reasons for using a slightly thicker material in the first place - I like things to look as seamless as possible.
 
Last edited:
I have removed the screws from the throttle fascia and the panels still seem to be held in-place.

I'm glad you checked this, I've been too chicken to go anywhere near my one with a screwdriver... It's a £300+ mistake waiting to happen when I do :D
 
I'm glad you checked this, I've been too chicken to go anywhere near my one with a screwdriver... It's a £300+ mistake waiting to happen when I do :D

Long gone are the days where I figure I can't repair something if I take it apart! That's part of the fun anyway :)

Not to stress you or anything, but im reeaaaaly looking forward to see you continue work on the seat :)

Yes, I wanted to get the pods out of the way so I can work on a really comfortable position for these. I'm thinking about stealing your idea and making the upper back section angled forwards very slightly. I'll need to re-cut some pieces but the old sections will get recycled into something else :) Like you, I have a busy schedule for the next few weeks so time available to work on this will be at a premium.

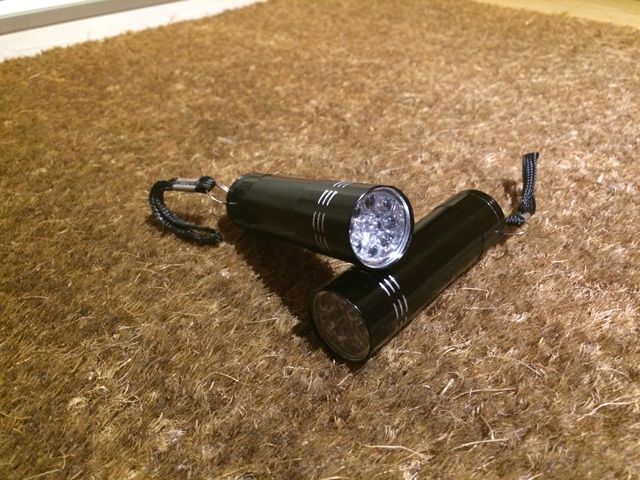
The torches arrived today. They have a nice light cluster layout. I'll figure out where I'm going to put these ... probably in the headrest somewhere.

 
Ah nice, looking forward to that!

By all means, if you find any inspiration or design ideas from my posts then im al the more happy to help :)
Its the reason we post in these threads, to get inspired and to give inspiration!
 
I remembered I had some pieces of HIPS in one of my project bags in the attic so I went to fetch it to test the drilling process out. Any potential concerns I may have had were completely unfounded. Using a spade bit with the plasticard clamped in place, holes were drilled with extreme ease. I used a power drill/driver for this which allows me to go pretty slowly. The holes came out superbly well. As with any cut using plasticard (drilling or scoring/cutting) there's always a slight lip around the edges. This can easily be removed with a decent medium/high grit sandpaper.


Back to work tomorrow :(

Edit: I have removed the screws from the throttle fascia and the panels still seem to be held in-place. I now don't have to concern myself with drilling holes for those. That was one of the reasons for using a slightly thicker material in the first place - I like things to look as seamless as possible.

Good stuff bud.I like that idea with the plasticard.I use it on miniatures to convert them into something new,it's easy to work with too.
 
Good stuff bud.I like that idea with the plasticard.I use it on miniatures to convert them into something new,it's easy to work with too.

Cheers Ven.

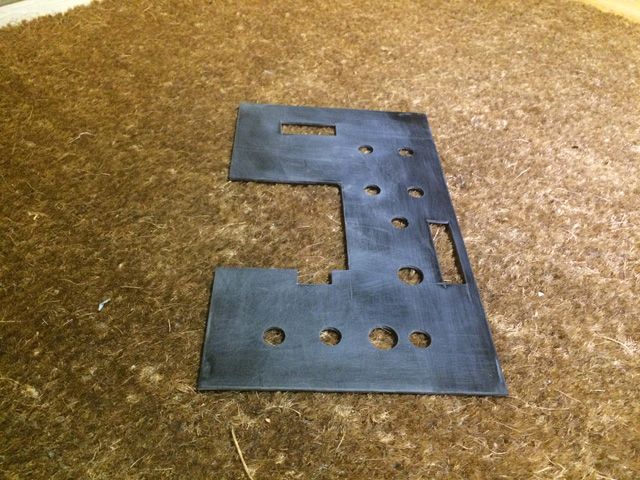
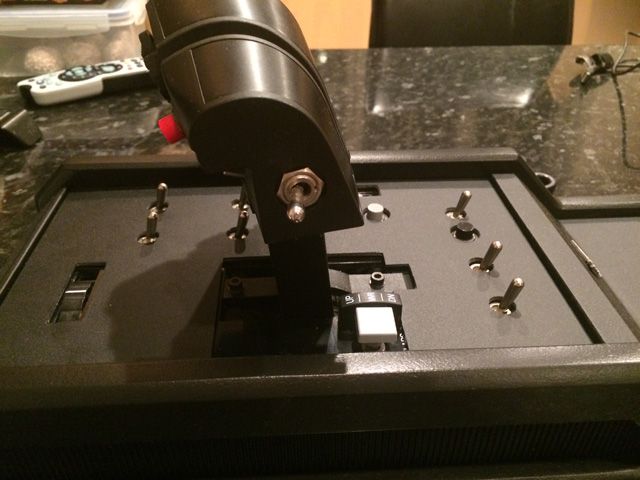
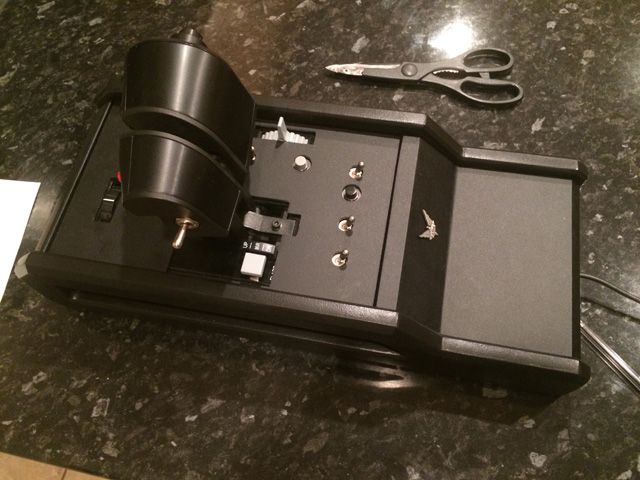
I spent the evening re-cutting the top plate for the throttle. It's a good deal thinner. The throttle itself will have to be raised a little to get it flush with the front section and the lid.


There's still a little trimming and tidying up to do yet.
 
Last edited:
Cheers Ven.

I spent the evening re-cutting the top plate for the throttle. It's a good deal thinner. The throttle itself will have to be raised a little to get it flush with the front section and the lid.


There's still a little trimming and tidying up to do yet.

Much better looking!
 
I agree also, it looks much better now and i like when the bottom rings of the switches are visible, its a nice detail!
 
I agree, good looking. Does it feel OK to the touch for you? I can imagine the first version felt more solid, but I think this looks more "technological", and for me cuts it much better, from the simulation / simulator point of view.

Thanks for the 'much better' responses :) The first version was more sold but to be honest, 2mm plasticard is fairly sturdy stuff. It was a right pain to cut the squared access holes though.
 

Rafe Zetter

Banned
Thanks for the 'much better' responses :) The first version was more sold but to be honest, 2mm plasticard is fairly sturdy stuff. It was a right pain to cut the squared access holes though.

Sounds like you need something called a "chisel" :) very handy things for cutting square vertical edges, can get some good cheap ones from Lidl or aldi believe it or not; yes honestly, they are pretty darn good the ones they sell, they are good steel that will take a really good edge and can be sharpened with ordinary wet and dry paper freehand. (I can give you links if you're interested)
 
Sounds like you need something called a "chisel" :) very handy things for cutting square vertical edges, can get some good cheap ones from Lidl or aldi believe it or not; yes honestly, they are pretty darn good the ones they sell, they are good steel that will take a really good edge and can be sharpened with ordinary wet and dry paper freehand. (I can give you links if you're interested)

Lol! You know, I hadn't even thought of that! I have a set so will make another at some point using that mysterious and magical 'chisel' tool you mentioned ;)
 
Lol! You know, I hadn't even thought of that! I have a set so will make another at some point using that mysterious and magical 'chisel' tool you mentioned ;)

Aaah, the mysterious "Chisel", way up there with aether and atlantis ;)
But if you put a chisel to the acrylic, wont it break?
 
Aaah, the mysterious "Chisel", way up there with aether and atlantis ;)
But if you put a chisel to the acrylic, wont it break?

Acrylic would definitely shatter and splinter. Plasticard is comparatively malleable so may not - I think the idea would be to score quite deep lines and use that as a guide. Definitely worth a go as cutting through even 2mm is really tough going - surprisingly so.
 
Glad you managed to find it again Ven. Welcome back

Well I was under the impression I had subscribed to it,and yet it appeared I wasn't?? I was in fact subscribed to something else I hadn't even looked at,nor was interested in :) But never mind my problems haha

- - - - - Additional Content Posted / Auto Merge - - - - -

Acrylic would definitely shatter and splinter. Plasticard is comparatively malleable so may not - I think the idea would be to score quite deep lines and use that as a guide. Definitely worth a go as cutting through even 2mm is really tough going - surprisingly so.

I know what you mean with the plasticard.Cutting a length is easy,you just score it and snap it off,but actually cutting holes is another matter entirely.Patience young padawan;)
 
Well, not being able to make any progress has been a little frustrating. I've also done my back in horsing around this weekend with my wife (no, not what you think ...).

The mic on my g930 headset snapped off so I've consoled myself by buying a new one. I really want to try out VoiceAttack and no microphone is kind of a deal breaker. The epoxy I ordered hasn't turned up yet either :(
 
Back
Top Bottom