Community Event / Creation The C-Pod: A DIY Command seat (build log)

I've covered the real lid. The edges will be painted black so there will be no visible wood to be seen once in-place.


Emblem close-up:


Rear view:


This on it's own is worthy of better coverage.I bet there are many out there wondering how to do something a bit special with the HOTAS.
I might have to start on the expletives soon,i'm running out of superlatives;)
 
Thanks very much for the comments Ven Jarvik, it's greatly appreciated. I'm really happy to share my ideas and techniques tbh. I can't understand people who won't do that either. As mentioned, one of the reasons I make these build logs is to give people some ideas to use. It's great to see what other people end up with and any improvements they make.

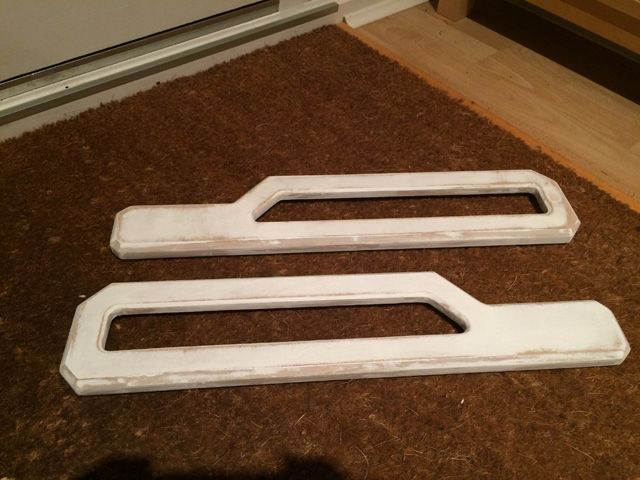
The most time consuming part of all of my projects is finishing the woodwork. It may not look like much but these 2 pieces have taken in excess of 2 hours to reach their current state. Filling, sanding, filling, undercoating twice, filling, sanding and then a final sand with a higher grit paper. They're now in a state where I'll be able to apply the flat black tomorrow morning. No doubt there will be one more round of filling and sanding before I put the final 2 flat black coats on followed by the polyurethane varnish.


I'll be sure to post a video when done. I did post one for the R-Pod - my first YouTube upload!

Well done, cant wait to see the throttle platform done and put together!
I must say that the Elite emblem really makes it top notch! If FD isnt noticing this build, they are blind, this is one for the newsletter without a doubt!

Another question, I understand putting vinyl on these pieces would be difficult, if even possible. But why not paint all pieces?
Does it save time, or maybe the vinyl stand against wear and tear better then the paint?

Sorry if youve mentioned this earlier, in which case ive missed it.

Thanks Attackmack, I can't wait either :) My ribbed rubber sheet should hopefully arrive in the next couple of days so I should be able to fill the window sections out too.

The reason for using vinyl rather than paint is twofold. Firstly, as the casing is all black, using different textures breaks the shapes into distinct sections making it much more interesting to look at imho. Secondly, it's a damn site faster to skin with vinyl than to paint! Even if it wasn't, I'd definitely go for the vinyl.
 
You mean like almost exactly like these ones ?? :D

Hope so !! (They're a bit dear really, but I'm having to have them made and posted to me first for QC, as each one is unique .. I'd have liked to have done for £4 but eBay won't let me edit the listing now anyway so ...)

I tried your Ebay link and it says the item is no longer available. Are you going to keep making these? I was hoping to order a couple. (sorry to be O.T.)
 
Hi, just wanted to add in my thanks for this wonderful project! I'm sure there are many more of us watching with glee, but not getting around to posting ........

I've been keeping up with your progress almost since day one, and haven't really put fingers to keyboard to say thank you and add my admiration because every post results in a "I could really do with that" moment and leaves me thinking of how to fit it in with my rejigged desktop layout.

You've prompted me into moving away from a standard office layout based around a keyboard and mouse (with a Razer Nostromo for MMOs) in my mancave/gaming room to thinking very seriously about incorporating the work you're doing (a very difficult act to follow! :smilie:) into something far more fun and more in keeping with the many hours of fun I intend to spend running Elite: Dangerous!

Keep up the awesome work and good on you :cool:
 
Thanks for the link AttackMack and for your information ThereIsOnlyOne! :)

It looks pretty nice and with a lot of detail... Though while I was looking at it mental images of Battlestar Galactica rushed through my head and a weathered Viper...***! I'm seeng things :eek:

:D

Ven Jarvik's reply made me think about a 3D printer...and parts you wouldn't be able to curve from wood or make with cartdboard like handles of joysticks and throtles... ;) and his recomendations about materials. Can someone rent time on a 3D printer somewhere anyway..but that s just food for thought.

I've covered the real lid. The edges will be painted black so there will be no visible wood to be seen once in-place.


Emblem close-up:


Rear view:


WOW! Amazing work! :eek:
Keep it coming man!

Taht's exactly what drove me to the thread. I ve seen your initial posts about the vinyl covering and i was eager to see the project as it moves along.

It's going to be a very nice cockpit methings! This is professional job you are doing man. :smilie:
 
https://www.youtube.com/watch?v=DUXy8mzSnmE

This video at 0:26 seconds and after after 0:32 until 0:36.
Turn the sound volume off (horrible music) and don't pay attention to the film except the scenes in those marks above.

That's what is missing from your beautifull cockpit mate once it gets finished!

:cool:

It was the only youtube video I could find about this movie with the specific scenes showing that screen.
 
To say I am surprised by the level of interest in this project would be a gross understatement and I am genuinely taken aback by many of the comments posted here. It really does help in providing the motivation to move forwards with the build, follow through with the ideas I have and create something I can be really satisfied with.

With each new project undertaken, I've focused more and more on including the ideas and design elements I've had in mind. It's incredibly easy to skip certain aspects if they look like they will take too much time to implement or present too much of a challenge. Believe it or not, comments, feedback and suggestions received are the single most important factor in driving me to deliver something which is approaching the best quality I'm able to achieve. I say approaching as there's always a trade off between progress and quality.

This may sound incredible sickly, but everyone who has posted here can consider themselves an integral part of this build. Without the feedback and comments, progress would no doubt be a lot slower and maybe even of lesser quality. So, a really genuine thank you from me and please do continue to post, provide feedback and ideas and point out any potential design issues you may see.

Just a thought for anyone thinking about starting a project; it only requires a fairly limited set of tools (I borrowed tools for my first project), some time patience and commitment but the level of satisfaction from creating something is immense. What you see here is actually fairly simple to do once the basics skills are acquired. As andygood posted:

"Every DIY'er has the God given right to stand back and admire their handiwork, no matter how bad the results..."


Hi, just wanted to add in my thanks for this wonderful project! I'm sure there are many more of us watching with glee, but not getting around to posting ........

I've been keeping up with your progress almost since day one, and haven't really put fingers to keyboard to say thank you and add my admiration because every post results in a "I could really do with that" moment and leaves me thinking of how to fit it in with my rejigged desktop layout.

You've prompted me into moving away from a standard office layout based around a keyboard and mouse (with a Razer Nostromo for MMOs) in my mancave/gaming room to thinking very seriously about incorporating the work you're doing (a very difficult act to follow! :smilie:) into something far more fun and more in keeping with the many hours of fun I intend to spend running Elite: Dangerous!

Keep up the awesome work and good on you :cool:

Thanks Sneakin and you're very welcome. If I'm honest, the initial idea was for flight sims and was going to be a for a setup I could attach to my desk. It was only when Elite came along and I saw the in-game ship cockpit that I changed my mind.

Attackmack posted a link to his project, it looks excellent with some great ideas. Definitely worth checking out.

Thanks for the link AttackMack and for your information ThereIsOnlyOne! :)

It looks pretty nice and with a lot of detail... Though while I was looking at it mental images of Battlestar Galactica rushed through my head and a weathered Viper...***! I'm seeng things :eek:

:D

Ven Jarvik's reply made me think about a 3D printer...and parts you wouldn't be able to curve from wood or make with cartdboard like handles of joysticks and throtles... ;) and his recomendations about materials. Can someone rent time on a 3D printer somewhere anyway..but that s just food for thought.


WOW! Amazing work! :eek:
Keep it coming man!

Taht's exactly what drove me to the thread. I ve seen your initial posts about the vinyl covering and i was eager to see the project as it moves along.

It's going to be a very nice cockpit methings! This is professional job you are doing man. :smilie:

https://www.youtube.com/watch?v=DUXy8mzSnmE

This video at 0:26 seconds and after after 0:32 until 0:36.
Turn the sound volume off (horrible music) and don't pay attention to the film except the scenes in those marks above.

That's what is missing from your beautifull cockpit mate once it gets finished!

:cool:

It was the only youtube video I could find about this movie with the specific scenes showing that screen.

Thanks Silent Run. If I had the room, I'd love a D-Box (or similar) motion platform just to add another dimension to the experience. I know it wouldn't necessarily be true to life but immersion in games and simulation often requires suspension of disbelief. The design of that craft you posted looks great! It's also nice and compact.

I would really love a 3D printer but lord knows how many hours I'd consume playing with it :)

Almost time to get started with the painting ...
 
Last edited:
Wow, this is looking outstanding!

Z...
Thanks very much Zeeman :)

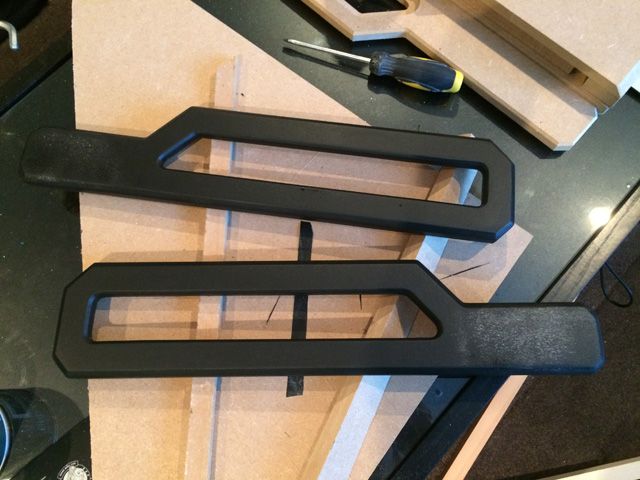
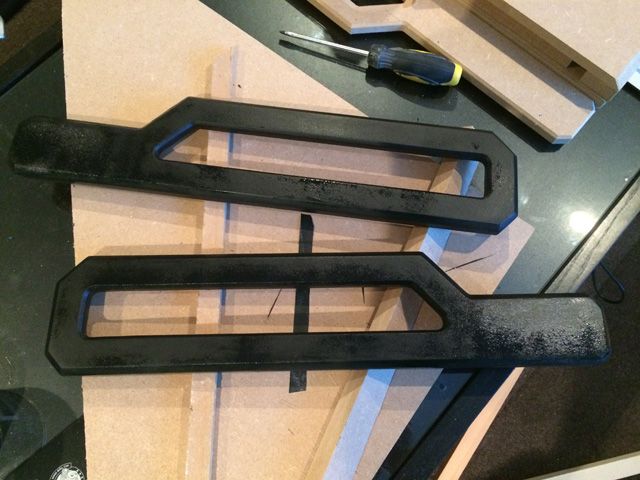
A few pictures of the flat black paint process.

2 coats (nearly - the tail has only 1 coat as I need to hold the pieces somewhere) of flat black applied:

Wet (it looks terrible and inconsistent at this point):


Drying (much better):


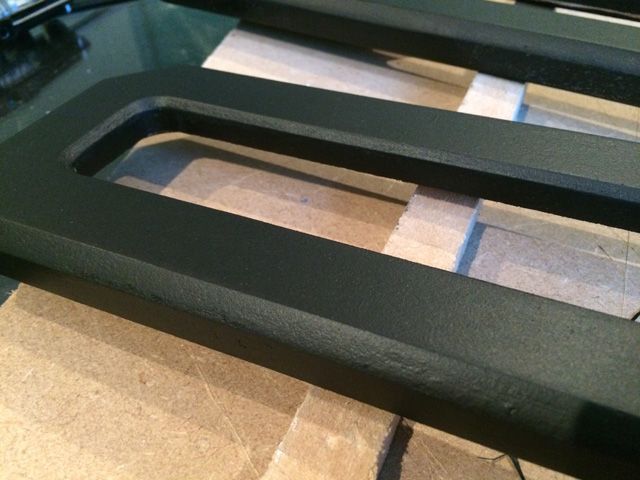
Close-up (this starts to bring out the inconsistencies and highlights where extra finishing needs to be done):


Inconsistencies will be filled and the paint will be sanded back with a high grit sandpaper before another coat is applied.

Thats the difference between a good craftman and myself. While you see ways to make it better, and do it, I would be happy to have such great result!
The inconsistencies you see wouldnt even cross my mind to try and fix :)
Im more and more impressed by each progress update! Keep em coming!


BTW, Enride is my new forumname to be consistent with my ingame personna, i war earlier called Attackmack.
 
I tried your Ebay link and it says the item is no longer available. Are you going to keep making these? I was hoping to order a couple. (sorry to be O.T.)

Sorry Gomisan .. I've no idea why eBay listing isn't working, it says it's live here. GAH!

Anyway .. for time being can continue to do it, "The African Way" ..
VERY GRATEFUL to know if this page makes sense ... [ Cmdr ID ]

:D
 
Well, like a lot of people, I've been lurking since day one on this thread. I look forward to every update you do here mate!

I only wish I actually had enough room in my tiny house to do what you're doing, but, alas, it's not to be. I've decided to console myself (pun intended ;)) with building a small mount for my Thrustmaster T Flight and keyboard instead.

Keep up the sterling work my friend :cool:

Thanks Duckfather, I'll be sure to keep the updates coming :) Any personalisation is a fun thing to do imho and greatly adds to the enjoyment of any game played.

Thats the difference between a good craftman and myself. While you see ways to make it better, and do it, I would be happy to have such great result!
The inconsistencies you see wouldnt even cross my mind to try and fix :)
Im more and more impressed by each progress update! Keep em coming!


BTW, Enride is my new forumname to be consistent with my ingame personna, i war earlier called Attackmack.

Cheers Atta ... er ... Enride. I'm a bit obsessive when it comes to finishing but I'm now at the stage where I need to move on. Just finished with my second round of filling and sanding since the flat black was applied. One more coat of flat black and I'll be able to post some more pics.
 
It's a top job .. wonderful stuff (hope I don't run out of superlatives!!)

Do I understand right, that you plan to do a facia to go over the Warthog, relabelling switches? Is that right?

Thanks and that's correct Winterwalker. The throttle will be fully encased. I want to make swap-able panels so I can use them for multiple games.
 
Back
Top Bottom