Wow TIOO! That's looking mighty fine!
You are using an out of date browser. It may not display this or other websites correctly.
You should upgrade or use an alternative browser.
You should upgrade or use an alternative browser.
Community Event / Creation The C-Pod: A DIY Command seat (build log)
- Thread starter ThereIs0nly0ne
- Start date
Great work on Geraint Winterwalker. I'd love to see a video of that if/when you're ready to post. Space can be a lonely place unless you have a Geraint to keep you company ")
Thanks PF It's not going as fast as I'd like but I'll keep plugging away at it.
Thanks PF
It's not going as fast as I'd like but I'll keep plugging away at it.Experienced Pythoneer here, in case ye need some assistance. PM me if/when you want my help with an email address for future communication.I'm an absolute 100% total and utterly complete novice with Python (1 1/2 days now), so have been scrounging websites for bits of code. I think I can add Geraint!'s chattering, to the GUI.
edit: Oh and on-topic, lookin' very nice, OOIT! I might have to grab that font yer using on the side and update the mock-up throttle layout I made.
Great work on Geraint Winterwalker. I'd love to see a video of that if/when you're ready to post. Space can be a lonely place unless you have a Geraint to keep you company
Thanks PF
Video on demand then ...
With apologies for shaky camera work ...
Stanley Kubrick I ain't !
only a couple of expressions ( 2 of 9 ) mostly to show the start up
.. shot at an angle, to avoid glare .. the face is actually a circle circle
[video=youtube_share;_efsxLPzoeI]http://youtu.be/_efsxLPzoeI[/video]
Experienced Pythoneer here, in case ye need some assistance. PM me if/when you want my help with an email address for future communication.
Many thanks Cmdr Tyrope .. May very well take you up on that kind offer ..
Will have a good think about architectures tomorrow and be in touch !!
Last edited:
Thanks Tyrope The font is a nice one.
That looks great Winterwalker! Thanks very much for posting that video and really interested in seeing this develop so please continue with the updates
The font is a nice one.That looks great Winterwalker! Thanks very much for posting that video and really interested in seeing this develop so please continue with the updates
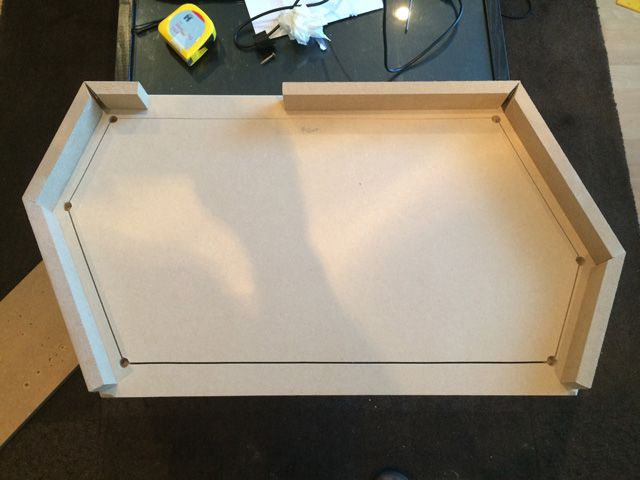
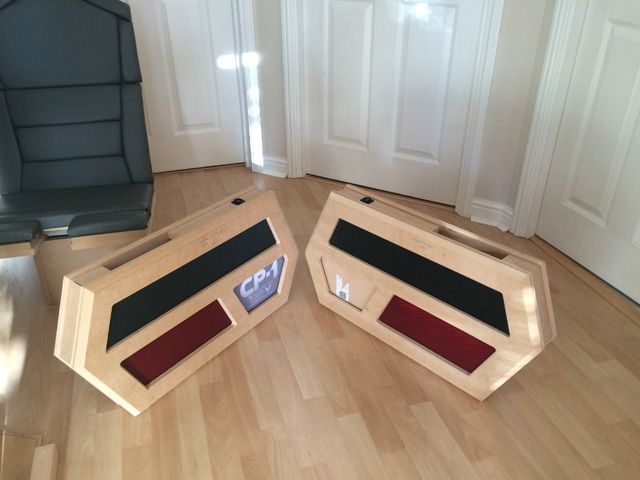
With the glue having dried overnight, I dry assembled the left side pod:
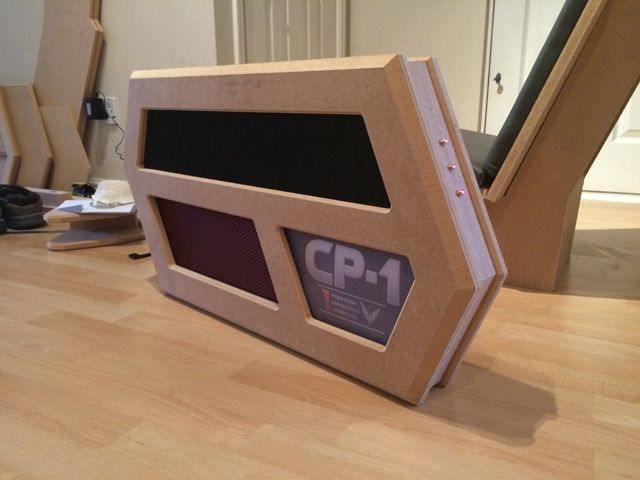
I still have to put the mounting poles in place. These will slide in and out of the side pods to make the HOTAS removable. The main side piece shown in the picture will sit about 3 inches lower. The platform sitting on the poles (4mm aluminium plate which was ordered yesterday) will raise the HOTAS by 2-3 inches from the top surface of the side pods. I'll need to experiment to get the position correct:


I still have to put the mounting poles in place. These will slide in and out of the side pods to make the HOTAS removable. The main side piece shown in the picture will sit about 3 inches lower. The platform sitting on the poles (4mm aluminium plate which was ordered yesterday) will raise the HOTAS by 2-3 inches from the top surface of the side pods. I'll need to experiment to get the position correct:

You're too kind mate. Thanks
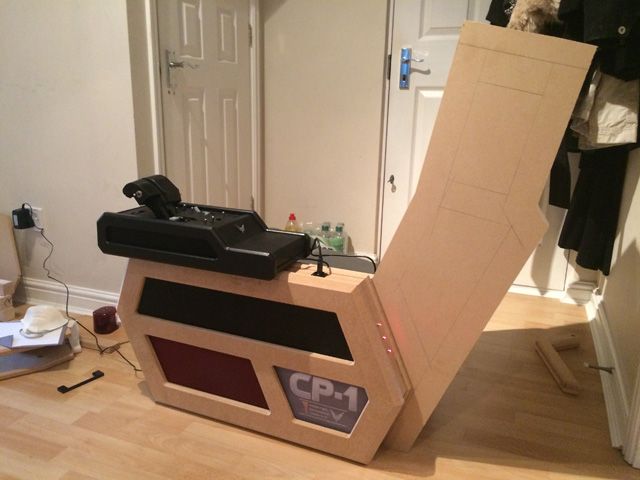
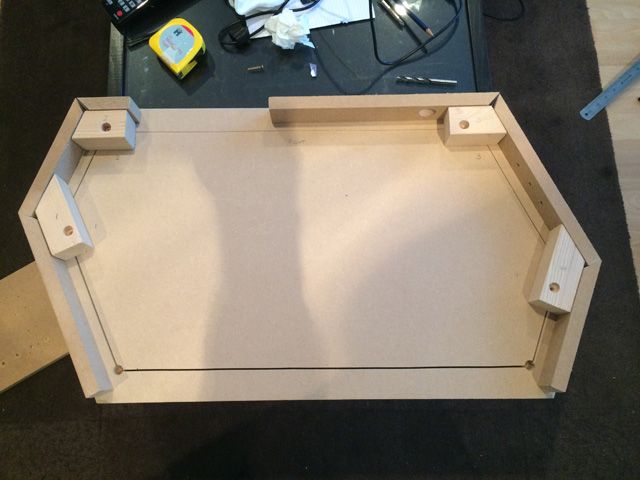
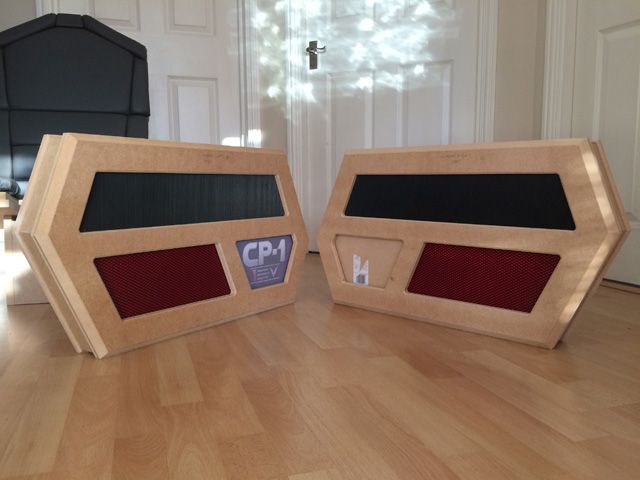
Cut the perimeter pieces for the second pod. I will need to cut the support blocks next:
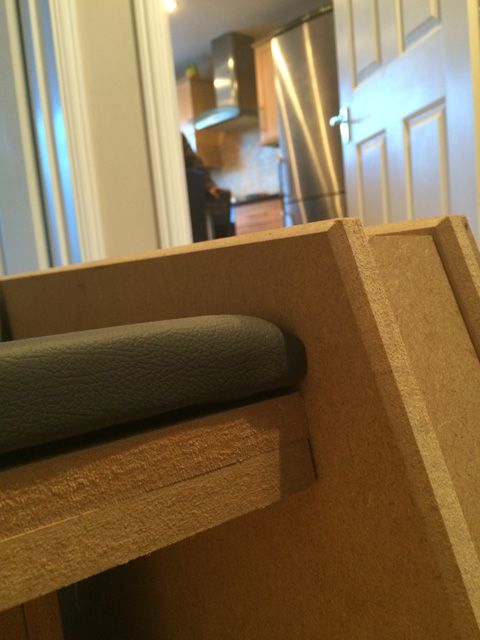
Just to give an idea of where the side pod will sit relative to the top of the front of the seat:
Cut the perimeter pieces for the second pod. I will need to cut the support blocks next:

Just to give an idea of where the side pod will sit relative to the top of the front of the seat:

Rinse and repeat for the second pod.
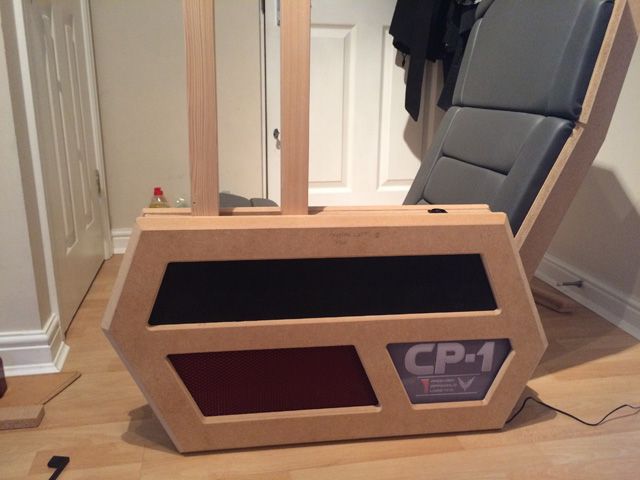
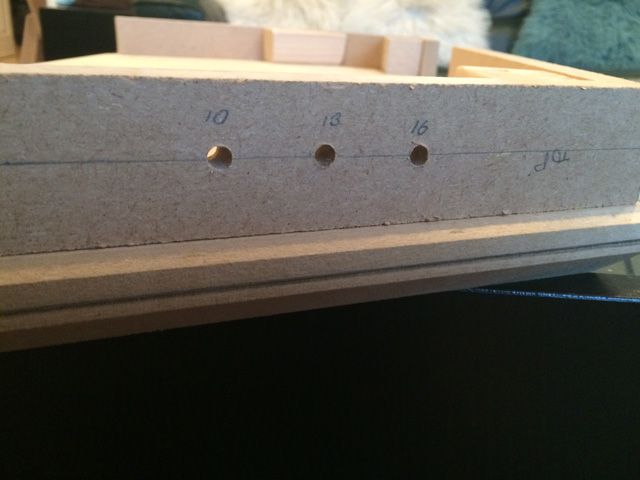
Support blocks hand cut with holes drilled for the screws.
LED and Neutric holes also drilled:

Support blocks hand cut with holes drilled for the screws.

LED and Neutric holes also drilled:


That's looking sexy! I just can't get over the quality of this build, even with your previous projects as guides, I never visualized it would look this good. Hat doffed yet again!
Cheers PF, it should look much better once painted with vinyl, artwork and acrylic in place.
I'm currently trying to figure out the pedal attachment and base at the moment. I may just take the easy option with the pedals and integrate with the base somehow. It needs to be adjustable though.
The one main challenge with my projects is that there's too many complicated bits to cut and I always underestimate the amount of time that takes. Never mind, it's fun
Looking very nice. Keeping your drill bits, router bits and saw blades sharp must be a nightmare cutting mdf. In my experience mdf is really bad for dulling tools, not as bad as particle board though lol.
Thanks Lormonkus. I have a cutter care kit for the router bits - some of the bits are expensive and need looking after. Drill bits are doing fine at the moment. I've got a number of jigsaw blades and have gone through a few - they seem to get destroyed the quickest.
These tools only get used in anger when I'm working on projects so just in fits and starts really
These tools only get used in anger when I'm working on projects so just in fits and starts really
Yeah in short spurts of usage it shouldn't be too bad, I guess im basing my experience on full time daily usage I'm also really picky about having very sharp tools, when I was doing full time trim carpentry the chisel I carried around in my back pocket got sharpened on a good japanese water stone several times a day to keep it sharp. http://www.traditionalwoodworker.co...-2-7_8-x-7_8-King-Brand/productinfo/406-8000/
I'm also really picky about having very sharp tools, when I was doing full time trim carpentry the chisel I carried around in my back pocket got sharpened on a good japanese water stone several times a day to keep it sharp. http://www.traditionalwoodworker.co...-2-7_8-x-7_8-King-Brand/productinfo/406-8000/Very nice stone! When I grow up (i.e. retire - some way off yet), I plan on getting a decent workshop sorted out along with some nice tools. I do fancy working with some proper wood at some point
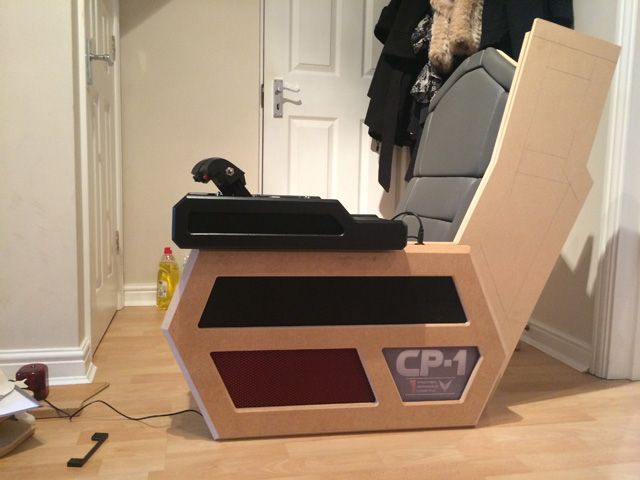
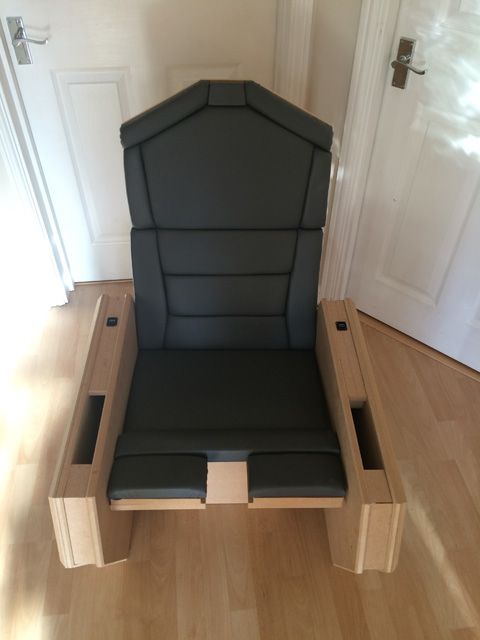
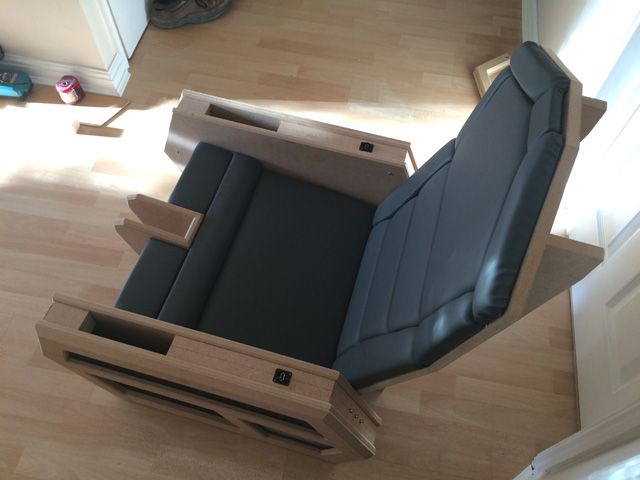
More progress and a better view of the fit:


Rafe Zetter
Banned
Damn TIOO that is looking SEXY!! The pedal rest - in what ways does it need to be adjustable? Forward back - up down - or just retracted?
For retracted - forward / back that would be a simple sliding mechanism into the box seat base, with the foot pedal base (I'm assuming a larger pad of some kind) that could flip up vertically parallel to the seat base box. Maybe use some ball bearing "wheels" for minimum clearance. Either something like this:
Omnitrack
Or maybe just some cheap rollerskate / track roller type wheels hidden inside a "U" shaped sliding housing:
Shower track wheels
If that pad needs to be tilted then some outside legs could be incorporated with a threaded rod right through the pad and butterfly nuts. The legs would be slotted so they can be raised and lowered to provide different tilt angles.
Sort of like this
If you do that though I would also add some foot rests / pegs either side of the pedals, so you can rest your feet without having to remove the pedals.
Last edited:
Damn TIOO that is looking SEXY!! The pedal rest - in what ways does it need to be adjustable? Forward back - up down - or just retracted?
For retracted - forward / back that would be a simple sliding mechanism into the box seat base, with the foot pedal base (I'm assuming a larger pad of some kind) that could flip up vertically parallel to the seat base box. Maybe use some ball bearing "wheels" for minimum clearance. Either something like this:
Omnitrack
Or maybe just some cheap rollerskate / track roller type wheels hidden inside a "U" shaped sliding housing:
Shower track wheels
If that pad needs to be tilted then some outside legs could be incorporated with a threaded rod right through the pad and butterfly nuts. The legs would be slotted so they can be raised and lowered to provide different tilt angles.
Sort of like this
If you do that though I would also add some foot rests / pegs either side of the pedals, so you can rest your feet without having to remove the pedals.
Thanks Rafe
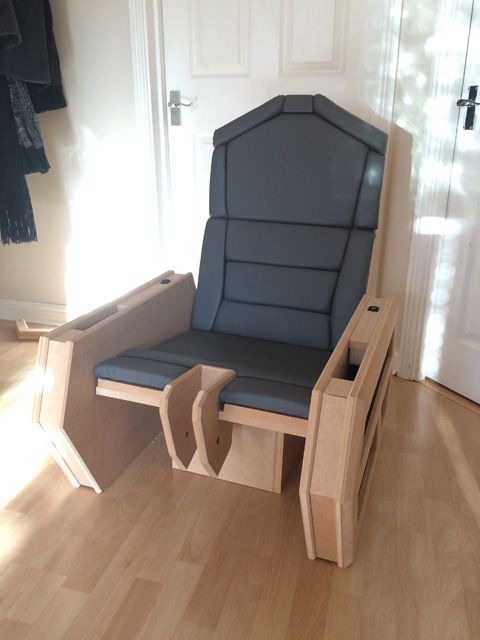
It does look a lot more like a seat now.Thanks for the ideas, it's appreciated. You hit the nail on the head with the first one - fore and aft with the pedals flipping up out of the way. I'll likely go for a pair of seat rails as well for the forwards backwards movement and a simple hinge made from bolts to allow it to be moved upwards, Pressure will only be applied forwards by my feet so it should make the retracting design a lot simpler.
Great idea with the foot pegs also. I'll look into that.
I've been reading this thread for almost two hours, enjoying every one of the wonderful pictures that show the progress of your building.
Hats off to you, ThereIsOnlyOne, absolutely wonderful handcrafted work: it's astonishing seen every bit of progress of this great project. in the fantastic finish of each one of the different elements you can see the enjoyment during the manufacturing.
Hats off to you, ThereIsOnlyOne, absolutely wonderful handcrafted work: it's astonishing seen every bit of progress of this great project. in the fantastic finish of each one of the different elements you can see the enjoyment during the manufacturing.
I've been reading this thread for almost two hours, enjoying every one of the wonderful pictures that show the progress of your building.
Hats off to you, ThereIsOnlyOne, absolutely wonderful handcrafted work: it's astonishing seen every bit of progress of this great project. in the fantastic finish of each one of the different elements you can see the enjoyment during the manufacturing.
Thank you for your very kind words Txakal and I'm glad you enjoyed reading it
I do like to take pictures of the process, even if it's seeming dull with little of significance being shown; it helps to detail all the steps involved and remind me of the effort spent! It's hopefully useful to others as well if they want to just take the odd idea here and there. Making a detailed log does help to keep me motivated also for some reason.