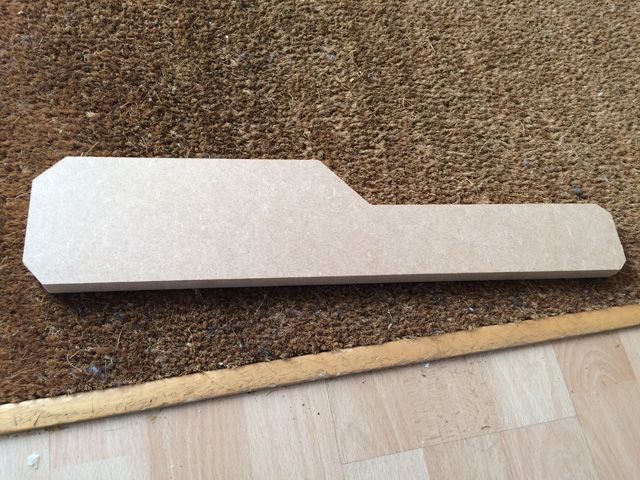
First side piece for the joystick case has been shaped:
Comparison with the throttle side:
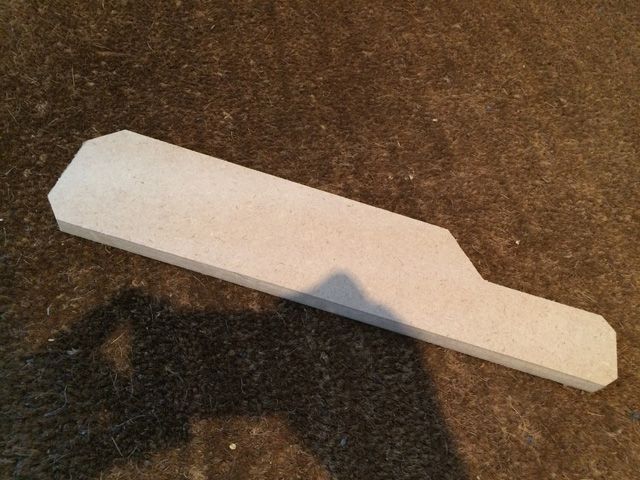
A much longer tail.

Comparison with the throttle side:

A much longer tail.


Side panels completed. External bevels:
Inlay routing:
Fit:
That's the weekend's building complete. The cases were more work than I'd anticipated but I'm pleased with them.
Hope you enjoyed all the pictures.
Awesome job !!
Have a good week ahead ..
already looking forward to next weekend's endeavour
Some of this can be done during the week.This is genius.Around six weeks ago I had been trawling through the internet trying to find a means of securing a joystick so it didn't look rubbish.
I agree, most are fairly simple which is great if you're not obsessed with aesthetics like I am. It can be a bit of a curse at times tbh.Great work mate. I bet at the end of each day working on this you are totally knackered but also happy as a pig in its natural environment
I hope you realise how jealous we all are here. With that in mind I'm off to play ED on my DK2 - HAH!!!
Yes, very happy with how things are turning out and I am always knackered at the end of a weekend of building. It's a nice contented kind of knackered though.

Thanks
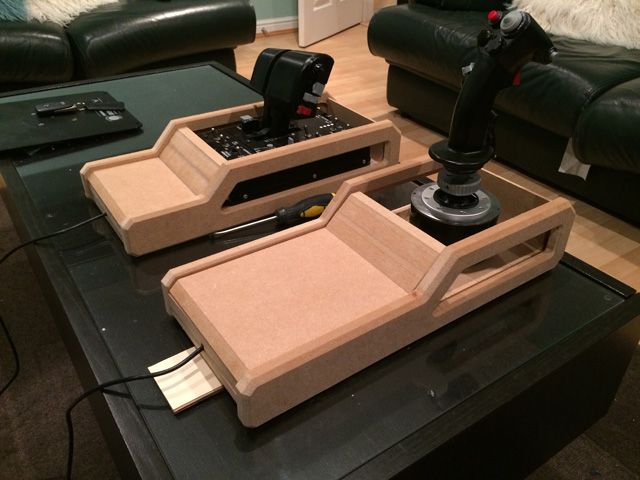
A couple of pictures of the cases loose/dry assembled before I start the finishing process and glue some more of the parts together. Some of the parts are a little wonky or leaning a little as a consequence. The bases of the units will be raised slightly to create a more even spacing around the edges. There are a couple of areas where it's a couple of mm off but I'm generally very pleased. They will look a whole lot better once complete.
Thanks very much Ven
I had a bit of problem with my joystick int hat it was a Thrustmaster T Hotas and there was no way of properly securing it.You would have kittens if you saw how it is currently held downThanks ZZleeZZ! Surrey is where I live and I work in London.
This is awesome, signed up for daily emails of this thread.
If funds were available, I'd ask if I could 'persuade' you to build another one. Alas, I'll have to make do with knowing there is 1 of these marvellous seats in existence, owned by a man who deserves it.
Well you can't criticize a man who wants to get things right
But the intention has always been in the next few weeks,to incorporate it into the little thing im doing.Your pictures come as a great source to me...like I said,yours is the first truly excellent effort I have seen so far.
I was born in Guildford,live Leicestershire now,and unfortunately still work in London a lot of the time.
Loving your work man, very nice indeed, seems a bit of a waste of time building all this then putting a rift on though, I would just want to sit there in my own home made cockpit perhaps a projector setup on a curved screen with head tracking would be awesomer
https://www.youtube.com/watch?v=bo33PceNS3o
it actually looks like you have the skills to faithfully model the whole cockpit interior tbh, a projector outside like on those big flight simulators would be pure nerdgasm
Perhaps devs should enable a fullscreen no cockpit mode, where the individual sensors and displays could output to android tablets, so you could literally have you sensor in front of you at an angle on a tablet, the nav and systems screens inside the cockpit each side on tablets, and the projector outside the screen
Can't say that I haven't considered a more elaborate setup - I'm particularly taken with CastAR. That would be an excellent technology to build into the setup and would fit well with what you've just described!I made an account with the sole purpose of saying this thread is inspiring!
Can't wait to see the finished product.
Man I wish I had your talents, wow awesome.